SERVICE AND ADJUSTMENTS
WARNING: Always stop engine, disconnect spark plug wire and keep away from spark plug, before performing any service or adjustments on your machine.
Disconnecting Spark Plug
WARNING: The muffler and surrounding area will be hot if the engine has been running. Use caution and protect your hands if working near the muffler.
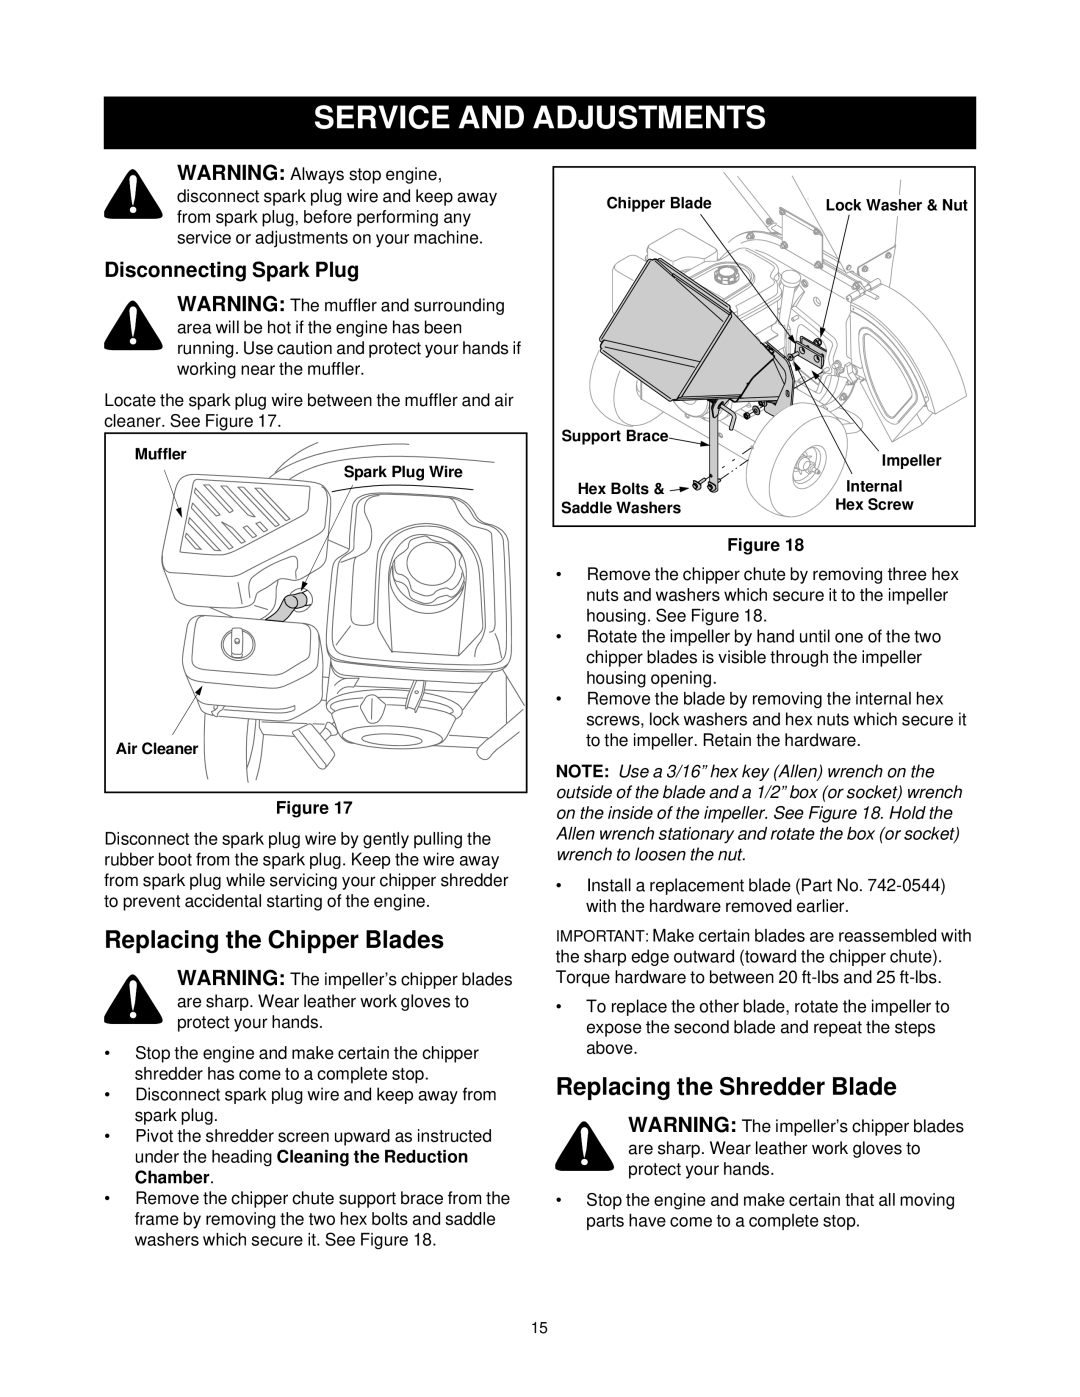
Locate the spark plug wire between the muffler and air cleaner. See Figure 17.
Muffler |
Spark Plug Wire |
Air Cleaner |
Figure 17
Disconnect the spark plug wire by gently pulling the rubber boot from the spark plug. Keep the wire away from spark plug while servicing your chipper shredder to prevent accidental starting of the engine.
Replacing the Chipper Blades
WARNING: The impeller’s chipper blades are sharp. Wear leather work gloves to protect your hands.
•Stop the engine and make certain the chipper shredder has come to a complete stop.
•Disconnect spark plug wire and keep away from spark plug.
•Pivot the shredder screen upward as instructed under the heading Cleaning the Reduction Chamber.
•Remove the chipper chute support brace from the frame by removing the two hex bolts and saddle washers which secure it. See Figure 18.
Chipper Blade | Lock Washer & Nut |
Support Brace |
|
| Impeller |
Hex Bolts & | Internal |
Saddle Washers | Hex Screw |
Figure 18
•Remove the chipper chute by removing three hex nuts and washers which secure it to the impeller housing. See Figure 18.
•Rotate the impeller by hand until one of the two chipper blades is visible through the impeller housing opening.
•Remove the blade by removing the internal hex screws, lock washers and hex nuts which secure it to the impeller. Retain the hardware.
NOTE: Use a 3/16” hex key (Allen) wrench on the outside of the blade and a 1/2” box (or socket) wrench on the inside of the impeller. See Figure 18. Hold the Allen wrench stationary and rotate the box (or socket) wrench to loosen the nut.
•Install a replacement blade (Part No.
IMPORTANT: Make certain blades are reassembled with the sharp edge outward (toward the chipper chute). Torque hardware to between 20
•To replace the other blade, rotate the impeller to expose the second blade and repeat the steps above.
Replacing the Shredder Blade
WARNING: The impeller’s chipper blades are sharp. Wear leather work gloves to protect your hands.
•Stop the engine and make certain that all moving parts have come to a complete stop.
15