Chipping
WARNING: Never operate the chipper shredder without chipper chute lowered into the operating position.
Branches up to 3” in diameter can be fed into the chipper chute. See Figure 6.Observe the following guidelines when chipping branches:
•Keep both hands firmly on the branch as you feed it into the chipper chute.
•Never feed more than one branch into the chipper chute at a time.
•Never feed anything other than branches (or wood) into the chipper chute.
•Use the tamper to assist in feeding branches into the chipper chute.
•Apply intermittent pressure (force, in short pulses) while feeding larger (2-
IMPORTANT: Never feed branches with a diameter greater than three (3) inches into the chipper chute. Doing so can result in serious damage to your unit’s chipper blades, flails or impeller.
NOTE: For best performance, always operate the unit with sharp chipper blades. If a noticeable loss in performance is encountered while chipping branches, the chipper blades should be replaced.
Cleaning the Reduction Chamber
WARNING: The impeller’s shredder blade and chipper blades are sharp. Wear leather work gloves to protect your hands when cleaning out the reduction chamber.
If the reduction chamber becomes clogged with debris, the shredder screen can be pivoted upward so that you can clean the surrounding area. To do so, proceed as follows:
•Stop the engine and wait untill all moving parts have come to a complete stop.
•Disconnect spark plug wire and keep away from spark plug. Refer to Page 15.
WARNING: The muffler and surrounding area will be hot if the engine has been running. Use caution and protect your hands if working near the muffler.
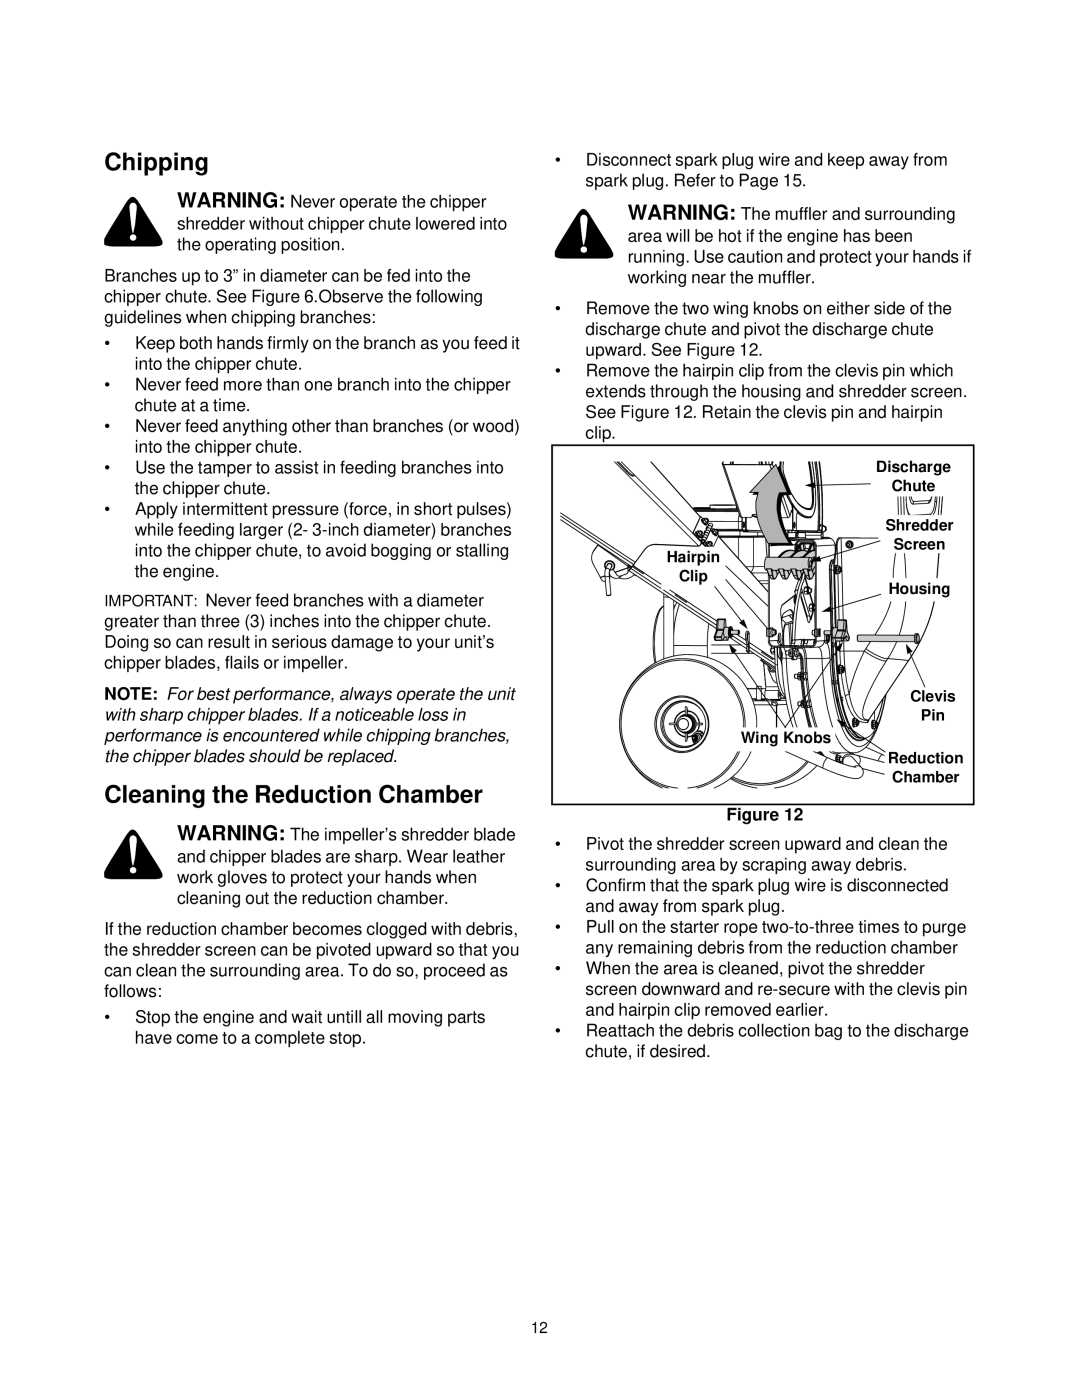
•Remove the two wing knobs on either side of the discharge chute and pivot the discharge chute upward. See Figure 12.
•Remove the hairpin clip from the clevis pin which extends through the housing and shredder screen. See Figure 12. Retain the clevis pin and hairpin clip.
Discharge
Chute
Shredder |
Screen |
Hairpin |
Clip |
Housing |
Clevis
Pin
Wing Knobs
![]()
![]()
![]()
![]() Reduction
Reduction
Chamber
Figure 12
•Pivot the shredder screen upward and clean the surrounding area by scraping away debris.
•Confirm that the spark plug wire is disconnected and away from spark plug.
•Pull on the starter rope
•When the area is cleaned, pivot the shredder screen downward and
•Reattach the debris collection bag to the discharge chute, if desired.
12