BEFORESTARTING |
|
|
| Caution: | Experience | indicates | that | alcohol | blended | |||||||
GAS AND OIL |
|
|
| fuels | (called gasohol | or using | ethanol or methanol) | |||||||||
NOTE: | ENGINE | IS SHIPPED | WITHOUT OIL | FILL | can | attract | moisture | which | leads to | separation | and | |||||
CRANKCASE | WITH | OIL BEFORE | STARTING. | BE | formation | of acids during | storage | Acidic | gas | can | ||||||
VERY | CAREFUL | NOT TO ALLOW | DIRT TO ENTER | damage the fuel system of an engine | while in storage | |||||||||||
THE ENGINE | WHEN | CHECKING | OR ADDING | OIL | To avoid engine problems, | the fuel system | should | be | ||||||||
OR FUEL |
|
|
|
|
|
| empty before storage | for 30 days or longer | Refer to | |||||||
| Recommended | SAE Viscosity Grades |
| "Storage" section of this manual for details Use fresh | ||||||||||||
|
| fuel each season. |
|
|
|
|
|
| ||||||||
<llllll' |
|
|
|
|
|
|
|
|
| |||||||
00!1o'w |
|
|
|
|
| |||||||||||
|
|
|
|
|
|
|
| Never use engine or carburetor cleaner products in | ||||||||
the fuel tank or permanent damage may result
!,'T,,t_I_L!1[I.
0° | 32 ° | 60° | 80° 100 ° | |
TEMPERATURE | RANGE | EXPECTED | BEFORE | |
NEXT OIL CHANGE ALL OILS MUST BE API | ||||
SERVICE | CLASSIFICATION | SD, SE OR SF | ||
®Fill engine with oil as follows. Remove oil fill dip- stick See figure 7 With
NOTE: USE CLEAN OIL AND FUEL. STORE IN APPROVED, CLEAN, COVERED CONTAINERS USE CLEAN FILL FUNNELS.
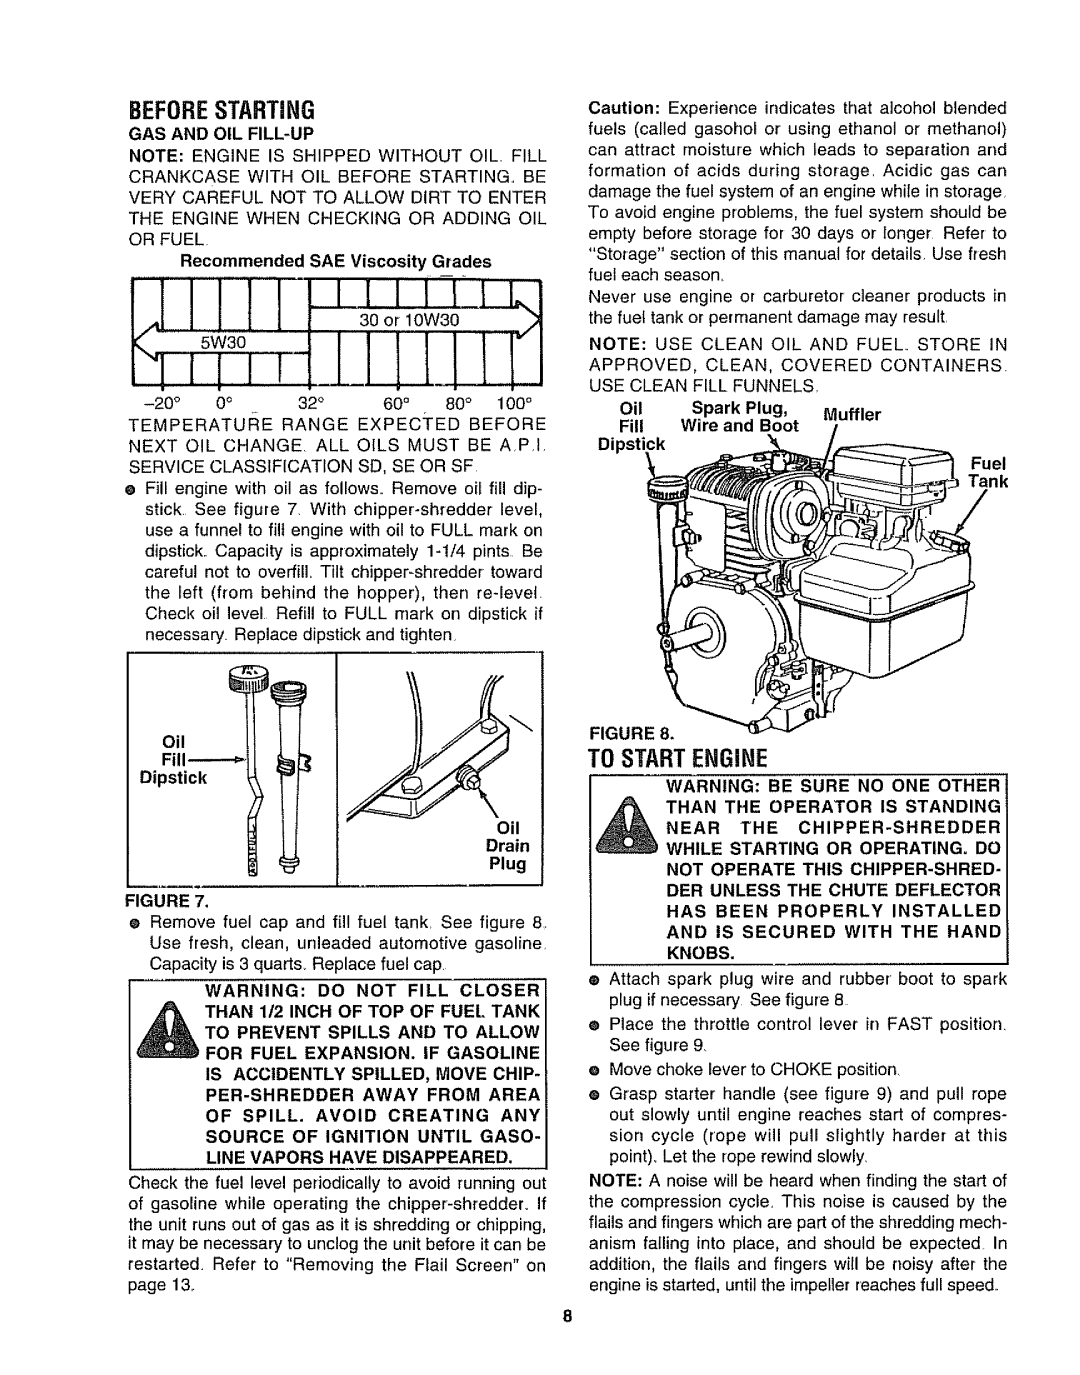
Oil Spark Plug, Muffler
Fill Wire and Boot
Dipstick
Fuel
Tank
Oil
Fill.-----_
Dipstick
Oil
Drain
Plug
FIGURE 7.
®Remove fuel cap and fill fuel tank. See figure 8 Use fresh, clean, unleaded automotive gasoline. Capacity is 3 quarts. Replace fuel cap
WARNING: DO NOT FILL CLOSER THAN 1/2 INCH OF TOP OF FUEL TANK
TO PREVENT SPILLS AND TO ALLOW FOR FUEL EXPANSION. IF GASOLINE IS ACCIDENTLY SPILLED, MOVE CHIP-
OF SPILL. AVOID CREATING ANY SOURCE OF IGNITION UNTIL GASO- LINE VAPORS HAVE DISAPPEARED.
Check the fuel level periodically to avoid running out
of gasoline wMle operating the
FIGURE 8.
TO STARTENGINE
WARNING: BE SURE NO ONE OTHER
THAN THE OPERATOR IS STANDING
NEAR THE
NOT OPERATE THIS
HAS BEEN PROPERLY INSTALLED AND IS SECURED WITH THE HAND KNOBS.
•Attach spark plug wire and rubber boot to spark plug if necessary See figure 8
•Place the throttle control lever in FAST position. See figure 9.
e Move choke lever to CHOKE position
e Grasp starter handle (see figure 9) and pull rope out slowly until engine reaches start of compres- sion cycle (rope will pull slightly harder at this point)_ Let the rope rewind slowly,
NOTE: A noise will be heard when finding the start of the compression cycle. This noise is caused by the flails and fingers which are part of the shredding mech- anism falling into place, and should be expected In addition, the flails and fingers will be noisy after the engine is started, until the impeller reaches full speed.
8