TOINSTALLBATTERYPACK
•Lock switch trigger on your drill by placing the direction of rotation selector in center position. See Figure 3.
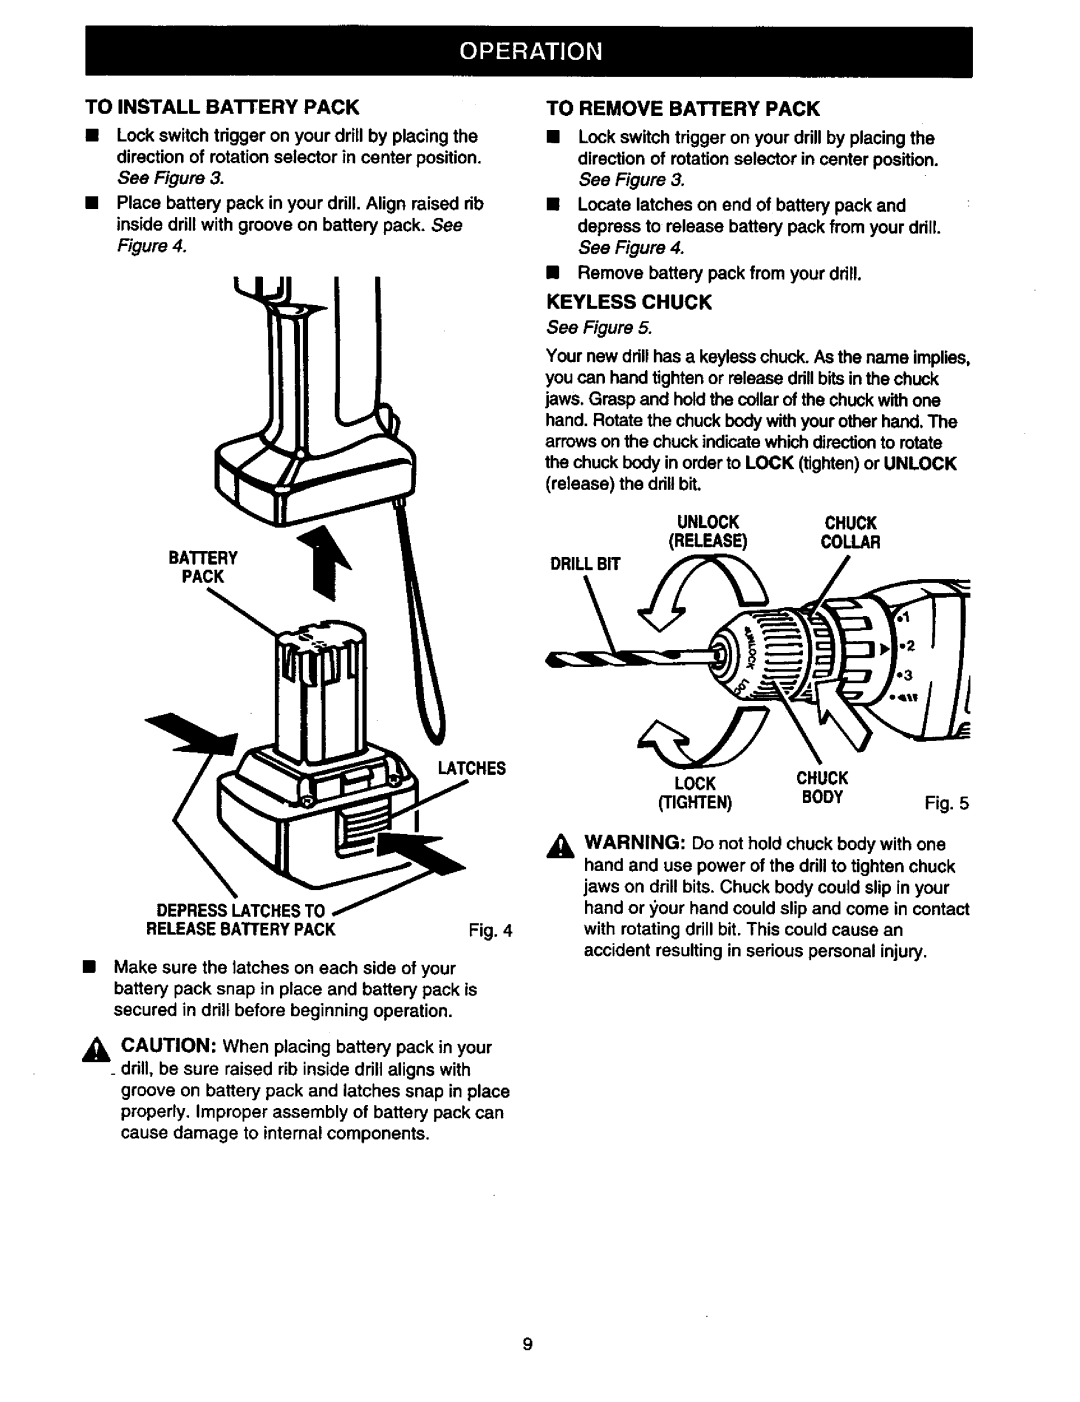
•Place battery pack in your drill. Align raised rib inside drill with groove on battery pack. See Figure 4.
BATI'ERYPACK t
TO REMOVE BATTERY PACK
•Lock switch trigger on your drill by placing the direction of rotation selector in center position. See Figure 3.
•Locate latches on end of battery pack and depress to release battery pack from your drill. See Figure 4.
•Remove battery pack from your ddll.
KEYLESS CHUCK
See Figure 5.
Your new drill has a keyless chuck. As the name implies, you can hand tighten or release drillbits in the chuck jaws. Grasp and hold the collar of the chuck with one hand. Rotate the chuck body with your other hand. The arrows on the chuck indicate which directionto rotate the chuck body in order to LOCK (tighten) or UNLOCK (release) the drillbit.
UNLOCKCHUCK
(RELEASE) COLLAR
DRILLBIT
| LATCHES | LOCK | CHUCK |
|
|
|
| ||
|
| (TIGHTEN) | BODY | Fig. 5 |
| _1= | WARNING: Do not hold chuck body with one | ||
|
| hand and use power of the drill to tighten chuck | ||
|
| jaws on drill bits. Chuck body could slip in your | ||
DEPRESSLATCHESTO |
| hand or _,our hand could slip and come in contact | ||
| with rotating drill bit. This could cause an |
| ||
RELEASEBATTERYPACK | Fig. 4 |
| ||
|
| accident resulting in serious personal injury. | ||
•Make sure the latches on each side of your battery pack snap in place and battery pack is secured in drill before beginning operation.
CAUTION: When placing battery pack in your _ drill, be sure raised rib inside drill aligns with
groove on battery pack and latches snap in place properly. Improper assembly of battery pack can cause damage to internal components,
9