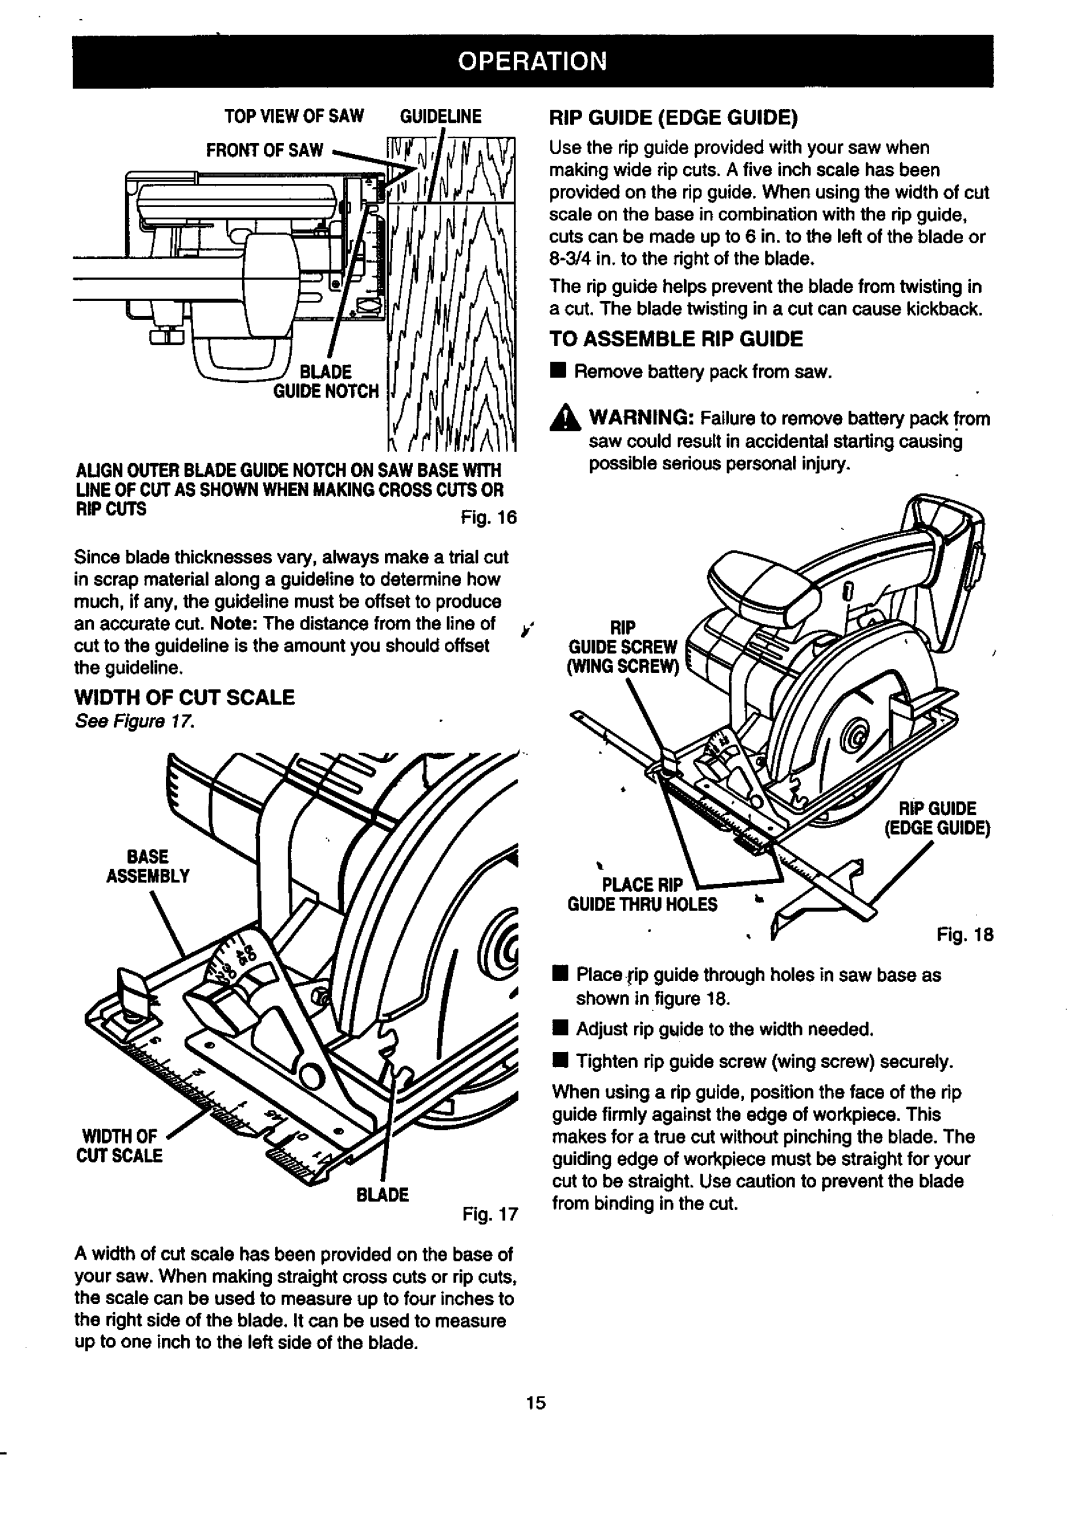
TOPVIEWOFSAW GUIDELINE
AUGNOUTERBLADEGUIDENOTCHONSAWBASEWITH UNEOFCUTASSHOWNWHENMAKINGCROSSCUTSOR
RIPCUTSFig.16
Since blade thicknesses vary, always make a trial cut in scrap material along a guideline to determine how
much, if any, the guideline must be offset to produce an accurate cut. Note: The distance from the line of
cut to the guideline is the amount you should offset the guideline.
WIDTH OF CUT SCALE
See Figure 17.
BASE
ASSEMBLY
WIDTHOF
CUT SCALE
BLADE
Fig. 17
A width of cut scale has been provided on the base of your saw. When making straight cross cuts or rip cuts, the scale can be used to measure up to four inches to the right side of the blade. It can be used to measure up to one inch to the left side of the blade.
RIP GUIDE (EDGE GUIDE)
Use the rip guide provided with your saw when making wide rip cuts. A five inch scale has been provided on the rip guide. When using the width of cut scale on the base in combination with the rip guide, cuts can be made up to 6 in. to the left of the blade or
The rip guide helps prevent the blade from twisting in a cut. The blade twisting in a cut can cause kickback.
TO ASSEMBLE RIP GUIDE
•Remove battery pack from saw.
&WARNING: Failure to remove battery pack from saw could result in accidental starting causing possible serious personal injury.
RIP
GUIDESCREW
RIP GUIDE (EDGEGUIDE)
PLACERIP
GUIDETHRUHOLES i,
Fig. 18
•Place lip guide through holes in saw base as shown in figure 18.
•Adjust rip guide to the width needed.
•Tighten rip guide screw (wing screw) securely.
When using a rip guide, position the face of the dp guide firmly against the edge of workpiece. This makes for a true cut without pinching the blade. The guiding edge of workpiece must be straight for your cut to be straight. Use caution to prevent the blade from binding in the cut.
15