the vacuum or blower tubes. The rotat- ing blades can cause serious injury.
1.Insert the tip of a screwdriver into the latch area of the vacuum inlet.
Latch Area
Vacuum Intet Cover
2= Gently tilt the handle of the screw- driver toward the front of the unit to
release the latch while pulling up
on the vacuum inlet cover with your other hand.
3= Hold the vacuum inlet cover open until upper vacuum tube is installed.
Vaeuum
Inlet
Cover
Inlet
4= Align the tabs on the inside of the vacuum inlet with the slots in the
upper vacuum tube.
Tab Slot
5= Push the upper vacuum tube into the vacuum inlet. Turn the tube
counterclockwise until a click is felt to secure the tube to tile blower unit.
6.Align slanted end of lower vacuum
tube as shown. Firmly push lower vacuum tube into upper vacuum tube.
Slanted end of lower vacuum tube
HOW TO CONVERT UNIT FROM VACUUM USE TO BLOWER USE
1.Remove the elbow tube and vacu-
um bag by turning the knob coun- terclockwise to loosen the elbow tube.
2.Remove the vacuum tubes by turn- ing the tubes clockwise.
3.Close the vacuum inlet cover and make sure it is latched closed.
4.Reinstall the blower tubes (see
BLOWER TUBE ASSEMBLY).
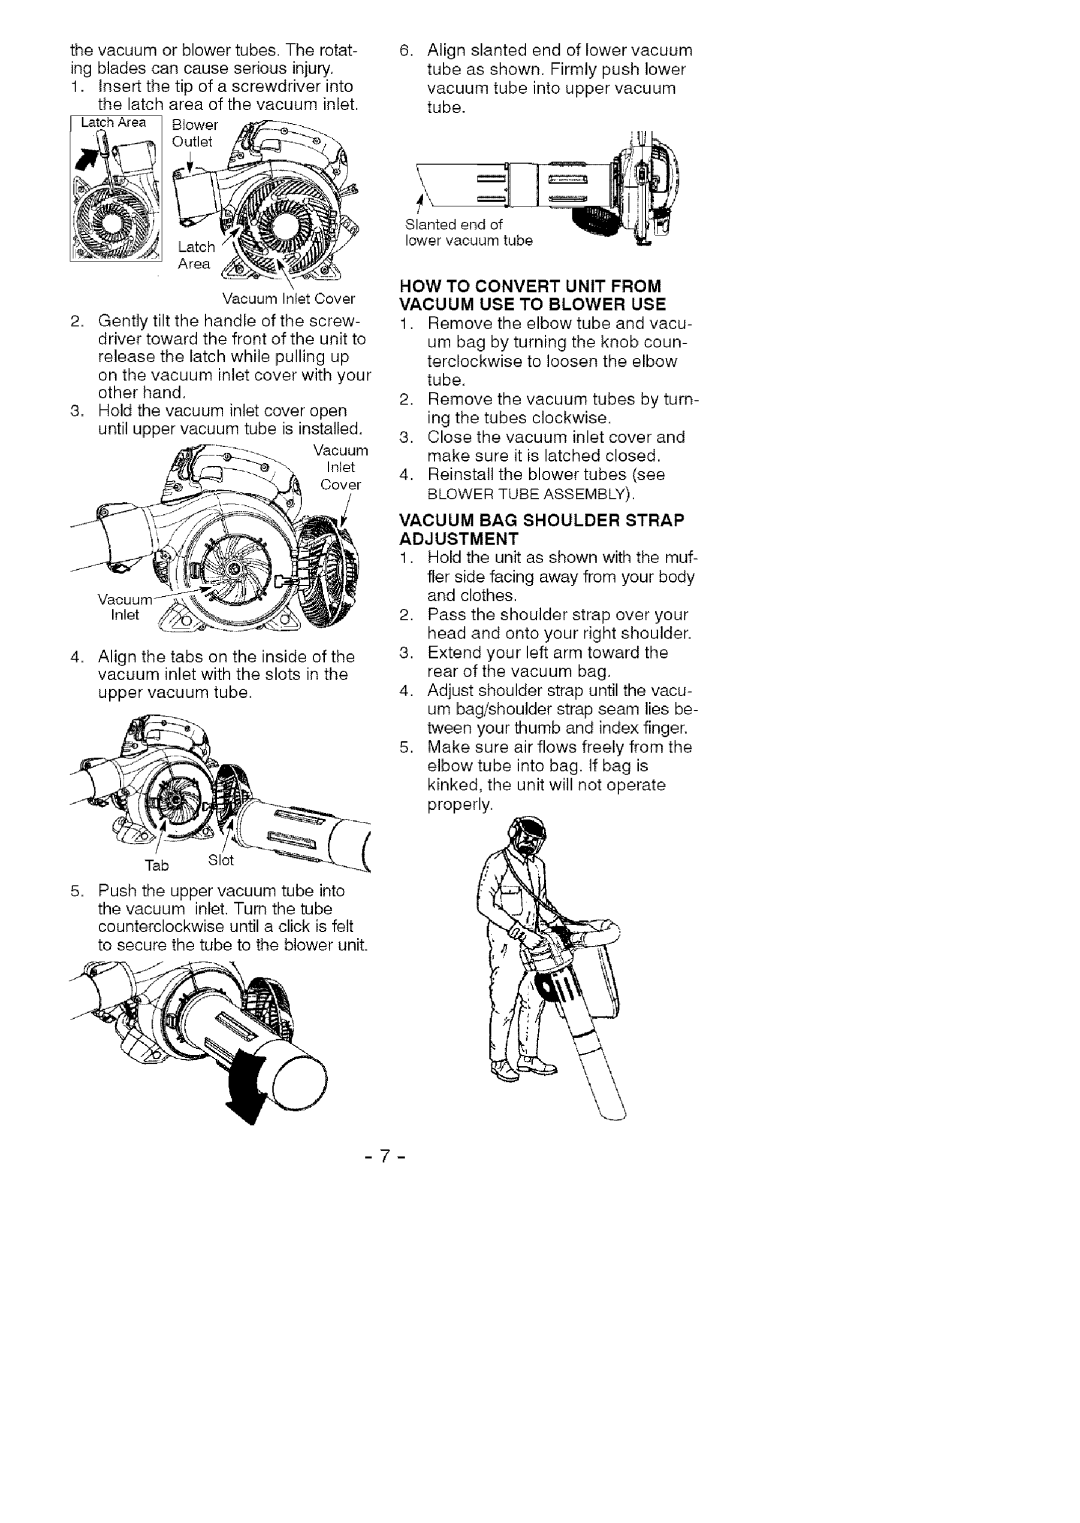
VACUUM BAG SHOULDER STRAP ADJUSTMENT
1.Hold the unit as shown with tile muf-
fler side facing away from your body and clothes.
2.Pass the shoulder strap over your head and onto your right shoulder.
3.Extend your left arm toward the rear of the vacuum bag.
4.Adjust shoulder strap until the vacu- um bag/shoulder strap seam lies be- tween your thumb and index finger.
5.Make sure air flows freely from the elbow tube into bag. If bag is kinked, the unit will not operate properly.