
358.796131- 26.2CC specifications
The Craftsman 358.796131 is a robust and reliable 26.2CC gas-powered string trimmer designed for both homeowners and professionals who require efficient gardening tools. Equipped with a powerful 26.2cc 2-cycle engine, this string trimmer delivers dependable performance for a variety of lawn care tasks, including trimming, edging, and clearing overgrown areas.One of the standout features of the Craftsman 358.796131 is its lightweight and ergonomic design. Weighing in at only 11.5 pounds, this trimmer is comfortable to handle, allowing users to operate it for extended periods without fatigue. The well-balanced construction ensures optimal maneuverability, making it easy to navigate around flower beds, trees, and other obstacles in your yard.
In terms of technology, the Craftsman 358.796131 incorporates the Easy Start system, which significantly reduces the effort required to start the engine. This feature minimizes the pull required on the starter cord, allowing for quick and hassle-free starts every time. This is particularly beneficial for users who may struggle with traditional starting methods, as it enhances the overall user experience.
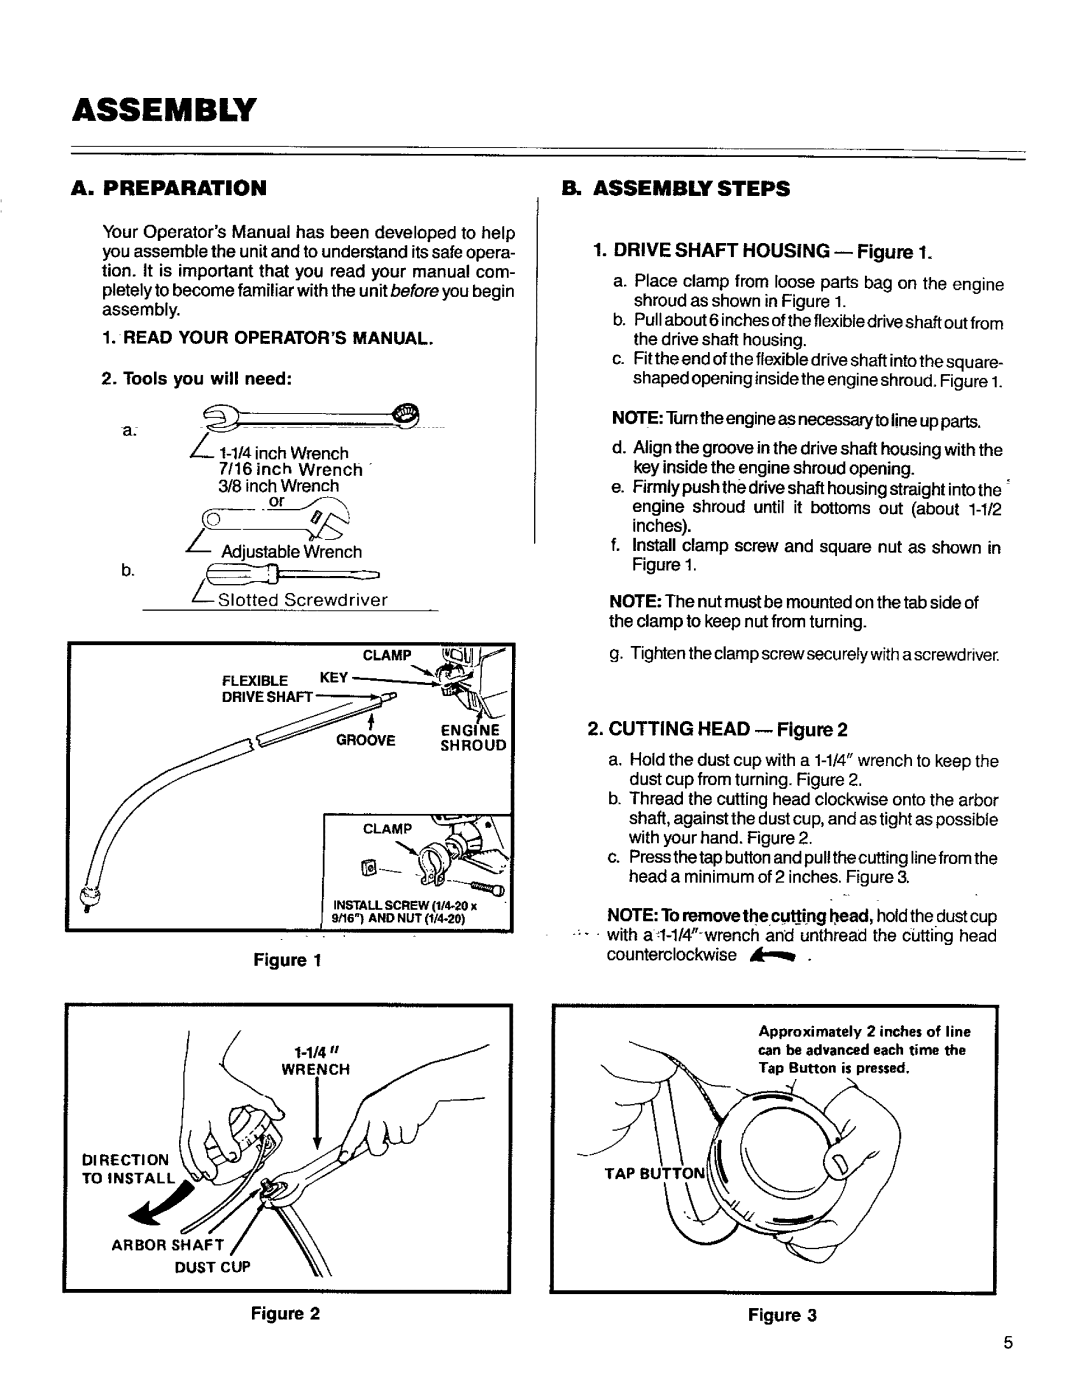
The trimmer is also equipped with a 17-inch cutting swath, allowing users to cover more ground in less time. The dual-line bump feed head provides a continuous flow of line, ensuring that the cutting area is maximized with minimal interruptions. The ability to easily advance the line by simply bumping the head against the ground allows for convenient operation while working in various terrains.
Another noteworthy characteristic of the Craftsman 358.796131 is its durability. The trimmer is constructed with high-quality materials and components designed to withstand the rigors of regular use in tough outdoor conditions. The solid build ensures longevity, making it a worthwhile investment for anyone looking to keep their outdoor spaces well-maintained.
Moreover, the Craftsman trimmer includes a variety of attachments and accessories, enhancing its versatility. These accessories can help tackle different tasks, from edging to clearing taller weeds and brush.
In conclusion, the Craftsman 358.796131 is a powerful, user-friendly, and versatile solution for lawn care enthusiasts. Its combination of performance, technology, and durability makes it an excellent choice for both residential and professional lawn maintenance, ensuring that users can achieve a well-groomed yard with ease and efficiency.