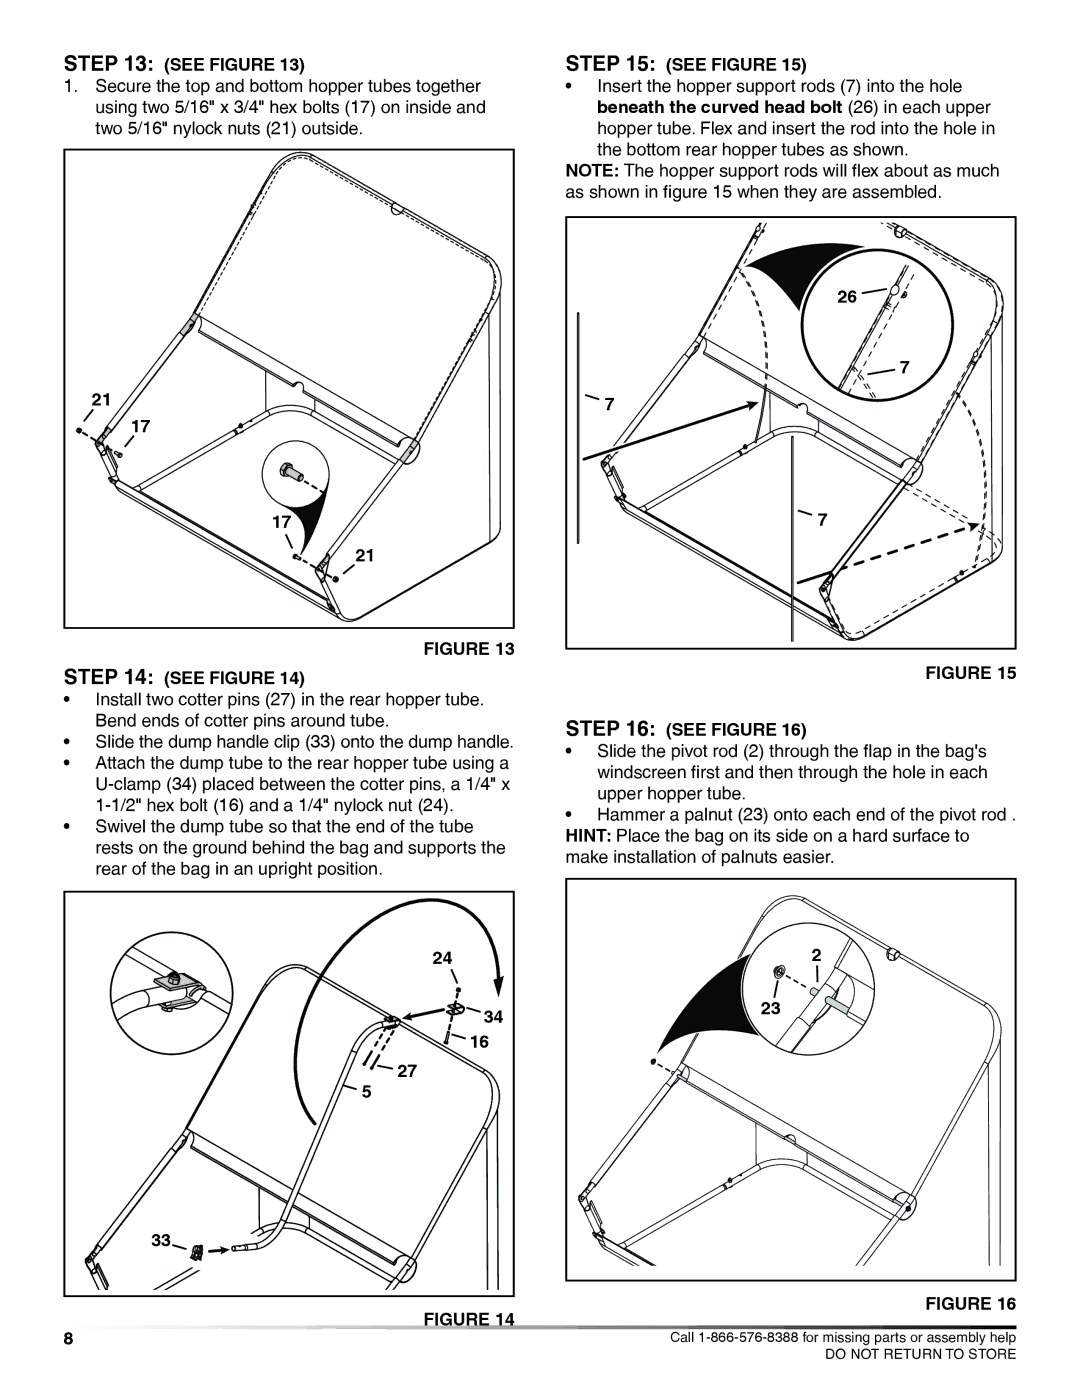
STEP 13: (SEE FIGURE 13)
1.Secure the top and bottom hopper tubes together using two 5/16" x 3/4" hex bolts (17) on inside and two 5/16" nylock nuts (21) outside.
21 |
17 |
17 |
21 |
figure 13
STEP 14: (SEE FIGURE 14)
•Install two cotter pins (27) in the rear hopper tube. Bend ends of cotter pins around tube.
•Slide the dump handle clip (33) onto the dump handle.
•Attach the dump tube to the rear hopper tube using a
•Swivel the dump tube so that the end of the tube rests on the ground behind the bag and supports the rear of the bag in an upright position.
24 |
34 |
16 |
27 |
5 |
33 |
figure 14
STEP 15: (SEE FIGURE 15)
•Insert the hopper support rods (7) into the hole beneath the curved head bolt (26) in each upper hopper tube. Flex and insert the rod into the hole in the bottom rear hopper tubes as shown.
NOTE: The hopper support rods will flex about as much as shown in figure 15 when they are assembled.
26 |
7 |
7 |
7 |
figure 15
STEP 16: (SEE FIGURE 16)
•Slide the pivot rod (2) through the flap in the bag's windscreen first and then through the hole in each upper hopper tube.
•Hammer a palnut (23) onto each end of the pivot rod . HINT: Place the bag on its side on a hard surface to make installation of palnuts easier.
2 |
23 |
figure 16 |
8 | Call |
| DO NOT RETURN TO STORE |