TOOLSREQUIREDFORASSEMBLY
(1)7/16"Wrench
(1)1/2"Wrench
(1)9/16"Wrench
(1)3/4"Wrench
(1)AdjustableWrench
(1)PhillipsScrewdriver
(1)Hammer
,Removea!lpartsandhardwarepackagesfromthe
carton.Layoutpartsandhardwareandidentifyusing
theillustrationsonpages3and4.
NOTE: Notallofthesuppliedpartsandhardwarewillbe neededforoneparticulartractorUnneededitemsmaybe. discardedafterassemblyhasbeencompleted.
NOTE: Righthand(RH)andlefthand(LH)are determinedfromtheoperator'spositionwhileseatedon thetractor.
untilthetractorengine,mufflerandexhaust CAUTION: Donotbeginassembling deflectorhavebeenallowedtocooloff.
STEP 1 : (SEE FIGURE 1)
,Look under the front of your tractor. If there is a single mower deck suspension bracket located underneath the middle of the front axle, continue on to step 2. If your tractor does not have a mower deck suspension bracket underneath the middle of the front axle, skip
to step 5 on page 7 for tractors with dua! suspension brackets.
iNSTRUCTiONS FORTRACTORS WITH SINGLE FRONT DECK SUSPENSION BRACKET
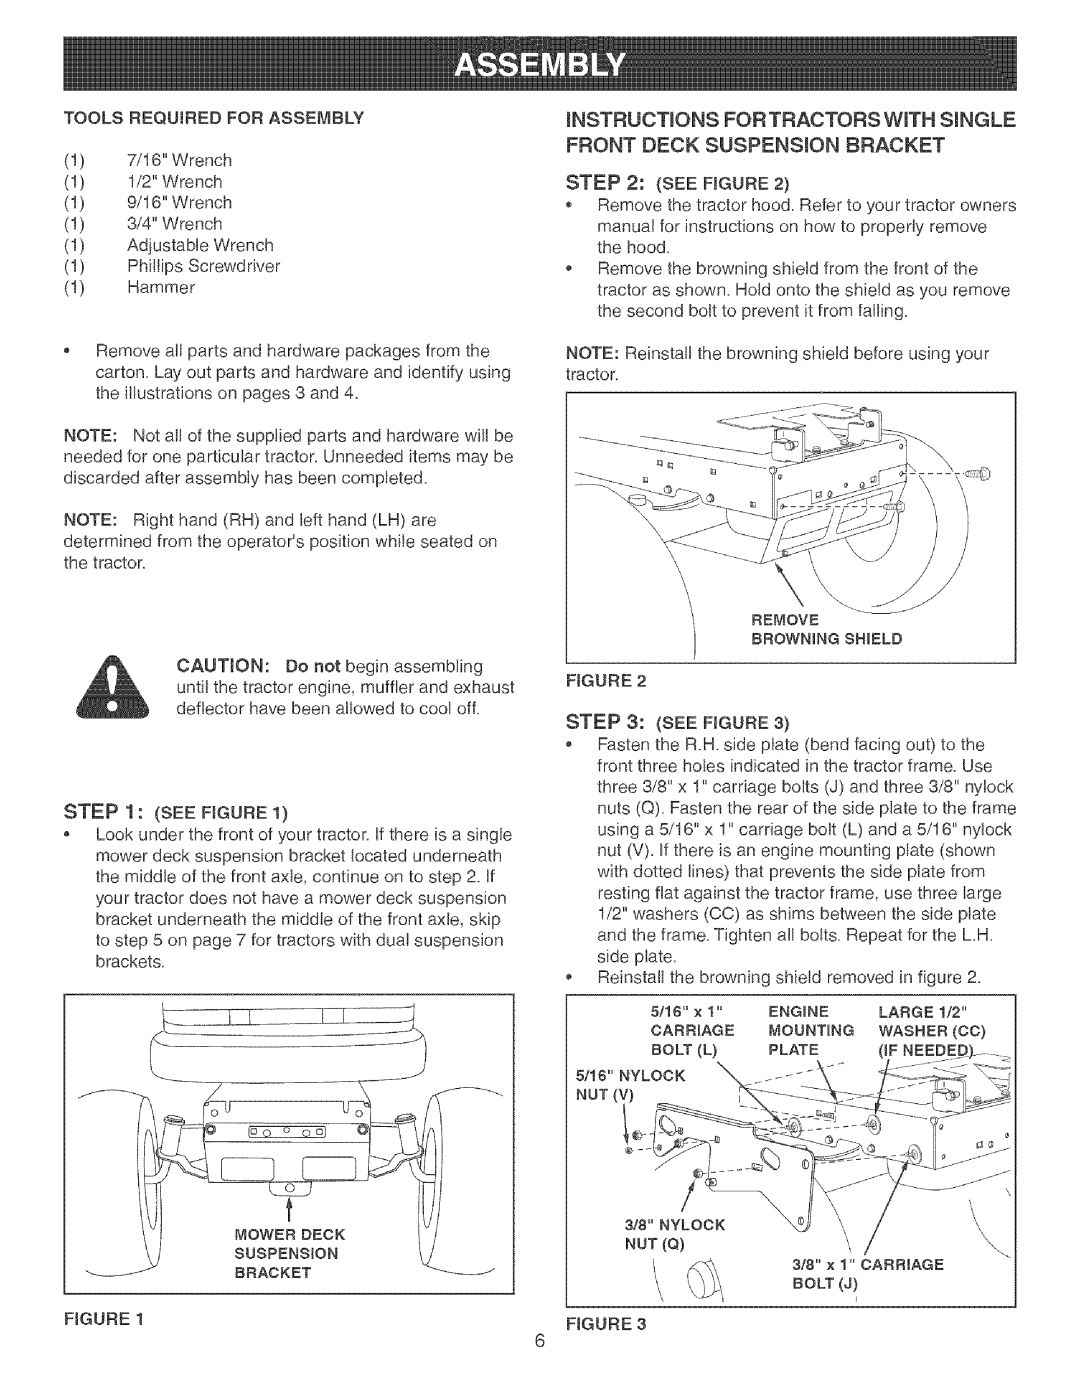
STEP 2: (SEE FIGURE 2)
Remove the tractor hood. Refer to your tractor owners
manual for instructions on how to properly remove the hood.
,Remove the browning shield from the front of the tractor as shown. Hold onto the shield as you remove the second bolt to prevent it from falling.
NOTE: Reinstall the browning shield before using your tractor.
\ \
REMOVE
BROWNUNG SHUELD
FIGURE 2
STEP 3: (SEE FIGURE 3)
,Fasten the R.H. side plate (bend facing out) to the front three holes indicated in the tractor frame. Use three 3/8" x 1" carriage bolts (J) and three 3/8" nylock nuts (Q). Fasten the rear of the side plate to the frame using a 5/16" x 1" carriage bolt (L) and a 5/16" ny!ock nut (V). If there is an engine mounting plate (shown with dotted lines) that prevents the side plate from resting flat against the tractor frame, use three large 1/2" washers (CC) as shims between the side plate and the frame. Tighten all bolts. Repeat for the LH. side plate.
,Reinstai! the browning shield removed in figure 2.
| 5/16" | x t" | ENGmNE | LARGE | 1/2" |
| CARRmAGE | MOUNTmNG | WASHER | (CO) | |
| BOLT | (L) | PLATE | (IF |
|
5/16" | NYLOCK |
|
|
| |
NUT | (V) |
|
|
|
|
|
| J |
|
|
| / |
|
|
| 3/8" NYLOCK |
|
|
| NUT (Q) |
|
BRACKET | 318" | x 1" CARRIAGE | |
| |||
|
| BOLT | (J) |
FIGURE | 1 | FIGURE 3 |
|
|
|
|
6