YourcleaningsystemrequiressomeassembIyandisready foruseonlyafterit hasbeenproperiyservicedwiththe recommendedoilandfuel.
Jfyou have any prohbms with the assembly of your
pressurewasher, please call the pressurewasher hempline at 1o800o222o3136.
UNPACKTHE PRESSUREWASHER
1.Remove everything from carton except pressure washer.
2.Opencarton completely by cutting each corner from top to bottom.
3.Remove pressure washer from carton.
8.Attach nozzleextension to spray gun.
9.Select/attachquick connect spray tip to nozzleextension.
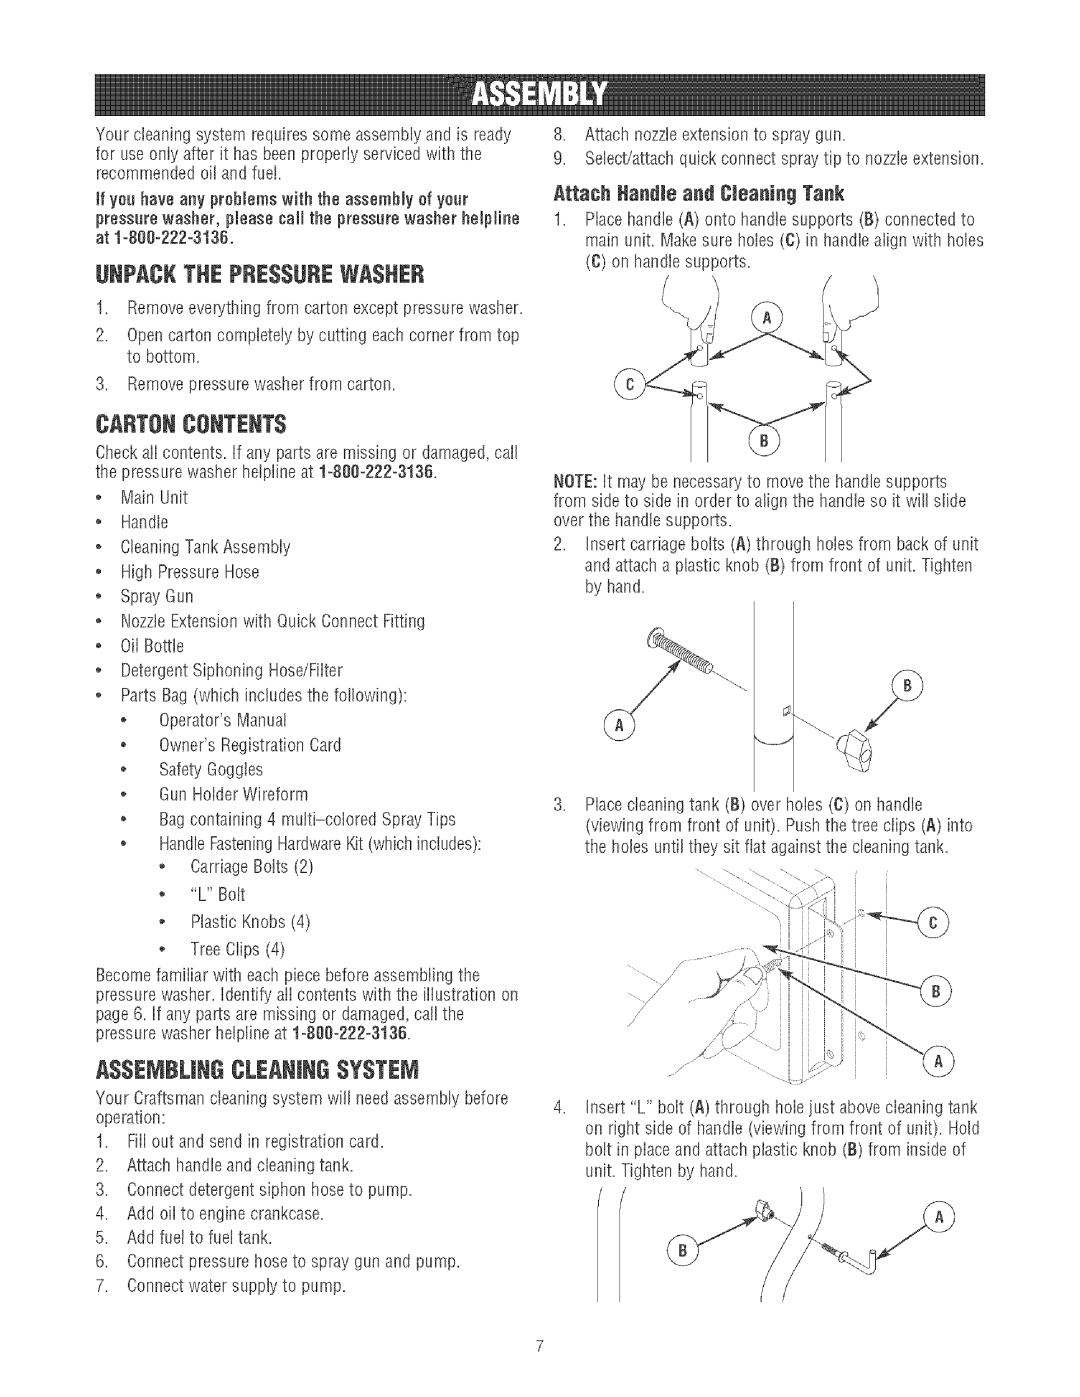
Attach Handle and Cleaning Tank
1.Placehandle (A) onto handb supports (B) connected to main unit. Make sure holes (C) in handlealign with hobs
(C) on handle supports.
CARTONCONTENTS
Checkali contents, if any parts are missing or damaged,call the pressure washer hetpline at 1=800=222=3136.
°Main Unit
°Handle
,6baning TankAssembly ° High PressureHose
° Spray Gun
,NozzleExtensionwith Quick Connect Fitting
*OiI Bottle
°DetergentSiphoning Hose/Fiiter
,Parts Bag (which includes the following):
o Operator'sManual
,Owner'sRegistration Card
,Safety Goggles
o Gun Hoider Wireform
,Bagcontaining 4
,HandleFasteningHardwareKit (whichincludes): o Carriage Bolts (2)
°"U'Bott
°Plastic Knobs (4)
°Tree Clips (4)
Becomefamiiiar with each piece before assembling the pressure washer. Identify ati contents with the iiiustrationon page 6. if any parts are missing or damaged,call the pressure washer hetpline at 1=800=222=3136.
ASSEMBLINGCLEANINGSYSTEM
Your Craftsman cJeaning system wJJJ need assembJy before
operation:
1.Fiii out and send in registration card.
2.Attach handleand cleaning tank.
3.Connect detergent siphon hose to pump.
4.Add oii to engine crankcase.
5.Add fuel to fuet tank.
6.Connect pressure hose to spray gun and pump.
7.Connect water supply to pump.
NOTE:it may be necessaryto move the handle supports from side to side in order to align the handle so it will slide over the handb supports.
2.Insert carriage bolts (A) througil holes from back of unit and attach a plastic knob (B) from front of unit. Tigilten by hand.
Placecleaning tank (B) over holes (C) on handb (viewing from front of unit). Push the tree clips (A) into the holes until they sit fiat againstthe cleaning tank.
i
/
/
z/
Insert "L" bolt (A) through hole just abovecleaning tank on right side of handle (viewing from front of unit). Hold bolt in piace and attach plastic knob (B) from inside of unit. Tighten by hand.