
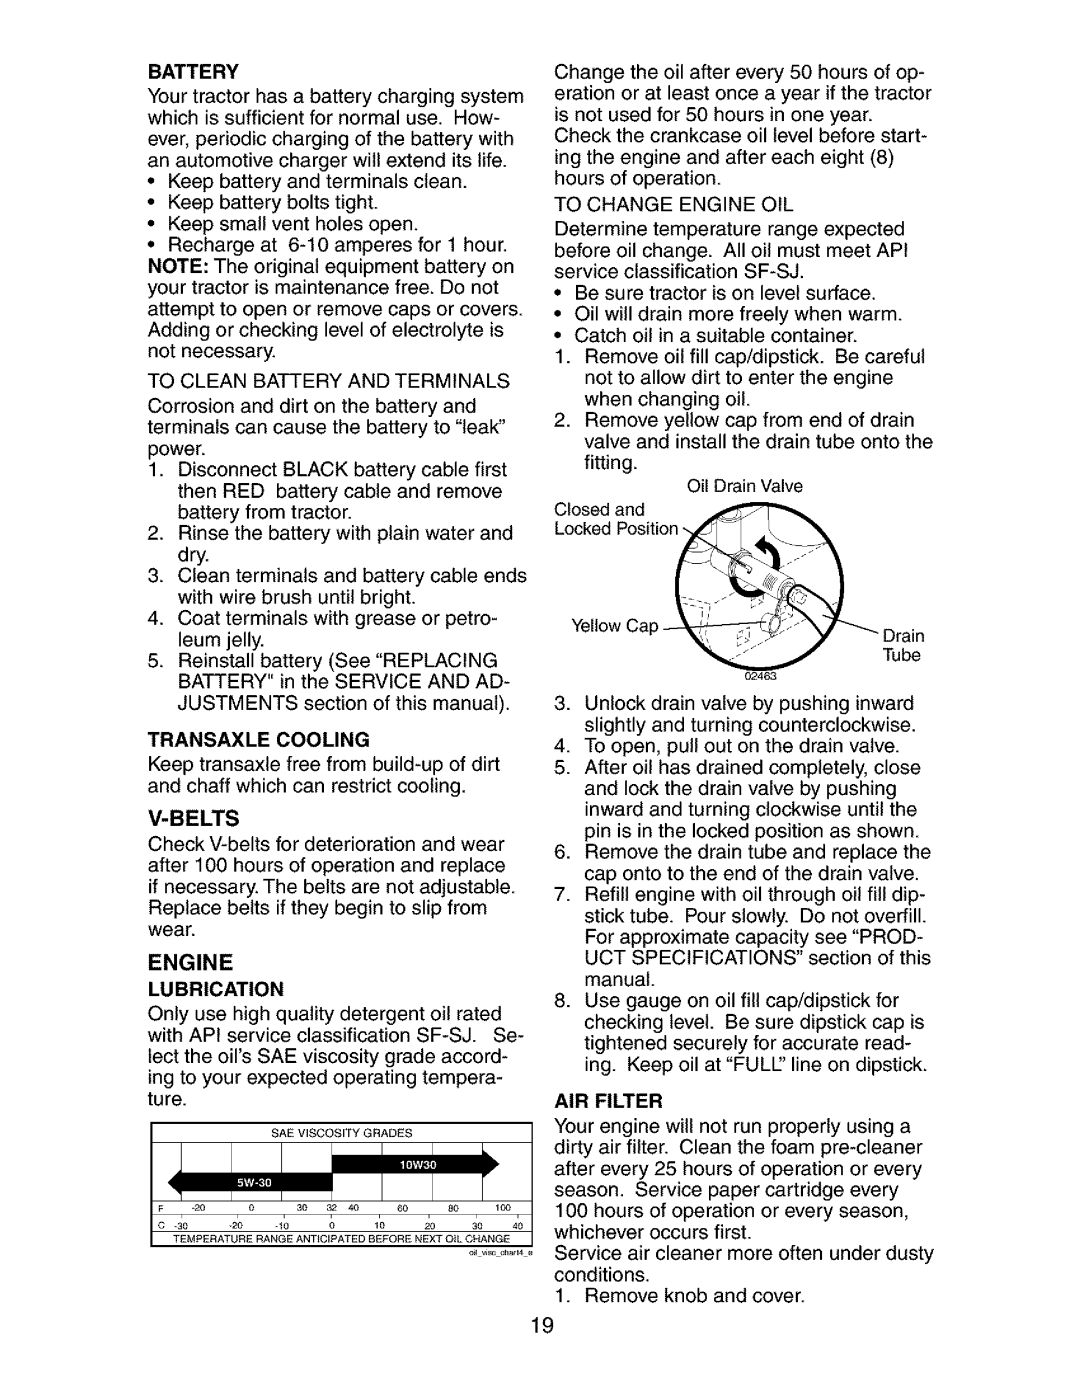
917.273134 specifications
The Craftsman 917.273134 is a remarkable lawn tractor that stands out in the realm of outdoor power equipment. Designed for homeowners seeking a reliable and efficient solution for maintaining their lawns, this tractor combines performance and user-friendly features, making lawn care tasks simpler and more enjoyable.One of the key attributes of the Craftsman 917.273134 is its powerful engine. Equipped with a robust 19 horsepower Briggs & Stratton engine, this lawn tractor delivers dependable performance and is capable of handling challenging terrains and heavier workloads. The engine is designed for easy starting and efficient fuel consumption, allowing users to complete their mowing tasks without frequent refueling interruptions.
The cutting deck is another prominent feature of the 917.273134. With a 42-inch cutting width, it enables users to quickly and efficiently cover large areas of grass. The deck features a three-blade system that ensures a clean and even cut, minimizing the need for multiple passes and reducing the overall mowing time. Additionally, the height of the cutting deck is adjustable, allowing users to choose the perfect grass length for their specific lawn needs.
User comfort and control are essential elements of the Craftsman 917.273134 design. It boasts a comfortable high-back seat that provides excellent support, especially during longer mowing sessions. The tractor is equipped with an intuitive dashboard displaying essential information, such as fuel level and engine status, allowing users to monitor the tractor’s health easily.
Moreover, the Craftsman 917.273134 integrates advanced technologies, such as an automatic transmission system that provides seamless gear shifting, allowing users to maintain optimal speed according to the terrain without manually shifting gears. This feature greatly enhances maneuverability and ease of use, making it accessible for operators of all skill levels.
Safety is also a priority in the design of this lawn tractor. It is equipped with safety features such as a automatic shutoff when the operator leaves the seat, preventing accidents while in operation. The durable construction of the Craftsman 917.273134 ensures its longevity and reliability, making it a worthy investment for any homeowner seeking a quality lawn care solution.
In summary, the Craftsman 917.273134 is a versatile and powerful lawn tractor that effectively meets the needs of today’s homeowners. With its robust engine, efficient cutting system, user-friendly design, and advanced technologies, it stands out as a top choice for maintaining lush and healthy lawns.