ACAUTION: Disconnectspark plugwire from spark plugand placewirewhere it cannotcomein contactwith plug.
•Cleanthe undersideof your lawn mower
by scrapingto
•Cleanengineoftento keeptrashfrom accumulating.A cloggedengineruns hotterandshortensenginelife.
•Keepfinishedsurfacesandwheelsfree of all gasoline,oil, etc.
•Wedonotrecommendusingagardenhose to cleanlawnmowerunlesstheelectrical
system,muffler,airfilterandcarburetorare coveredtokeepwaterout.Waterinengine can result in shortenedengine life.
CLEAN UNDERDRIVECOVER Clean underdrive coverat least twice a season.Scrapeundersideof coverwith putty knifeor similartool to removeany
Ai:_WARNING: To avoid serious injury, before performing any service and adjustments:
1.Release control bar and stop engine.
2.Make sure the blade and all moving parts have completely stopped.
3.Disconnect spark plug wire from spark plug and place wire where it cannot come in contact with plug.
LAWN MOWER
TO ADJUST CUTTING HEIGHT
See "TO ADJUST CUTTING HEIGHT" in the Operation section of this manual.
REAR DEFLECTOR
The rear deflector, attached between the rear wheels of your mower, is provided to
minimize the possibility that objects will be thrown out of the rear of the mower into
the operator mowing position. If deflector becomes damaged, it should be replaced.
TO REMOVE DRIVE BELT
1.Disconnect spark plug wire from spark plug and place wire where it cannot come in contact with plug.
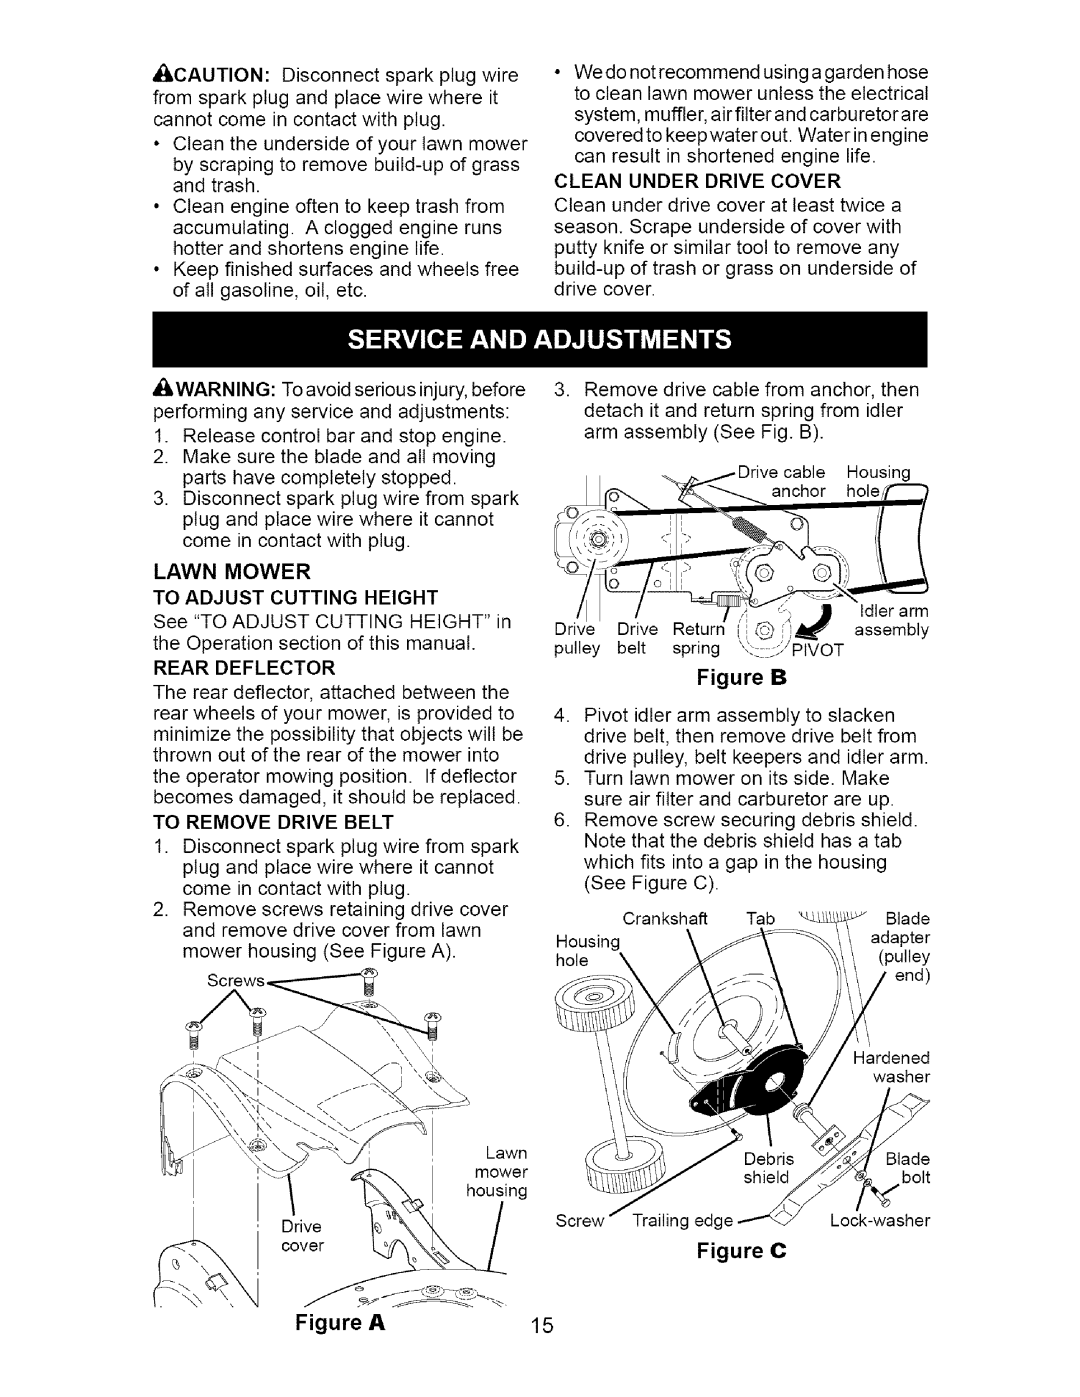
2.Remove screws retaining drive cover and remove drive cover from lawn mower housing (See Figure A).
3.Remove drive cable from anchor, then detach it and return spring from idler arm assembly (See Fig. B).
._j>iDrive cable Housing
<,.. anchor ho eff'--
)- | o,, | , |
| l\ | |
t |
|
|
|
|
|
/ |
| '_ _ | Idler arm | ||
Drive | Drive | Return | ',_ | !)_ | assembly |
pulley | belt | spring | '% S'/PIVOT |
| |
|
| Figure | B |
| |
4.Pivot idler arm assembly to slacken drive belt, then remove drive belt from drive pulley, belt keepers and idler arm.
5.Turn lawn mower on its side. Make sure air filter and carburetor are up.
6.Remove screw securing debris shield. Note that the debris shield has a tab
which fits into a gap in the housing (See Figure C).
| Crankshaft | Tab | Blade |
Housing |
|
| adapter |
hole | \ |
| (pulley |
|
|
| end) |
|
|
| Hardened |
|
|
| washer |
| Lawn |
| Blade |
| mower |
| |
|
| bolt | |
| housing |
| |
|
|
| |
Drive | Screw | Trailing edge | |
cover |
| Figure | C |
|
|
Figure A | 15 |
