Screws_
Lawn mower
housing
Drive cover
Figure A
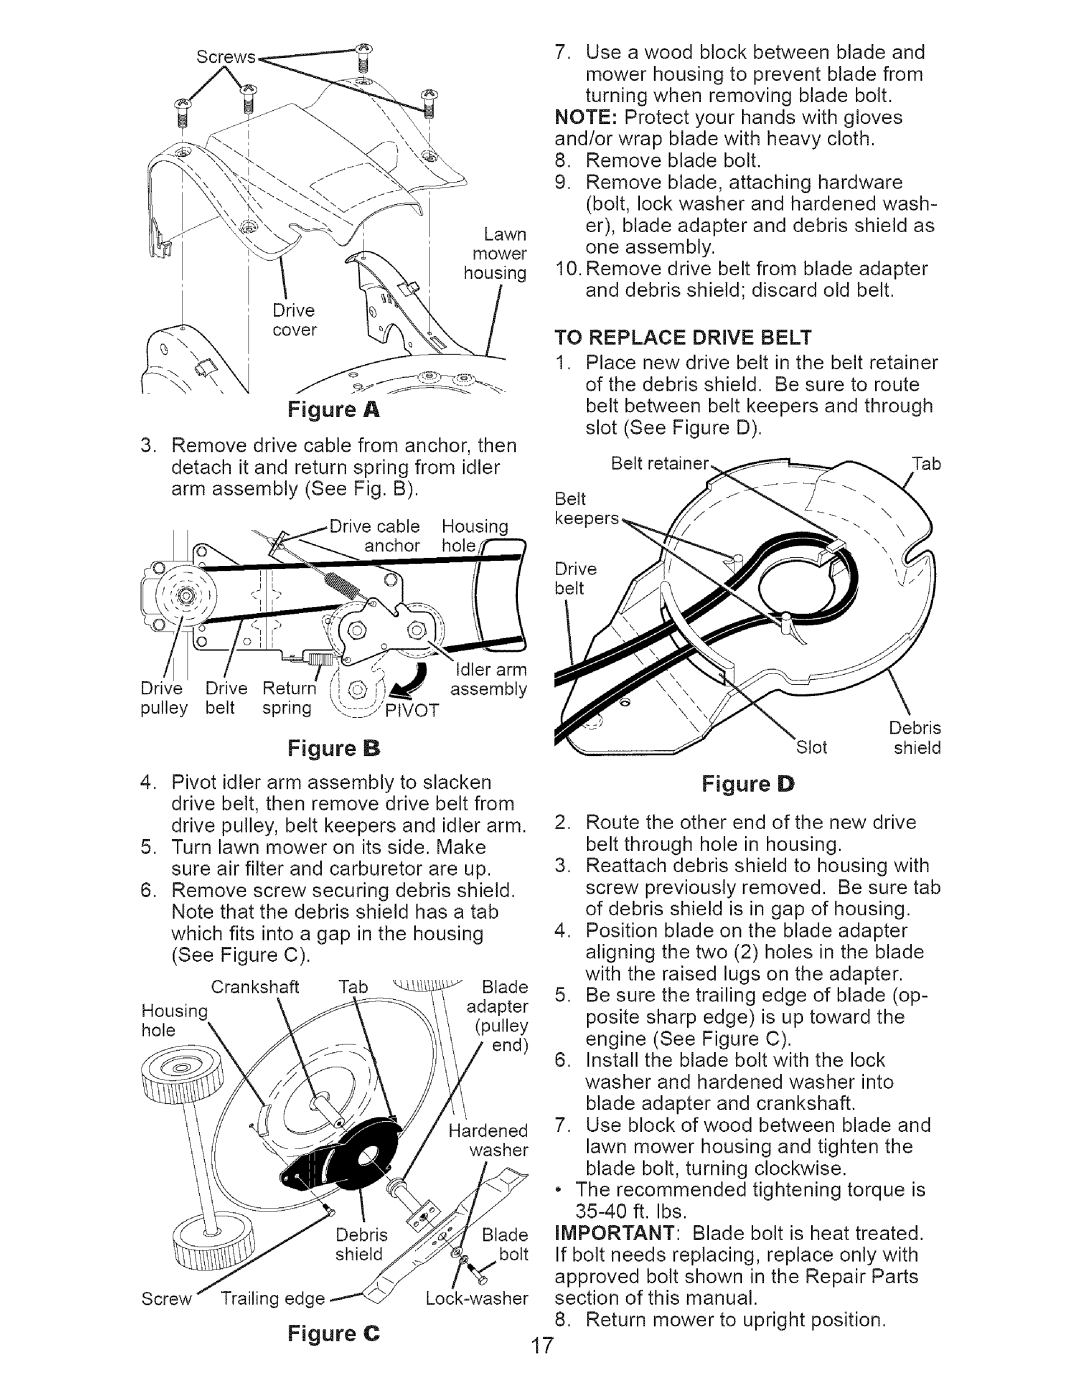
,Remove drive cable from anchor, then detach it and return spring from idler arm assembly (See Fig. B).
Figure B
4.Pivot idler arm assembly to slacken drive belt, then remove drive belt from drive pulley, belt keepers and idler arm.
5.Turn lawn mower on its side. Make sure air filter and carburetor are up.
6.Remove screw securing debris shield. Note that the debris shield has a tab
which fits into a gap in the housing (See Figure C).
| Crankshaft | Tab | Blade |
Housing |
|
| adapter |
|
| (pulley | |
hole | \ |
| |
| end) | ||
|
|
|
Hardened washer
Blade bolt
Screw | Trailing edge |
7.Use a wood block between blade and
mower housing to prevent blade from turning when removing blade bolt.
NOTE: Protect your hands with gloves and/or wrap blade with heavy cloth.
8.Remove blade bolt.
9.Remove blade, attaching hardware (bolt, lock washer and hardened wash- er), blade adapter and debris shield as one assembly.
10.Remove drive belt from blade adapter and debris shield; discard old belt.
TO REPLACE DRIVE BELT
1.Place new drive belt in the belt retainer of the debris shield. Be sure to route belt between belt keepers and through slot (See Figure D).
Belt retainer, | Tab |
Belt kee
Drive belt
Debris
Slot shield
Figured
2.Route the other end of the new drive belt through hole in housing.
3.Reattach debris shield to housing with screw previously removed. Be sure tab of debris shield is in gap of housing.
4.Position blade on the blade adapter aligning the two (2) holes in the blade with the raised lugs on the adapter.
5.Be sure the trailing edge of blade (op- posite sharp edge) is up toward the engine (See Figure C).
6.Install the blade bolt with the lock washer and hardened washer into blade adapter and crankshaft.
7.Use block of wood between blade and
lawn mower housing and tighten the blade bolt, turning clockwise.
• The recommended tightening torque is
IMPORTANT: Blade bolt is heat treated. If bolt needs replacing, replace only with
approved bolt shown in the Repair Parts section of this manual.
8.Return mower to upright position.
Figure C | 17 |
|
