Contents of Carton | |
1 - | Air Compressor |
2 - | Wheels |
2 - | Shoulder Bolts, |
2 - | Hex Nuts, |
2 - | Rubber Bumpers |
2 - | Screws, |
ASSEMBLY
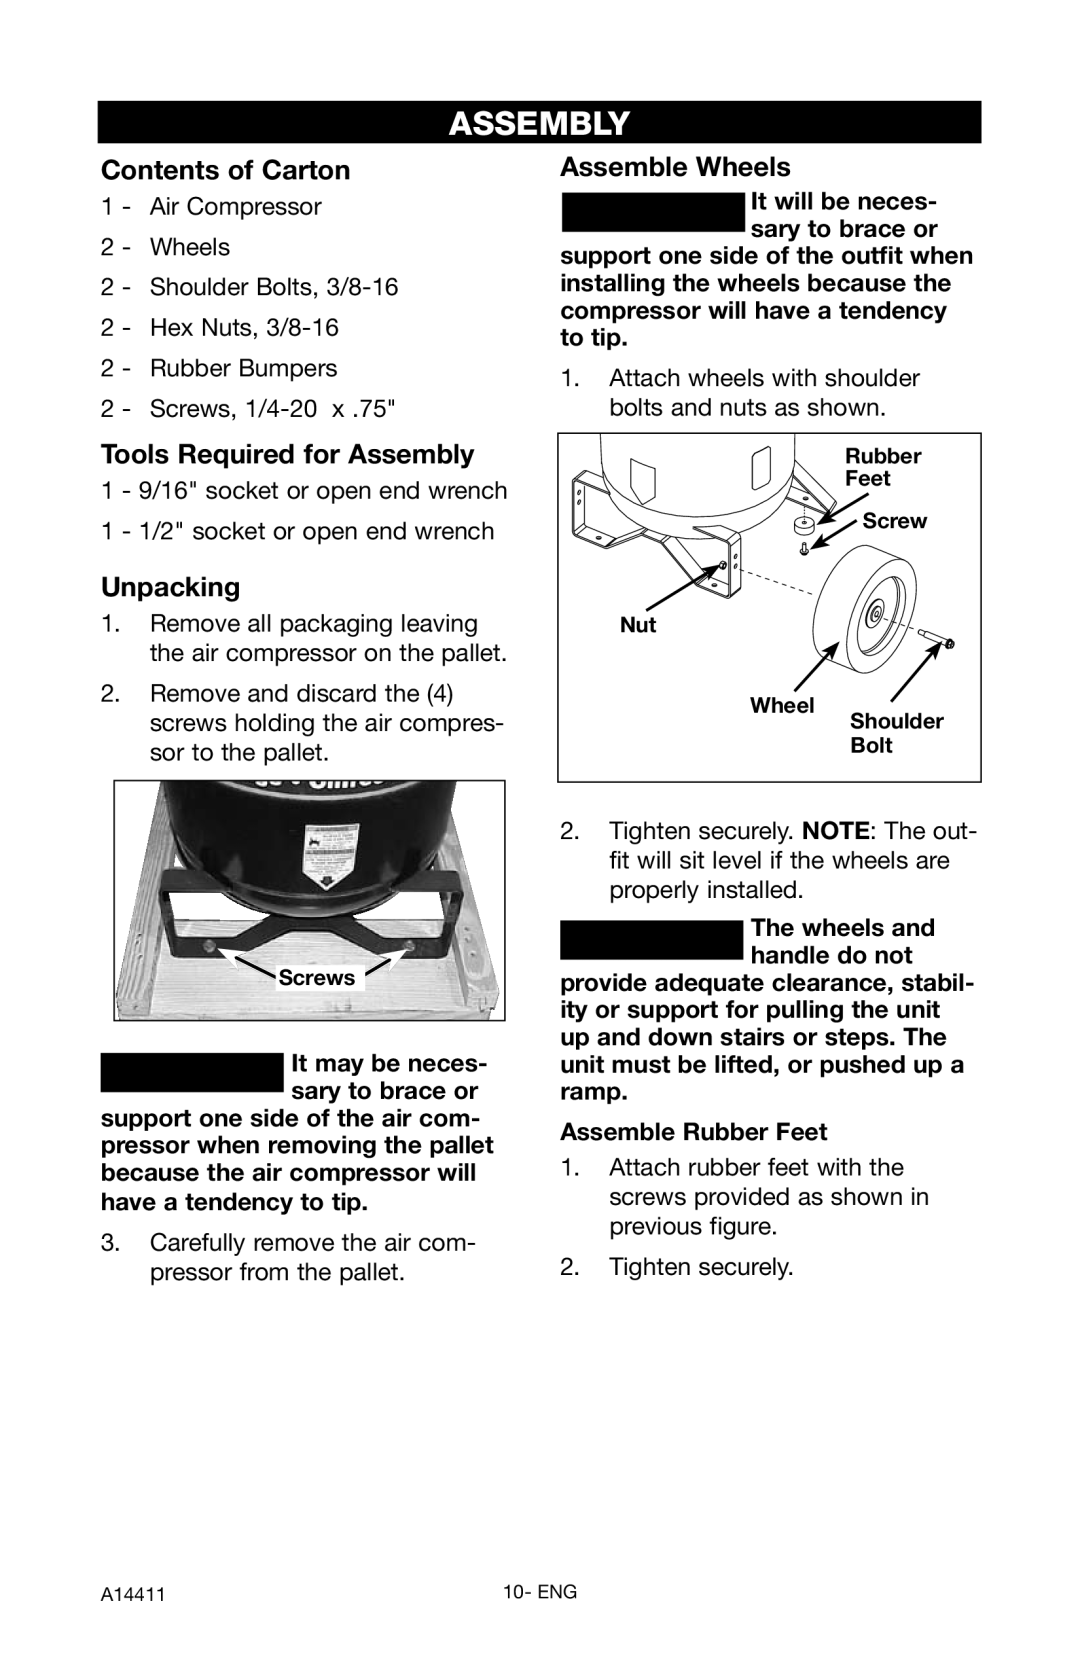
Assemble Wheels
It will be neces- sary to brace or
support one side of the outfit when installing the wheels because the compressor will have a tendency to tip.
1.Attach wheels with shoulder bolts and nuts as shown.
Tools Required for Assembly | |
1 | - 9/16" socket or open end wrench |
1 | - 1/2" socket or open end wrench |
Unpacking | |
1.Remove all packaging leaving the air compressor on the pallet.
2.Remove and discard the (4) screws holding the air compres- sor to the pallet.
Rubber
Feet
Screw
Nut
Wheel Shoulder
Bolt
![]() Screws
Screws![]()
It may be neces- sary to brace or support one side of the air com- pressor when removing the pallet because the air compressor will
have a tendency to tip.
3.Carefully remove the air com- pressor from the pallet.
2.Tighten securely. NOTE: The out- fit will sit level if the wheels are properly installed.
The wheels and handle do not
provide adequate clearance, stabil- ity or support for pulling the unit up and down stairs or steps. The unit must be lifted, or pushed up a ramp.
Assemble Rubber Feet
1.Attach rubber feet with the screws provided as shown in previous figure.
2.Tighten securely.
A14411 | 10- ENG |