CLEAN DECK & |
|
| |
CHECK/REPLACE | MOWER BLADES |
| |
Service Interval: 25 hours or as required. |
| ||
WARNING |
| ||
For your personal safety, do not handle the sharp |
| ||
mower blades with bare hands. Careless or |
| ||
improper handling of blades may result in serious |
| ||
injury. |
|
| |
WARNING | LOOSEN | ||
|
| ||
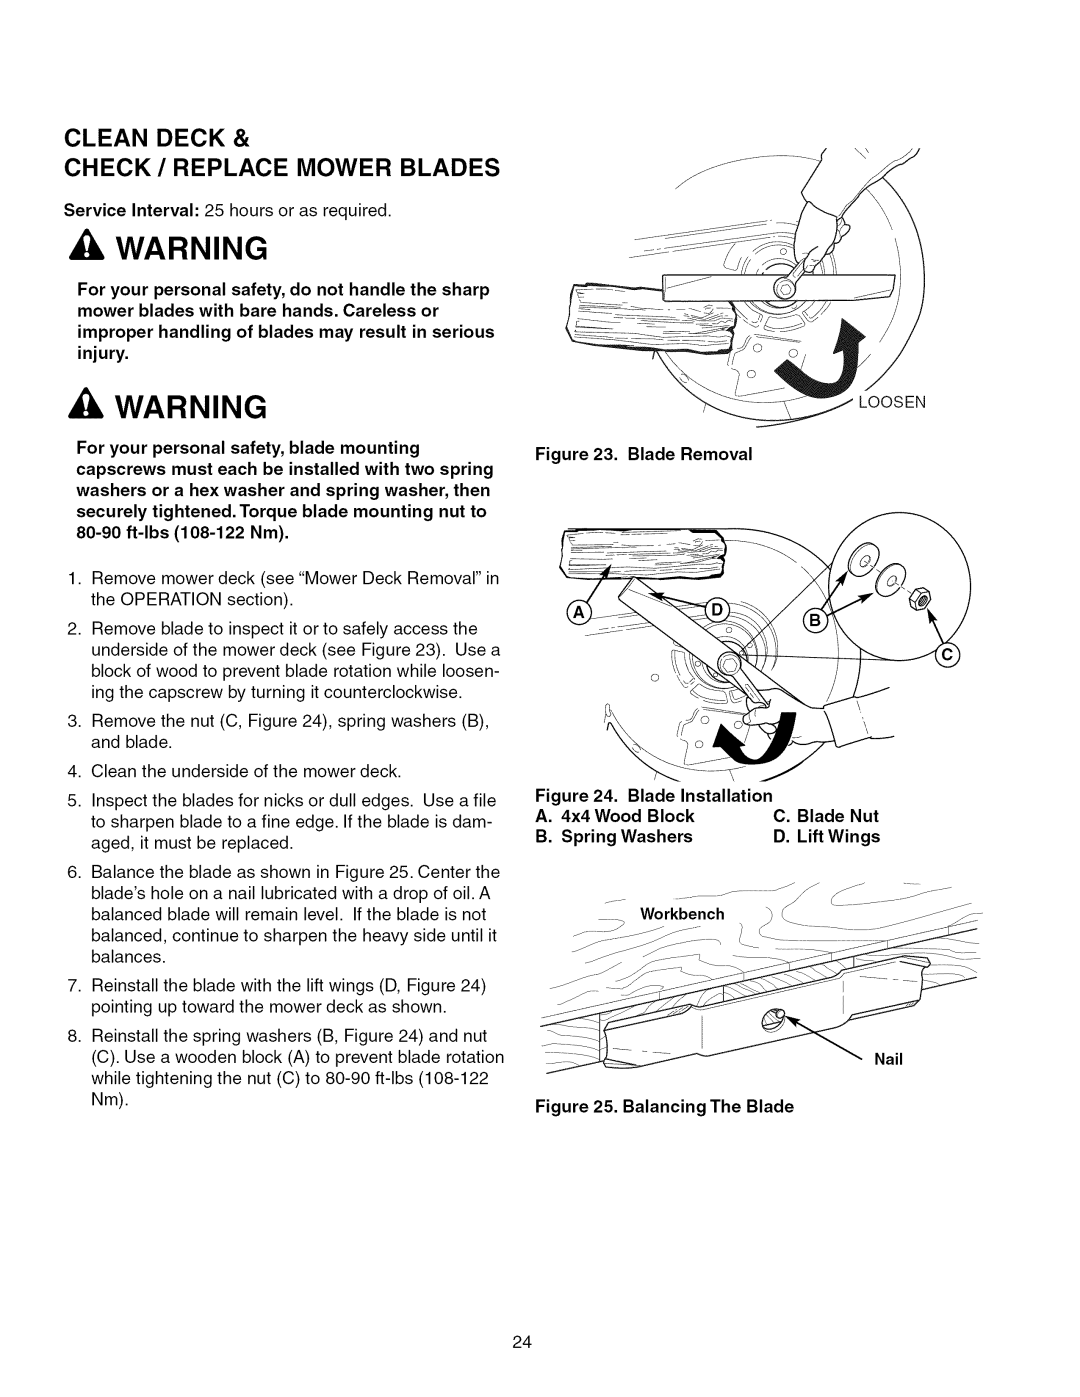
For your personal safety, blade mounting | Figure 23. Blade Removal | ||
capscrews must each be installed with two spring | |||
| |||
washers or a hex washer and spring washer, then |
| ||
securely tightened. Torque blade mounting nut to |
| ||
Nm). |
| ||
1.Remove mower deck (see "Mower Deck Removal" in the OPERATION section).
2.Remove blade to inspect it or to safely access the underside of the mower deck (see Figure 23). Use a block of wood to prevent blade rotation while loosen- ing the capscrew by turning it counterclockwise.
3.Remove the nut (C, Figure 24), spring washers (B), and blade.
. Clean the underside of the mower deck.
5.Inspect the blades for nicks or dull edges. Use a file to sharpen blade to a fine edge. If the blade is dam- aged, it must be replaced.
. Balance the blade as shown in Figure 25. Center the blade'shole on a nail lubricated with a drop of oil. A balanced blade will remain level. If the blade is not balanced, continue to sharpen the heavy side until it balances.
. Reinstall the blade with the lift wings (D, Figure 24) pointing up toward the mower deck as shown.
. Reinstall the spring washers (B, Figure 24) and nut
(C). Use a wooden block (A) to prevent blade rotation while tightening the nut (C) to
Figure | 24. Blade Installation |
| |
A. | 4x4 | Wood Block | C. Blade Nut |
B. | Spring Washers | D. Lift Wings | |
Workbench
Nail
Figure 25. Balancing The Blade
24
