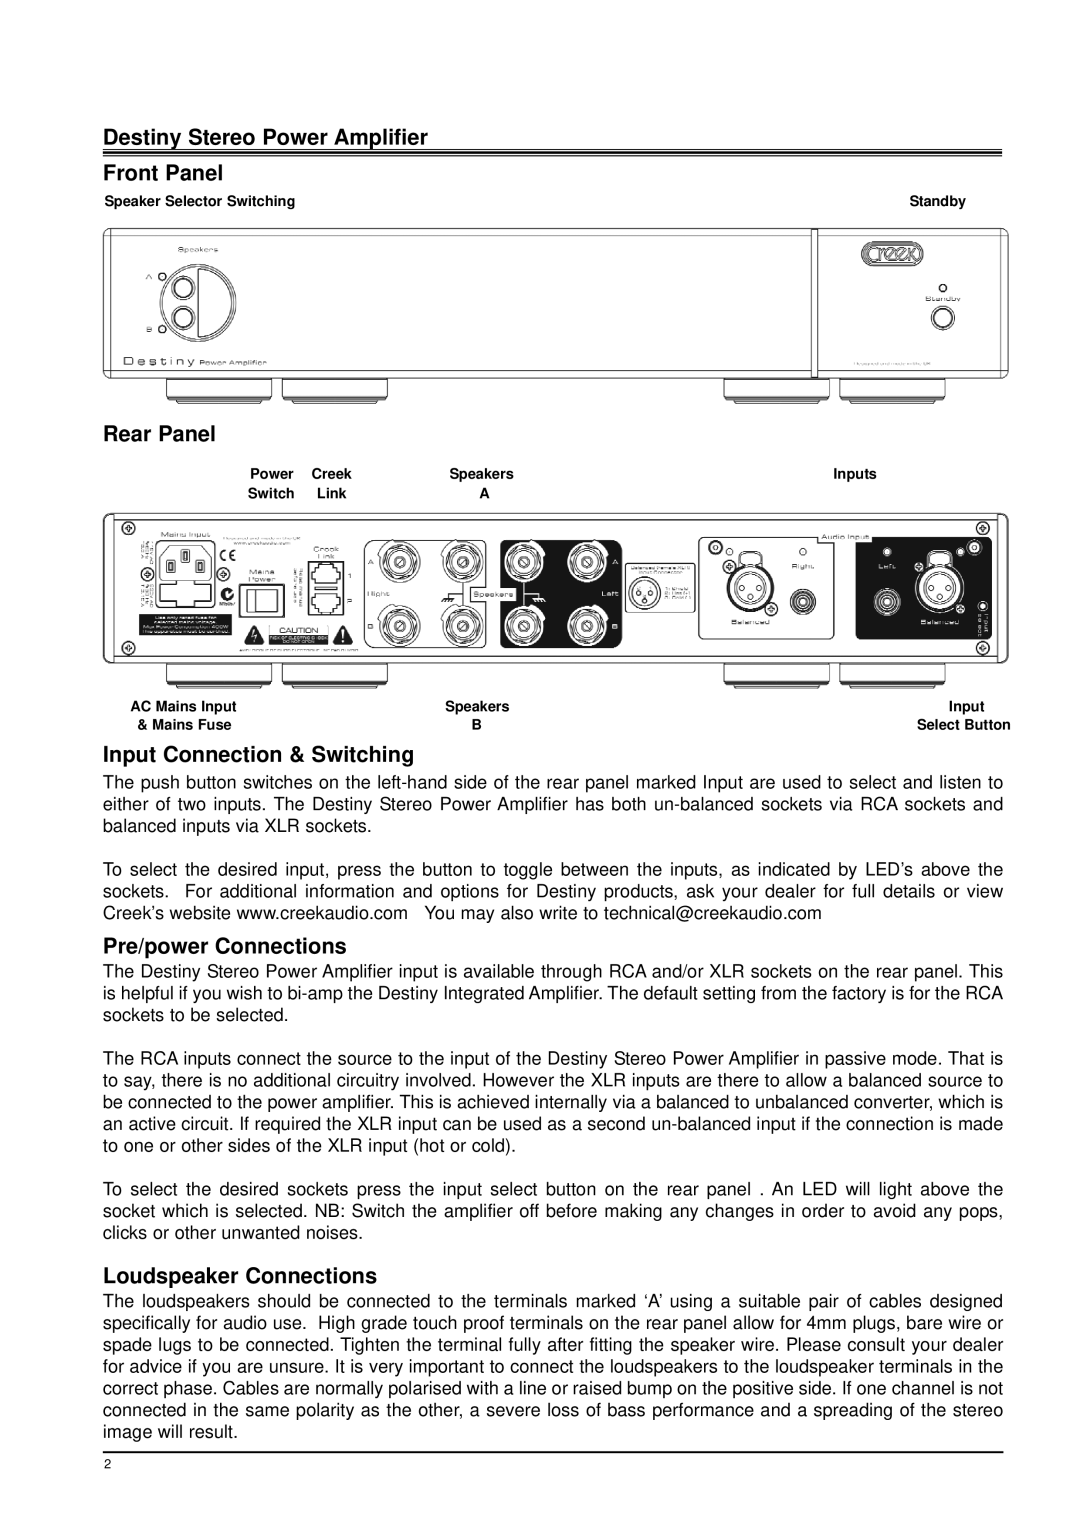
Stereo Power Amplifier specifications
The Creek Audio Stereo Power Amplifier is a standout choice for audiophiles seeking superior sound quality and reliable performance. Renowned for its engineering prowess, this amplifier exemplifies Creek's commitment to creating high-fidelity audio products that elevate the listening experience.One of the main features of the Creek Audio Stereo Power Amplifier is its exceptional power output. With a robust performance typically rated around 100 watts per channel into 8 ohms, this amplifier effortlessly drives a wide range of speakers, from bookshelf models to larger floor-standing designs. It provides ample headroom for dynamic sound reproduction, ensuring that audio playback remains clear and distortion-free even at high volumes.
The amplifier utilizes advanced Class AB technology, which combines the efficiency of Class B amplifiers with the linearity of Class A designs. This results in a powerful yet refined sound that is free from the fatigue often associated with lower-quality amplifiers. The Class AB design also plays a critical role in maintaining thermal stability, allowing the amplifier to operate efficiently without overheating.
Another notable characteristic is the high-quality components used throughout the amplifier. Creek has employed carefully selected resistors, capacitors, and transistors that contribute to the amplifier's overall sonic performance. These components work harmoniously to produce a natural and engaging soundstage, allowing listeners to experience music in its most authentic form.
The Creek Audio Stereo Power Amplifier also features a sleek, minimalist design which fits seamlessly into any audio setup. Its solid build quality not only enhances the aesthetic appeal but also ensures durability and longevity. Key connectivity options, including RCA and XLR inputs, provide flexibility for integration with various source components.
Additionally, the amplifier incorporates advanced protection circuits to safeguard against overheating and short circuits, promoting safe operation in the long run. This level of protection allows users to enjoy their music without worrying about potential damage to the equipment.
In conclusion, the Creek Audio Stereo Power Amplifier delivers a powerful, high-fidelity listening experience that appeals to discerning audiophiles. With its advanced technology, premium components, and robust performance, it stands out as a top choice for those looking to elevate their audio systems. Whether for casual listening or critical analysis, this amplifier promises to enrich any listening environment.

