AUTOMATIC ICE AND WATER DISPENSER
HOW TO PRIME THE WATER SUPPLY SYSTEM
Your refrigerator’s water supply system includes several tubing lines, a water filter, a water valve and a water tank. To ensure that your water dispenser works properly, this system must be completely filled with water when your refrigerator is first connected to the household water supply line and whenever you replace the water filter.
![]() CAUTION
CAUTION
For proper dispenser operation, recommended water supply pressure should fall between 30 psi and 100 psi. Excessive pressure may cause water filter to malfunction.
TO PRIME THE WATER SUPPLY SYSTEM:
•Begin filling the tank by pressing and holding a drinking glass against the water dispenser paddle.
•Keep the glass in this position until water comes out of the dispenser. There will be noticeable spurts and sputters as the system pushes air out through the system and dispenser nozzle. This is normal. This may take about 1½ minutes.
•Continue dispensing water for about 3 minutes to flush the system of any air and impurities. Empty glass as needed.
NOTE.
The water dispenser has a
HOW THE ICE MAKER WORKS
![]() CAUTION
CAUTION
Chemicals from a malfunctioning softener can damage the ice maker. If the ice maker is connected to soft water, ensure that the softener is maintained and working properly.
IMPORTANT
Your ice maker is shipped from the factory with the wire signal arm in the ON position (side mounted) or with the switch turned ON (rear mounted). To ensure proper function of your ice maker, hook up water supply immediately or turn ice maker OFF by lifting the wire signal arm until it clicks and locks in the UP position (side mounted) or turn the On/Off switch to the Off (O) position. If the ice maker is not turned off and the water supply is not connected, the water valve will make a loud chattering noise.
The ice maker and container are located in the top of the freezer compartment. After the refrigerator is installed properly and has cooled for several hours, the ice maker can begin making ice within 24 hours. Air in new plumbing lines may
cause the ice maker to cycle two or three times before making a full tray of ice. With no usage, it will take approximately two days to fill the ice container.
Because of new plumbing connections, the first production of ice cubes may be discolored or have an odd flavor. Discard ice made during the first 24 hours.
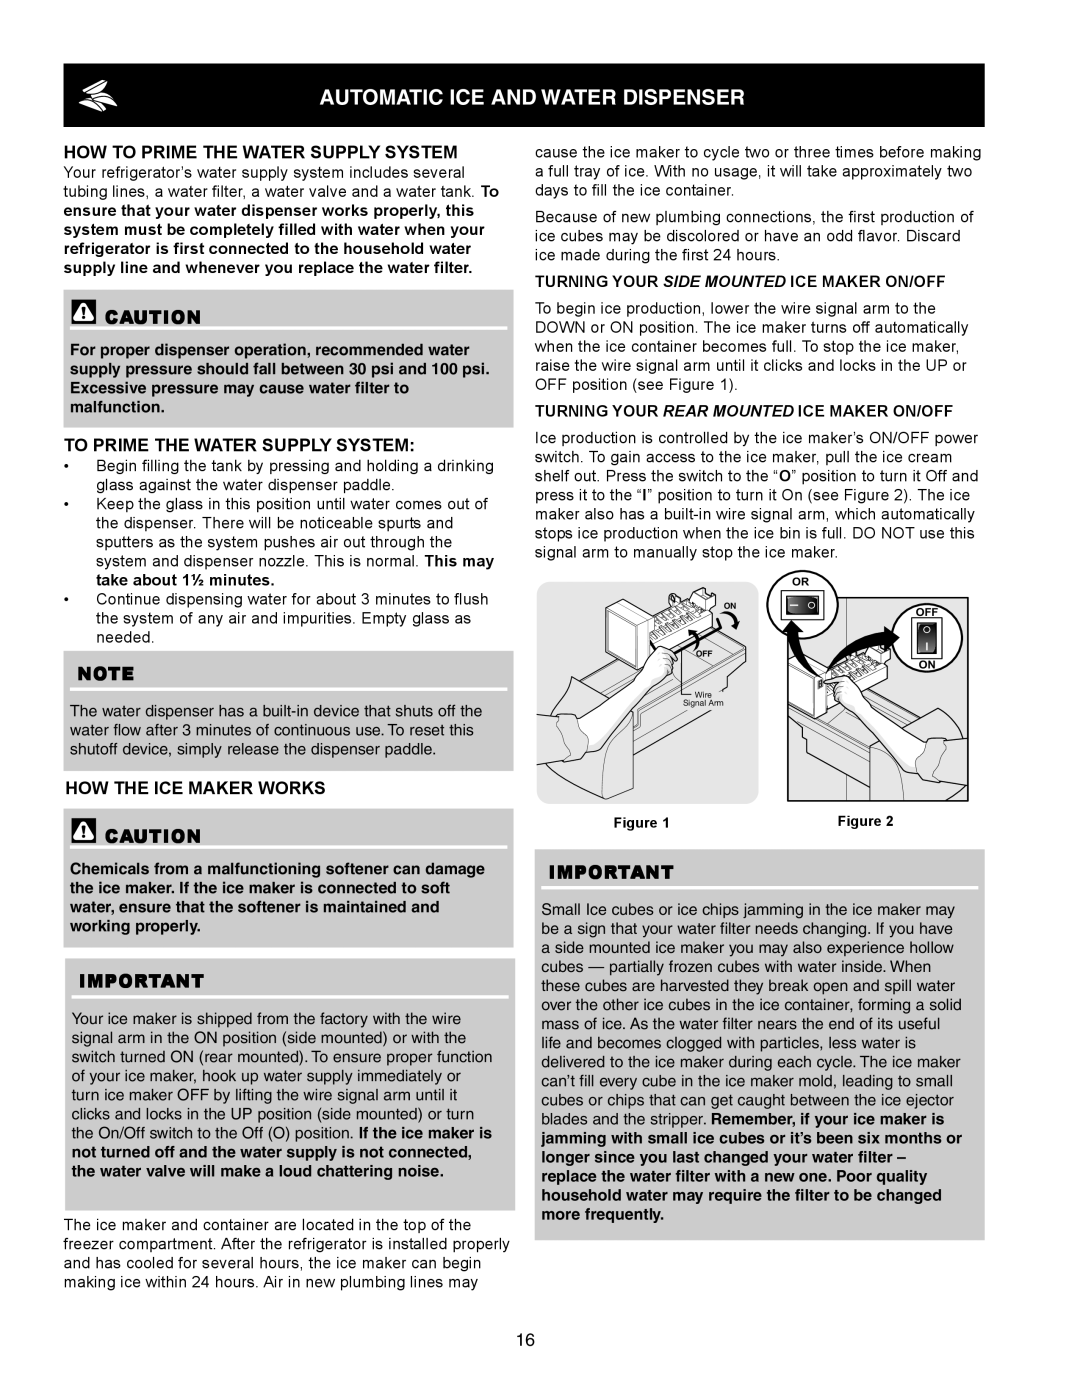
TURNING YOUR SIDE MOUNTED ICE MAKER ON/OFF
To begin ice production, lower the wire signal arm to the DOWN or ON position. The ice maker turns off automatically when the ice container becomes full. To stop the ice maker, raise the wire signal arm until it clicks and locks in the UP or OFF position (see Figure 1).
TURNING YOUR REAR MOUNTED ICE MAKER ON/OFF
Ice production is controlled by the ice maker’s ON/OFF power switch. To gain access to the ice maker, pull the ice cream shelf out. Press the switch to the “O” position to turn it Off and press it to the “I” position to turn it On (see Figure 2). The ice maker also has a
| OR |
ON | OFF |
| |
OFF |
|
| ON |
Wire |
|
Signal Arm |
|
Figure 1 | Figure 2 |
IMPORTANT
Small Ice cubes or ice chips jamming in the ice maker may be a sign that your water filter needs changing. If you have a side mounted ice maker you may also experience hollow cubes — partially frozen cubes with water inside. When these cubes are harvested they break open and spill water over the other ice cubes in the ice container, forming a solid mass of ice. As the water filter nears the end of its useful life and becomes clogged with particles, less water is delivered to the ice maker during each cycle. The ice maker can’t fill every cube in the ice maker mold, leading to small cubes or chips that can get caught between the ice ejector blades and the stripper. Remember, if your ice maker is jamming with small ice cubes or it’s been six months or longer since you last changed your water filter – replace the water filter with a new one. Poor quality household water may require the filter to be changed more frequently.
16