
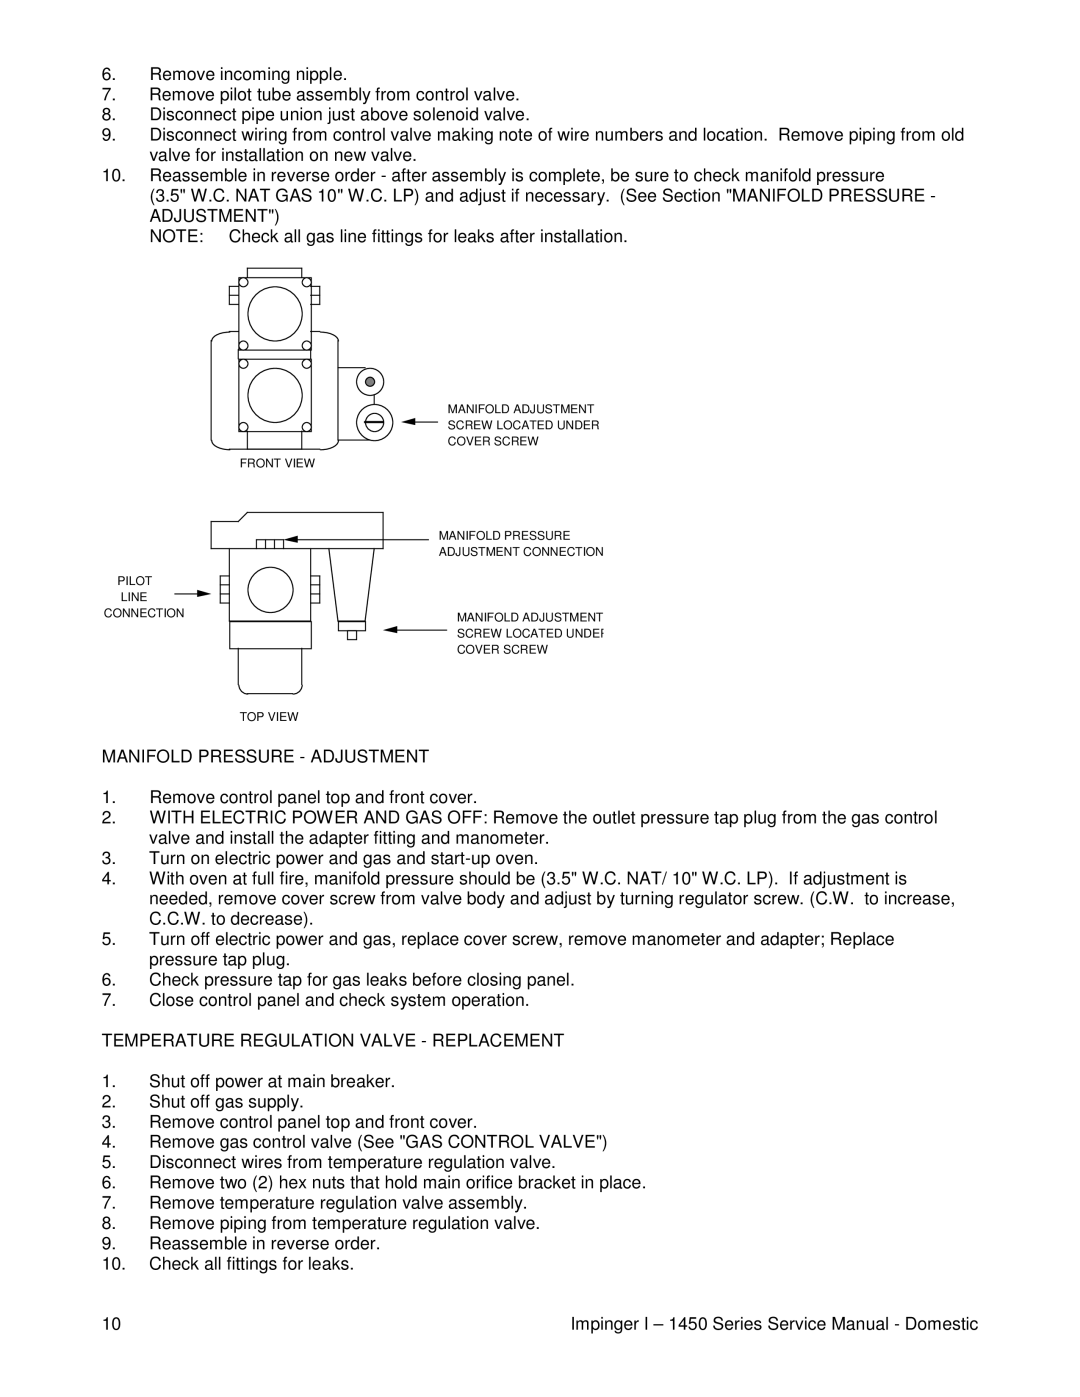
1451, 1450 specifications
The Cub Cadet 1450 and 1451 are part of Cub Cadet's renowned line of garden tractors, providing exceptional performance and durability for homeowners and professionals alike. These models have garnered attention for their robust engineering, making them suitable for various lawn care tasks, from mowing to hauling and tilling.One of the main features of the Cub Cadet 1450 and 1451 is their powerful engine. Both models are equipped with a reliable Kohler K-Series engine, which delivers smooth operation and a significant amount of torque, ensuring that users can tackle tough terrain and challenging mowing conditions. The engines are designed with an emphasis on longevity and easy maintenance, offering owners peace of mind and an efficient performance.
Another significant characteristic is the hydrostatic transmission system found in these tractors. This technology allows for seamless speed adjustments without the need for manual gear shifting, providing a more comfortable and user-friendly experience. Operators can easily maneuver through their yards or properties, making quick turns and adapting to different areas of their lawns with ease.
The cutting decks on both the Cub Cadet 1450 and 1451 are engineered for precision. Featuring a 50-inch cutting width, the decks allow for efficient mowing of large areas, reducing the time spent on lawn care. The innovative design also includes adjustable cutting heights, giving users the flexibility to maintain their lawns at the desired length. The robust construction of the decks ensures that they can withstand the rigors of regular use.
In addition to their impressive mowing capabilities, these models come equipped with a range of accessories and options. From attachments like snow blowers to tillers, users can expand the functionality of their tractors throughout the year. This versatility makes the Cub Cadet 1450 and 1451 ideal for various landscaping projects and seasonal tasks, including snow removal and garden preparation.
Comfort and ease of operation are further enhanced by the ergonomic design of the operator station. Both models feature a high-back seat, easy-to-reach controls, and adequate legroom, making long hours of operation more enjoyable. The intuitive dashboard provides important information at a glance, allowing users to monitor their tractor's performance without distraction.
Overall, the Cub Cadet 1450 and 1451 are reliable, powerful, and versatile garden tractors that can meet the needs of any homeowner or landscape professional. Their cutting-edge technology and robust design ensure they stand out in the competitive market of lawn care equipment, making them excellent investments for long-term yard maintenance. Whether tackling large mowing jobs or completing seasonal tasks, these tractors deliver an optimal balance of performance and comfort.