![]() WARNING
WARNING
The exhaust system is HOT. To avoid personal injury, allow the engine and exhaust system to cool before proceeding with the following PTO belt removal instructions.
4.Open the tractor hood and remove the forward end of the PTO belt from the PTO clutch pulley (Refer to Figure 39).
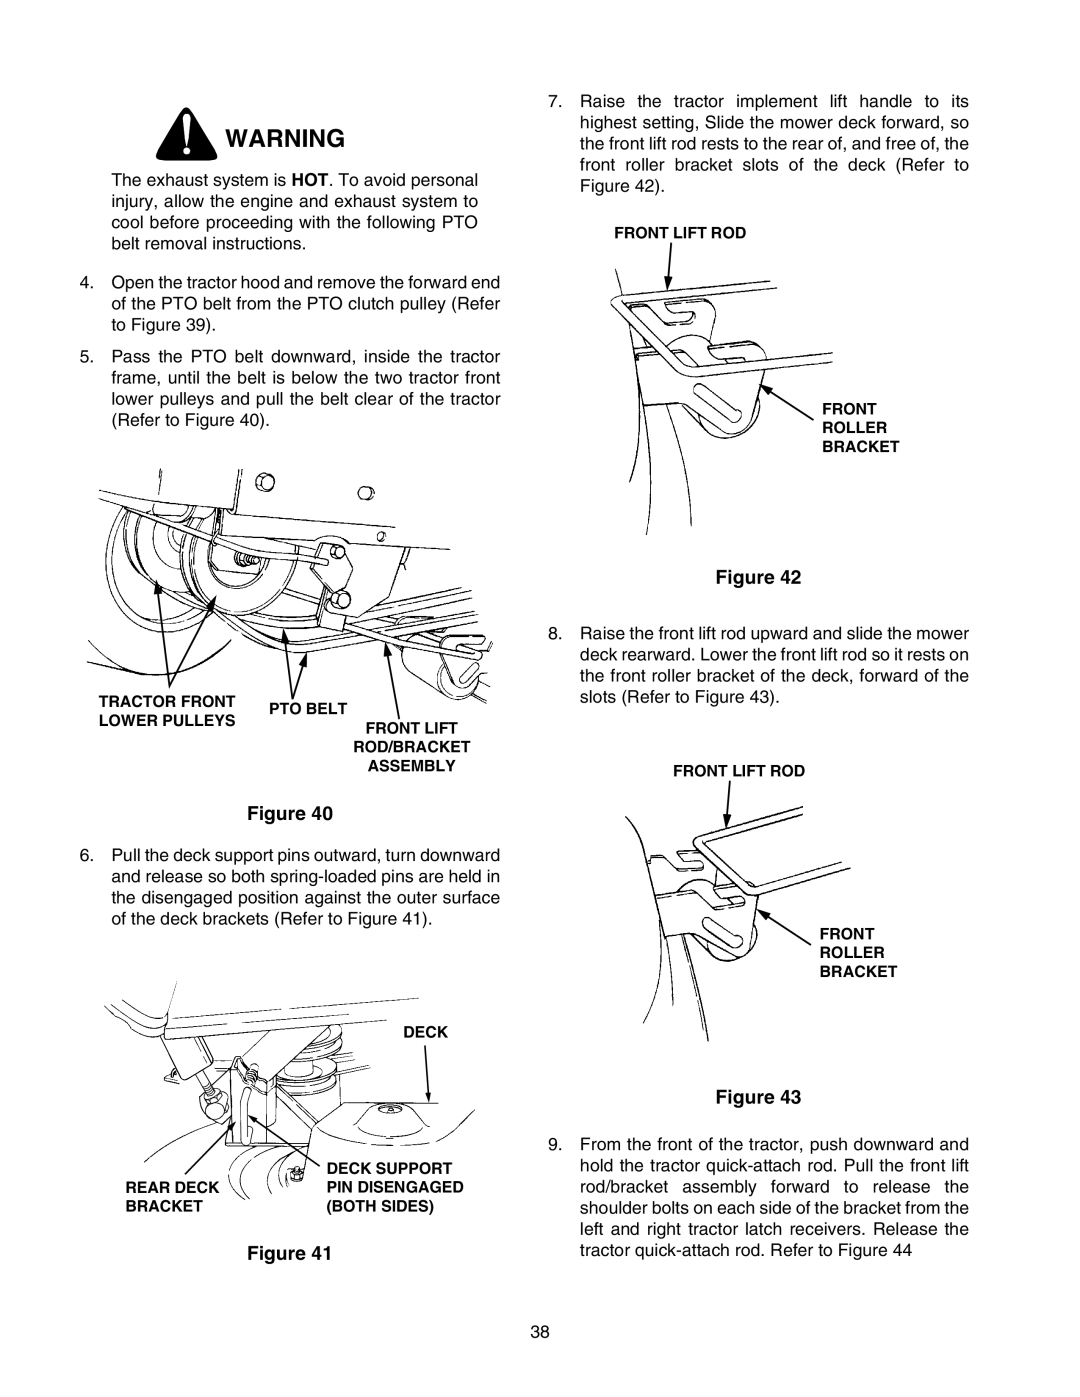
5.Pass the PTO belt downward, inside the tractor frame, until the belt is below the two tractor front lower pulleys and pull the belt clear of the tractor (Refer to Figure 40).
7.Raise the tractor implement lift handle to its highest setting, Slide the mower deck forward, so the front lift rod rests to the rear of, and free of, the front roller bracket slots of the deck (Refer to Figure 42).
FRONT LIFT ROD
FRONT
ROLLER
BRACKET
TRACTOR FRONT | PTO BELT | |
LOWER PULLEYS | ||
FRONT LIFT | ||
| ||
| ROD/BRACKET | |
| ASSEMBLY |
Figure 40
6.Pull the deck support pins outward, turn downward and release so both
DECK
| DECK SUPPORT |
REAR DECK | PIN DISENGAGED |
BRACKET | (BOTH SIDES) |
Figure 41
Figure 42
8.Raise the front lift rod upward and slide the mower deck rearward. Lower the front lift rod so it rests on the front roller bracket of the deck, forward of the slots (Refer to Figure 43).
FRONT LIFT ROD
FRONT
ROLLER
BRACKET
Figure 43
9.From the front of the tractor, push downward and hold the tractor
38