The Optional Remote 3rd Hole Slide - Part No. 02004521
Mounting Instructions
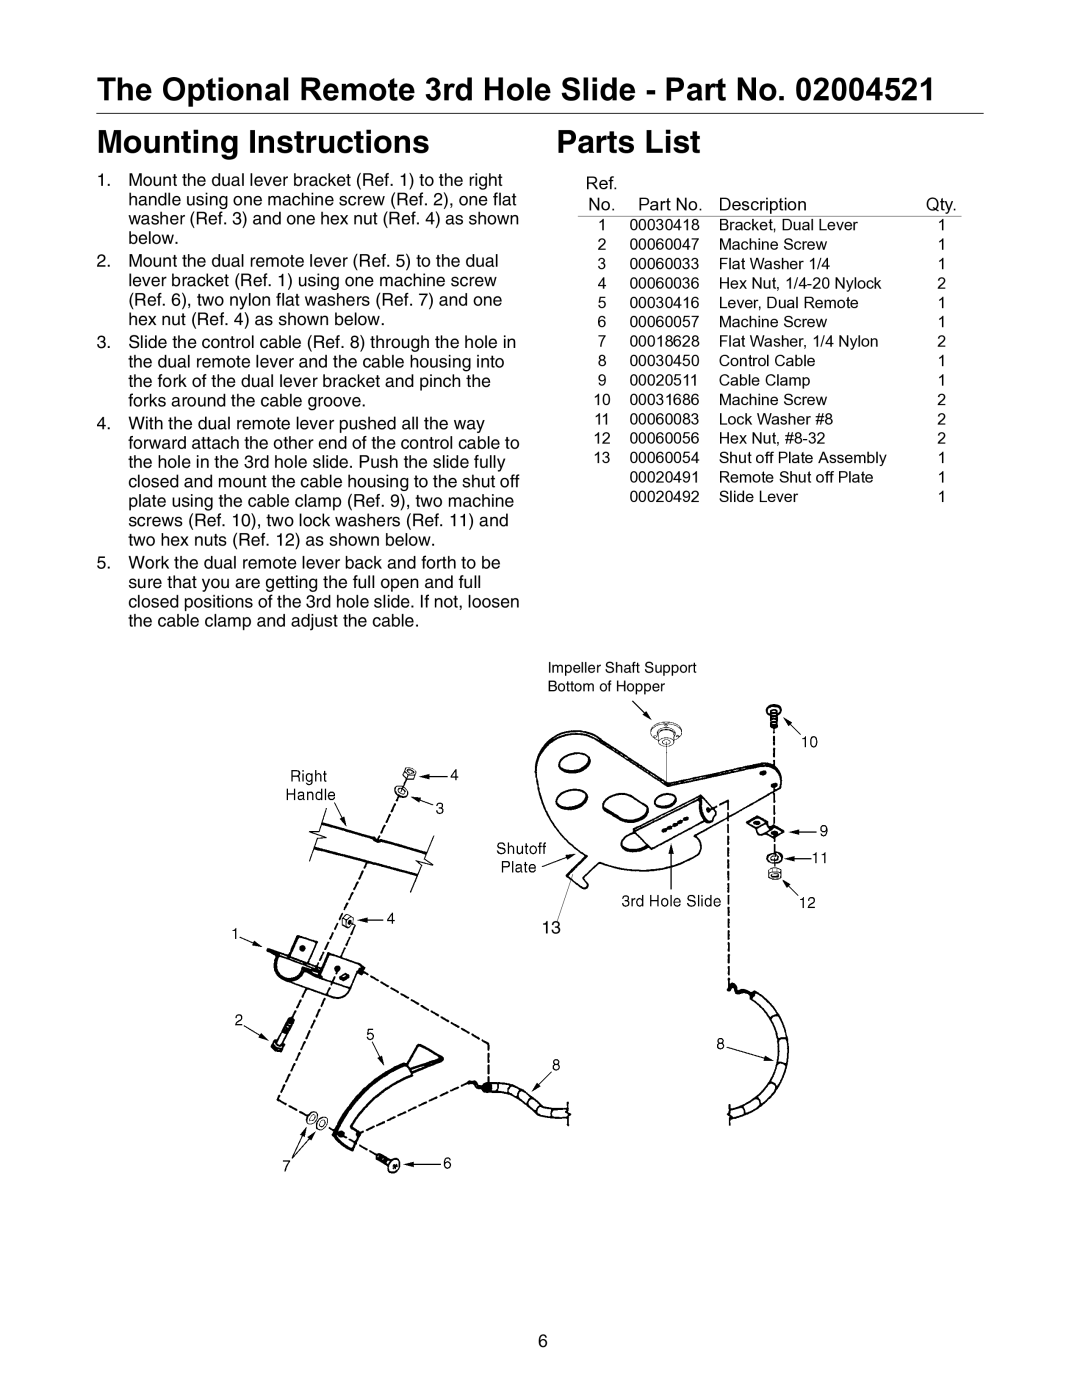
1.Mount the dual lever bracket (Ref. 1) to the right handle using one machine screw (Ref. 2), one flat washer (Ref. 3) and one hex nut (Ref. 4) as shown below.
2.Mount the dual remote lever (Ref. 5) to the dual lever bracket (Ref. 1) using one machine screw (Ref. 6), two nylon flat washers (Ref. 7) and one hex nut (Ref. 4) as shown below.
3.Slide the control cable (Ref. 8) through the hole in the dual remote lever and the cable housing into the fork of the dual lever bracket and pinch the forks around the cable groove.
4.With the dual remote lever pushed all the way forward attach the other end of the control cable to the hole in the 3rd hole slide. Push the slide fully closed and mount the cable housing to the shut off plate using the cable clamp (Ref. 9), two machine screws (Ref. 10), two lock washers (Ref. 11) and two hex nuts (Ref. 12) as shown below.
5.Work the dual remote lever back and forth to be sure that you are getting the full open and full closed positions of the 3rd hole slide. If not, loosen the cable clamp and adjust the cable.
Parts List
Ref. |
|
|
|
No. | Part No. | Description | Qty. |
1 | 00030418 | Bracket, Dual Lever | 1 |
2 | 00060047 | Machine Screw | 1 |
3 | 00060033 | Flat Washer 1/4 | 1 |
4 | 00060036 | Hex Nut, | 2 |
5 | 00030416 | Lever, Dual Remote | 1 |
6 | 00060057 | Machine Screw | 1 |
7 | 00018628 | Flat Washer, 1/4 Nylon | 2 |
8 | 00030450 | Control Cable | 1 |
9 | 00020511 | Cable Clamp | 1 |
10 | 00031686 | Machine Screw | 2 |
11 | 00060083 | Lock Washer #8 | 2 |
12 | 00060056 | Hex Nut, | 2 |
13 | 00060054 | Shut off Plate Assembly | 1 |
| 00020491 | Remote Shut off Plate | 1 |
| 00020492 | Slide Lever | 1 |
Impeller Shaft Support
Bottom of Hopper
13
6
