Rotary Spreaders - Assembly Instructions
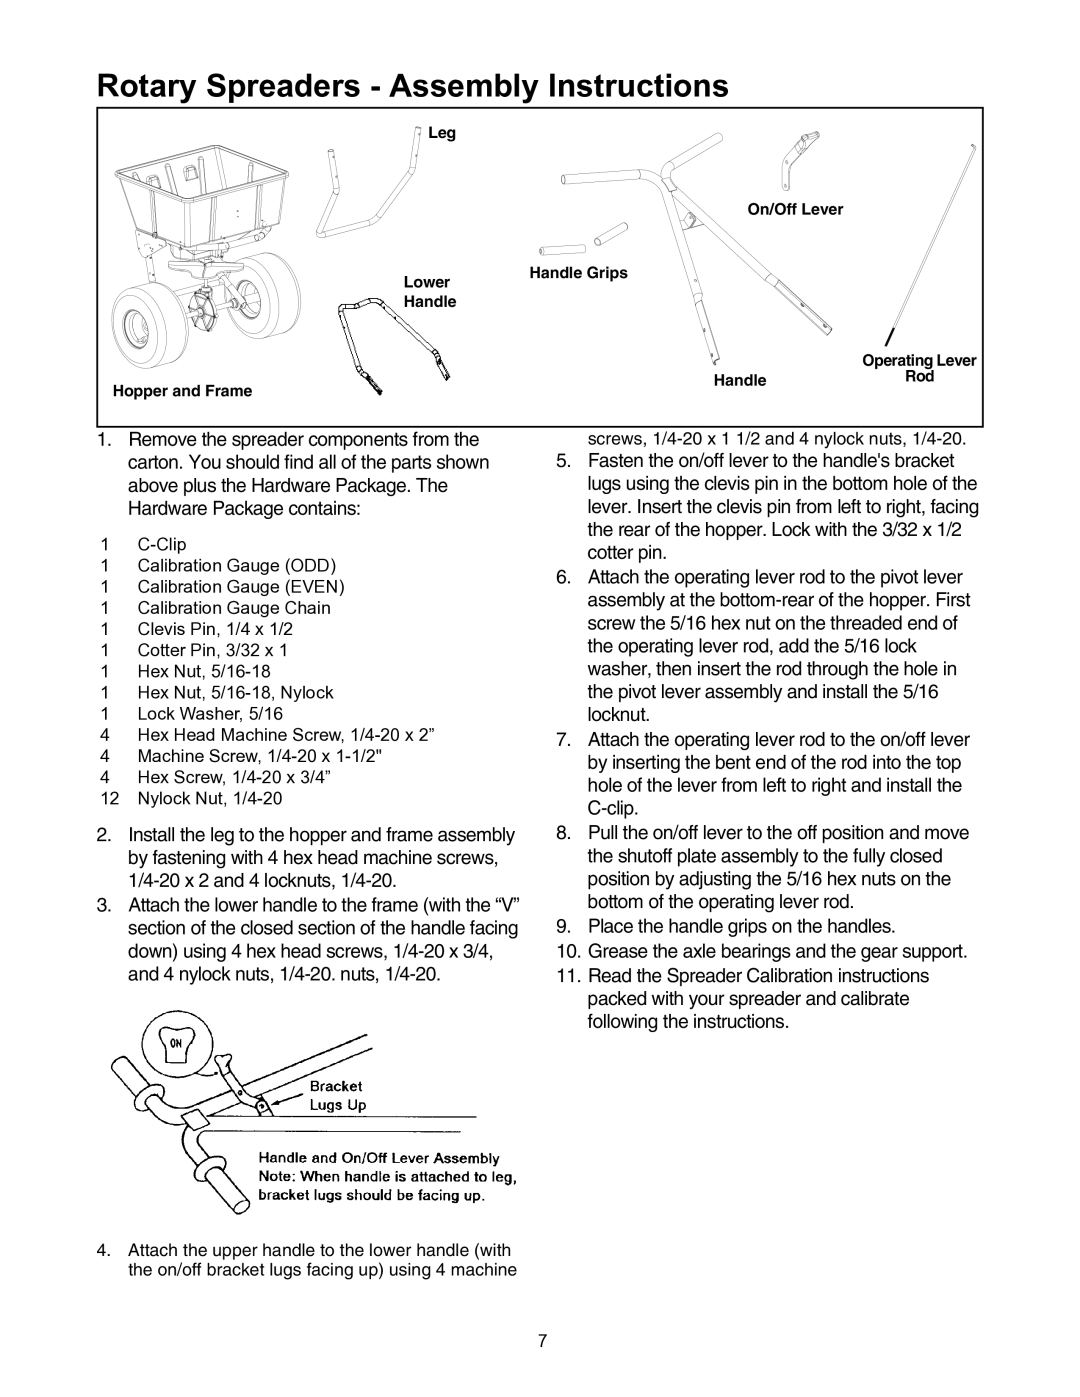
Leg |
|
|
| On/Off Lever |
|
Lower | Handle Grips |
|
|
| |
Handle |
|
|
|
| Operating Lever |
Hopper and Frame | Handle | Rod |
|
|
1.Remove the spreader components from the carton. You should find all of the parts shown above plus the Hardware Package. The Hardware Package contains:
1
1Calibration Gauge (ODD)
1Calibration Gauge (EVEN)
1Calibration Gauge Chain
1Clevis Pin, 1/4 x 1/2
1Cotter Pin, 3/32 x 1
1Hex Nut,
1Hex Nut,
1Lock Washer, 5/16
4Hex Head Machine Screw,
4Machine Screw,
4Hex Screw,
12Nylock Nut,
2.Install the leg to the hopper and frame assembly by fastening with 4 hex head machine screws,
3.Attach the lower handle to the frame (with the “V” section of the closed section of the handle facing down) using 4 hex head screws,
screws,
5.Fasten the on/off lever to the handle's bracket lugs using the clevis pin in the bottom hole of the lever. Insert the clevis pin from left to right, facing the rear of the hopper. Lock with the 3/32 x 1/2 cotter pin.
6.Attach the operating lever rod to the pivot lever assembly at the
7.Attach the operating lever rod to the on/off lever by inserting the bent end of the rod into the top hole of the lever from left to right and install the
8.Pull the on/off lever to the off position and move the shutoff plate assembly to the fully closed position by adjusting the 5/16 hex nuts on the bottom of the operating lever rod.
9.Place the handle grips on the handles.
10.Grease the axle bearings and the gear support.
11.Read the Spreader Calibration instructions packed with your spreader and calibrate following the instructions.
4.Attach the upper handle to the lower handle (with the on/off bracket lugs facing up) using 4 machine
7