
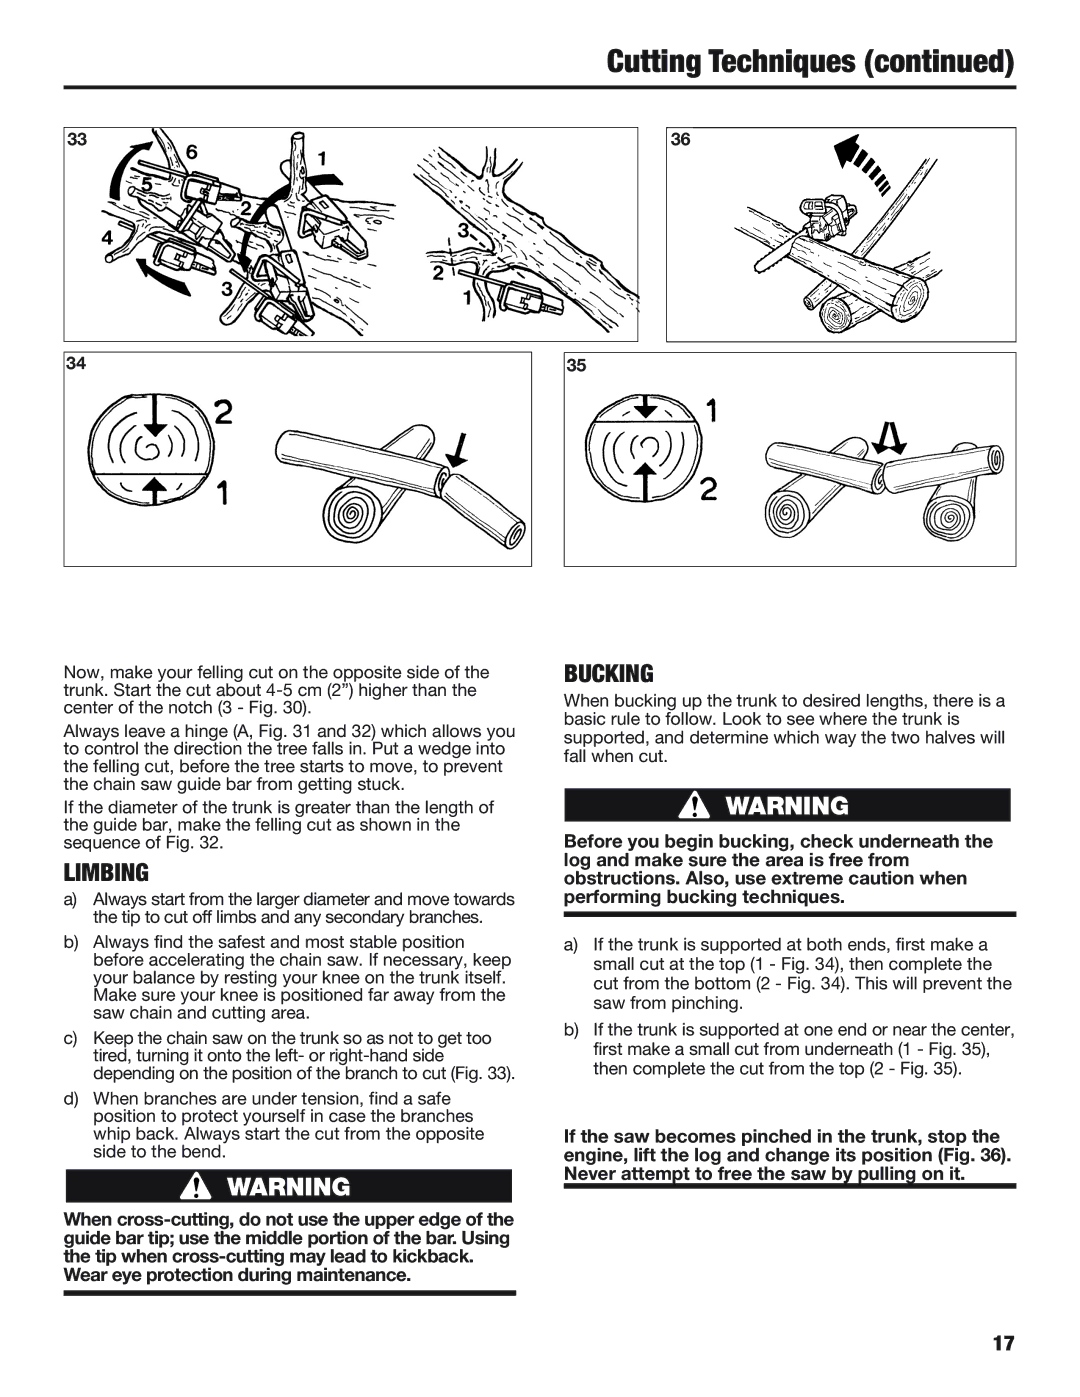
CS5720 specifications
The Cub Cadet CS5720 is an exceptionally engineered garden tractor designed to meet the needs of both professional landscapers and avid homeowners. This model exemplifies the brand's commitment to quality, performance, and comfort, offering a comprehensive solution for various landscaping tasks.One of the standout features of the CS5720 is its powerful engine. Equipped with a robust 24 horsepower Kohler engine, this tractor delivers reliable performance whether you're mowing your lawn or tackling heavy-duty yard work. The engine is designed for efficiency, providing ample power while minimizing fuel consumption, which is crucial for prolonged use.
Another key characteristic of the Cub Cadet CS5720 is its innovative cutting deck. The tractor features a 50-inch twin-blade cutting system that ensures a clean, precise cut. The enhanced design allows for better grass dispersion, providing a professional-looking finish that homeowners desire. Additionally, the deck's height adjustment system allows users to customize the cutting height quickly and easily, accommodating various grass types and lawn conditions.
Comfort is also a priority with the CS5720. The tractor boasts an ergonomic design, including a high-back seat and easy-access controls, ensuring a comfortable riding experience during long hours of yard work. The inclusion of large, all-terrain tires offers excellent traction and stability, making it easier to maneuver across uneven surfaces or challenging terrains.
Moreover, the CS5720 is equipped with advanced technology features. The ITC (Intelligent Traction Control) system enhances the tractor's handling and versatility, allowing it to adapt to different mowing conditions effortlessly. The integrated LED headlights ensure visibility during dawn or dusk, while a sturdy front grille adds durability and protection to vital components.
For added convenience, the CS5720 features a hydrostatic transmission, allowing for smooth and effortless gear changes without the need for manual shifting. This feature significantly enhances the overall user experience, making it perfect for those who want to focus on their landscaping tasks rather than wrestling with complex gear systems.
In summary, the Cub Cadet CS5720 combines power, precision, and comfort, making it an excellent choice for those looking to maintain their lawns effectively. With its durable construction, innovative features, and cutting-edge technology, this garden tractor is poised to tackle any landscaping challenge with ease. Whether you're a professional or a homeowner, the CS5720 is designed to deliver exceptional results and satisfaction.