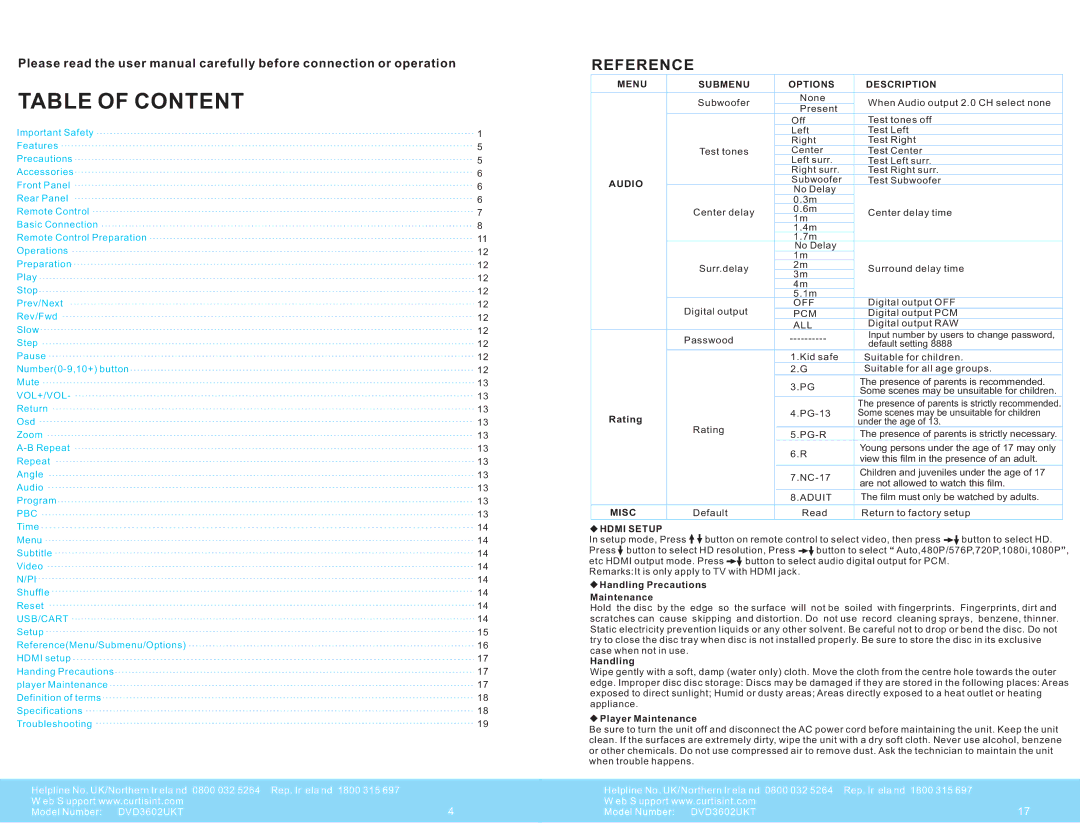
Please read the user manual carefully before connection or operation
TABLE OF CONTENT
Important Safety Features Precautions Accessories Front Panel Rear Panel Remote Control Basic Connection
Remote Control Preparation Operations
Preparation Play
Stop Prev/Next Rev/Fwd Slow Step Pause
VOL+/VOL- Return Osd Zoom
PBC
Time
Menu Subtitle Video N/Pl Shuffle Reset
USB/CART Setup Reference(Menu/Submenu/Options) HDMI setup
Handing Precautions player Maintenance Definition of terms Specifications Troubleshooting
1
5
5
6
6
6
7
8
11
12
12
12
12
12
12
12
12
12
12
13
13
13
13
13
13
13
13
13
13
13
14
14
14
14
14
14
14
14
15
16
17
17
17
18
18
19
REFERENCE
|
|
| DESCRIPTION |
|
|
|
|
| Subwoofer |
| When Audio output 2.0 CH select none |
|
| ||
|
|
|
|
|
|
| Test tones off |
|
|
| Test Left |
|
|
| Test Right |
| Test tones |
| Test Center |
|
|
| Test Left surr. |
|
| . | Test Right surr. |
AUDIO |
|
| Test Subwoofer |
| No Delay |
| |
|
|
| |
|
| 0.3m |
|
| Center delay | 0.6m | Center delay time |
| 1m | ||
|
|
| |
|
| 1.4m |
|
|
| 1.7m |
|
|
| No Delay |
|
| Surr.delay |
| Surround delay time |
|
| ||
|
| ||
|
|
|
|
|
|
|
|
|
|
|
|
|
|
| Digital output OFF |
| Digital output |
| Digital output PCM |
|
|
| Digital output RAW |
| Passwood | Input number by users to change password, | |
| default setting 8888 | ||
|
|
| |
|
|
| Suitable for children. |
|
| 2.G | Suitable for all age groups. |
|
| 3.PG | The presence of parents is recommended. |
|
| Some scenes may be unsuitable for children. | |
|
|
| |
|
|
| The presence of parents is strictly recommended. |
Rating |
| Some scenes may be unsuitable for children | |
Rating |
| under the age of 13. | |
|
| The presence of parents is strictly necessary. | |
|
| ||
|
| 6.R | Young persons under the age of 17 may only |
|
| view this film in the presence of an adult. | |
|
|
| |
|
| Children and juveniles under the age of 17 | |
|
| are not allowed to watch this film. | |
|
|
| |
|
| 8.ADUIT | The film must only be watched by adults. |
|
|
|
|
MISC | Default | Read | Return to factory setup |
 HDMI SETUP
In setup mode, Press ![]()
![]() button on remote control to select video, then press
button on remote control to select video, then press ![]()
![]() button to select HD.
button to select HD.
Press ![]() button to select HD resolution, Press
button to select HD resolution, Press ![]()
![]() button to select “ Auto,480P/576P,720P,1080i,1080P”,
button to select “ Auto,480P/576P,720P,1080i,1080P”,
etc HDMI output mode. Press ![]()
![]() button to select audio digital output for PCM. Remarks:It is only apply to TV with HDMI jack.
button to select audio digital output for PCM. Remarks:It is only apply to TV with HDMI jack.
 Handling Precautions
Maintenance
Hold the disc by the edge so the surface will not be soiled with fingerprints. Fingerprints, dirt and scratches can cause skipping and distortion. Do not use record cleaning sprays, benzene, thinner. Static electricity prevention liquids or any other solvent. Be careful not to drop or bend the disc. Do not try to close the disc tray when disc is not installed properly. Be sure to store the disc in its exclusive case when not in use.
Handling
Wipe gently with a soft, damp (water only) cloth. Move the cloth from the centre hole towards the outer edge. lmproper disc disc storage: Discs may be damaged if they are stored in the following places: Areas exposed to direct sunlight; Humid or dusty areas; Areas directly exposed to a heat outlet or heating appliance.
 Player Maintenance
Be sure to turn the unit off and disconnect the AC power cord before maintaining the unit. Keep the unit clean. If the surfaces are extremely dirty, wipe the unit with a dry soft cloth. Never use alcohol, benzene or other chemicals. Do not use compressed air to remove dust. Ask the technician to maintain the unit when trouble happens.
Helpline No . UK/Northern lr ela nd 0800 032 5264 Rep. lr ela nd 1800 315 697 |
| Helpline No . UK/Northern lr ela nd 0800 032 5264 | Rep. lr ela nd 1800 315 697 |
W eb S upport www.curtisint.com |
| W eb S upport www.curtisint.com |
|
Model Number: DVD3602UKT | 4 | Model Number: DVD3602UKT | 17 |
|
|
|
|
