http://www.cartft.com, Cool Embedded PCs
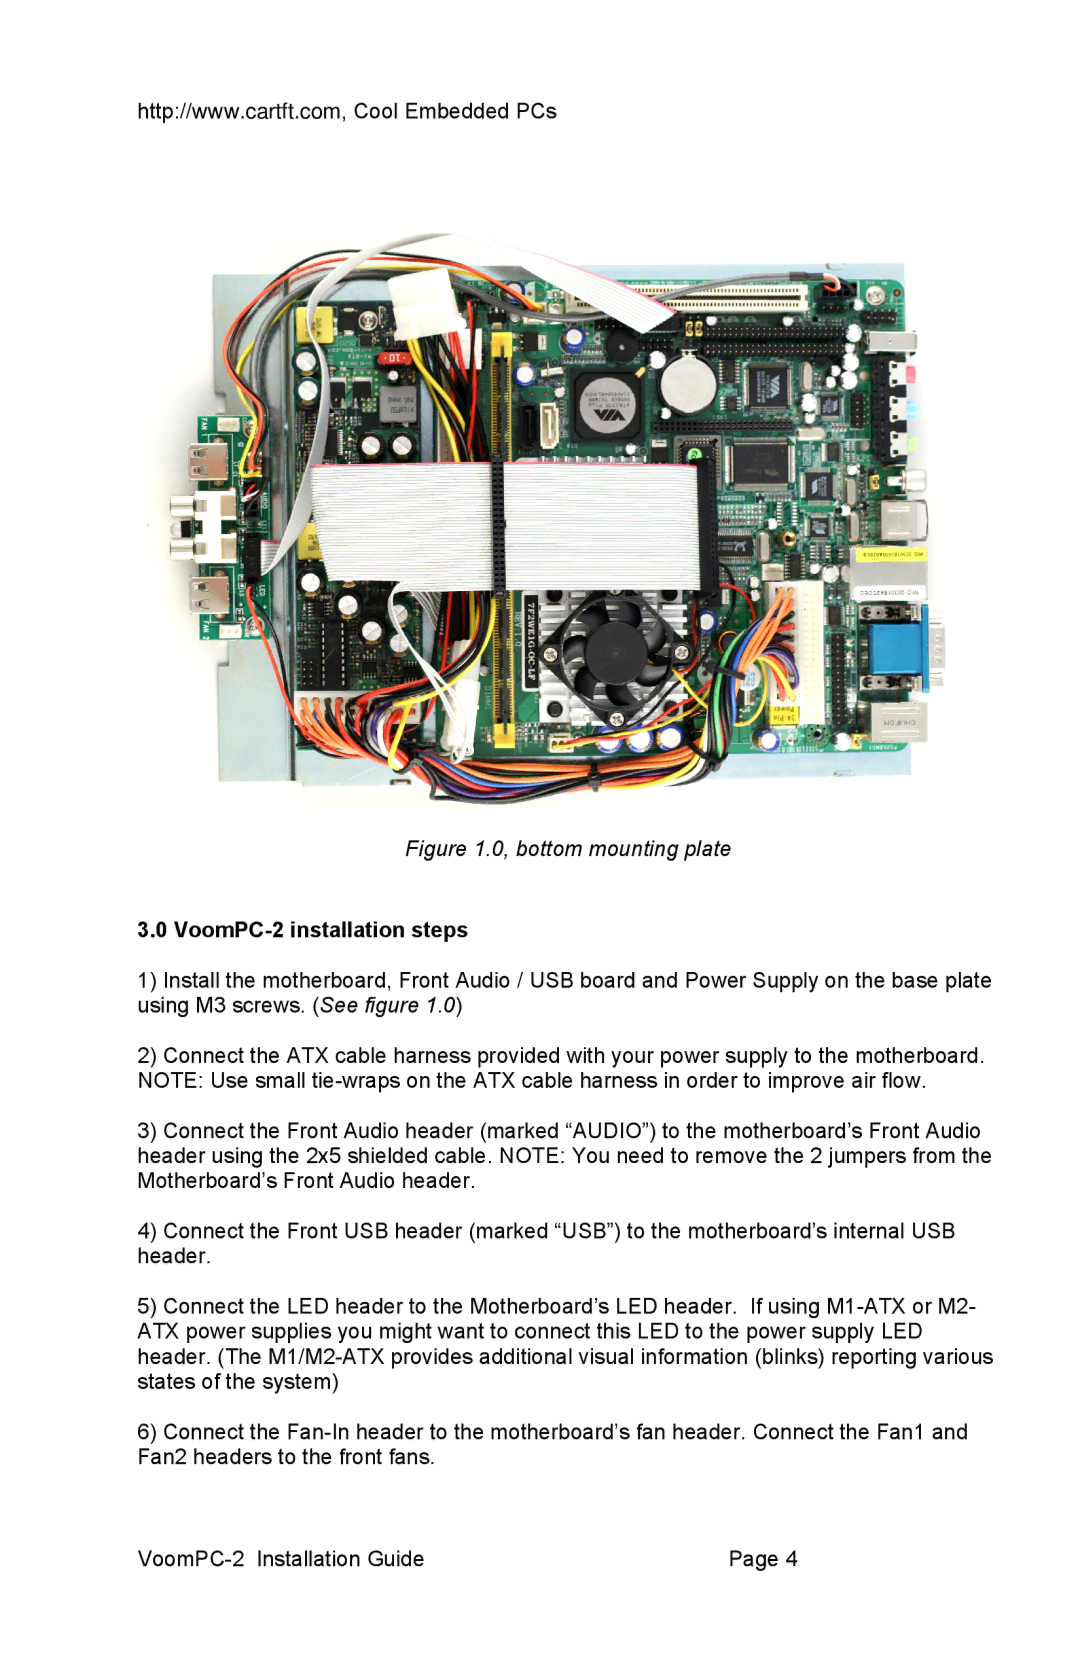
Figure 1.0, bottom mounting plate
3.0 VoomPC-2 installation steps
1)Install the motherboard, Front Audio / USB board and Power Supply on the base plate using M3 screws. (See figure 1.0)
2)Connect the ATX cable harness provided with your power supply to the motherboard. NOTE: Use small
3)Connect the Front Audio header (marked “AUDIO”) to the motherboard’s Front Audio header using the 2x5 shielded cable. NOTE: You need to remove the 2 jumpers from the Motherboard’s Front Audio header.
4)Connect the Front USB header (marked “USB”) to the motherboard’s internal USB header.
5)Connect the LED header to the Motherboard’s LED header. If using
6)Connect the
| Page 4 |