Hardware Overview
Rear Panel
1
|
|
|
|
| WPS |
|
|
| 12V |
| 2A | ETHERNET |
| LINE/VIDEO | MIC | RESET |
|
|
|
| |||||
|
|
|
|
|
|
|
|
|
|
|
|
|
| ||||||||||||
|
|
|
|
|
|
|
|
|
|
|
|
|
|
|
| OUT |
|
|
|
| |||||
|
|
|
|
|
|
|
|
|
|
|
|
|
|
|
|
|
|
|
|
|
|
|
| ||
|
|
|
|
|
|
|
|
|
|
|
|
|
|
|
|
|
|
|
|
|
|
|
|
| |
|
|
|
|
|
|
|
|
|
| 5 |
|
|
|
|
|
|
|
|
| ||||||
| 9 | 2 | 3 |
| 4 | 6 | 7 | 8 | 9 |
|
| ||||||||||||||
|
|
|
|
|
|
|
|
|
|
|
|
|
|
|
|
| |||||||||
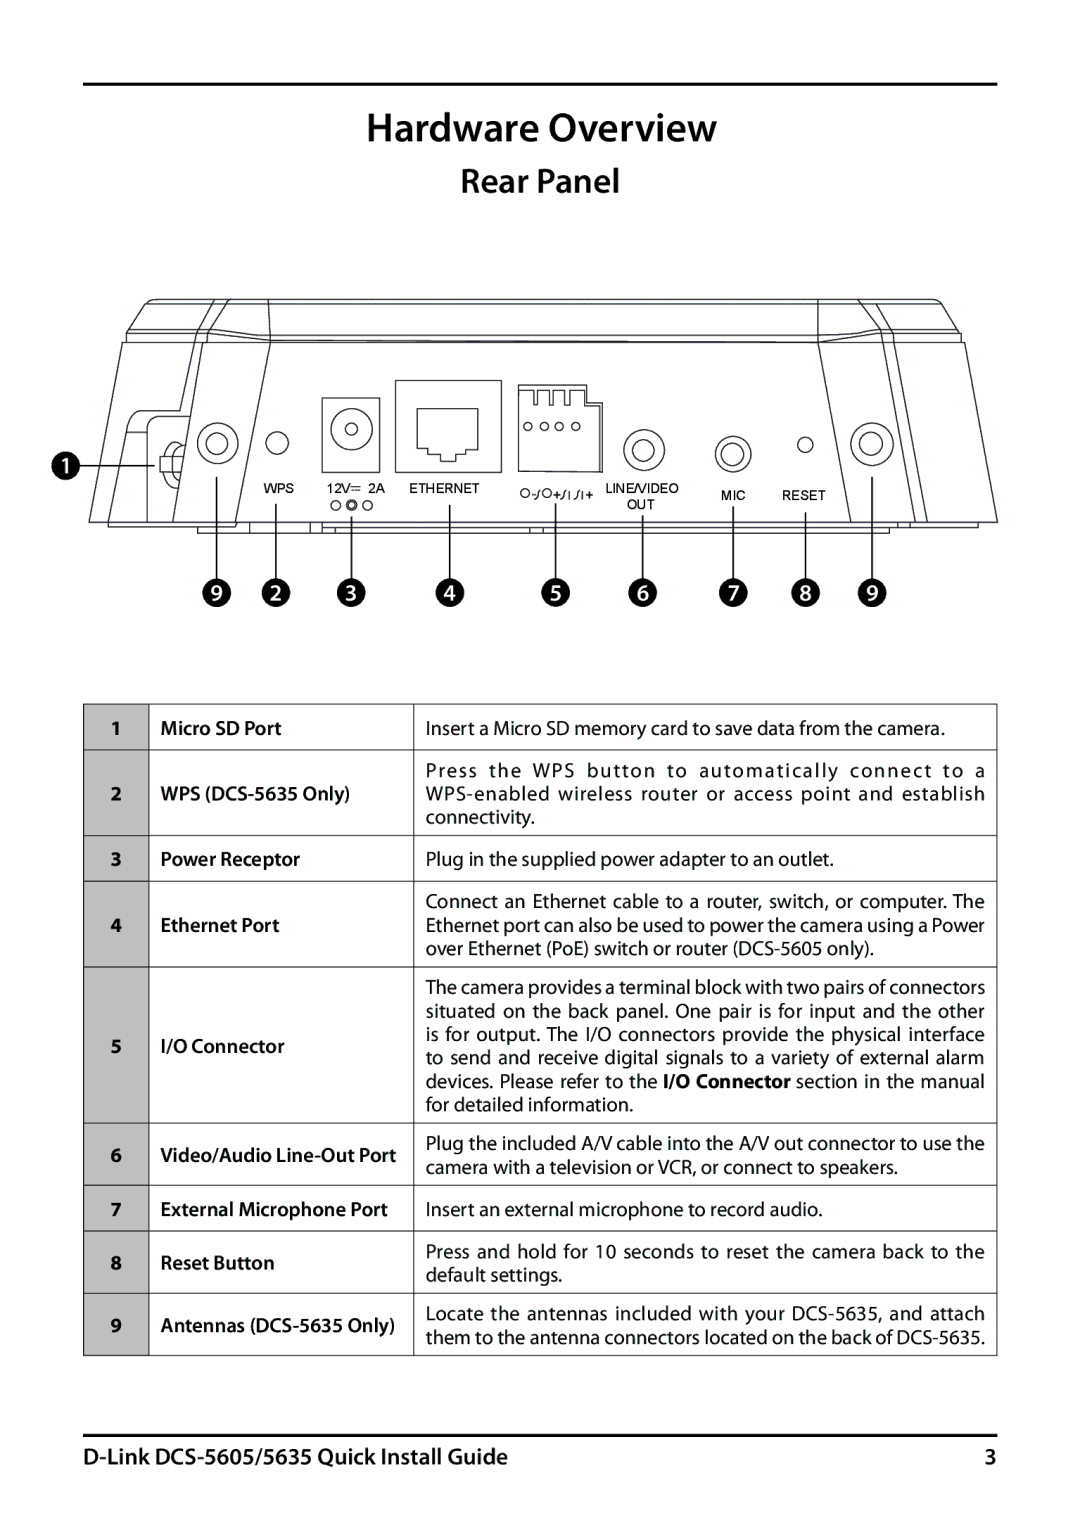
1 | Micro SD Port |
|
|
|
|
|
| Insert a Micro SD memory card to save data from the camera. | |||||||||||||||||
|
|
|
|
|
|
|
|
|
|
|
|
|
|
|
|
|
|
|
| ||||||
2 | WPS | Press the WPS button to automatically connect to a | |||||||||||||||||||||||
|
|
|
|
|
|
|
|
|
|
|
|
| connectivity. |
|
|
|
|
|
|
|
|
|
| ||
|
|
|
|
|
|
|
|
|
|
|
|
|
|
|
|
|
|
|
| ||||||
3 | Power Receptor |
|
|
|
|
|
| Plug in the supplied power adapter to an outlet. |
|
|
|
| |||||||||||||
|
|
|
|
|
|
|
|
|
|
|
|
|
|
|
|
|
|
|
| ||||||
4 | Ethernet Port |
|
|
|
|
|
| Connect an Ethernet cable to a router, switch, or computer. The | |||||||||||||||||
|
|
|
|
|
| Ethernet port can also be used to power the camera using a Power | |||||||||||||||||||
|
|
|
|
|
|
|
|
|
|
|
|
| over Ethernet (PoE) switch or router | ||||||||||||
|
|
|
|
|
|
|
|
|
|
|
|
|
|
|
|
|
|
|
| ||||||
|
|
|
|
|
|
|
|
|
|
|
|
| The camera provides a terminal block with two pairs of connectors | ||||||||||||
|
|
|
|
|
|
|
|
|
|
|
|
| situated on the back panel. One pair is for input and the other | ||||||||||||
5 | I/O Connector |
|
|
|
|
|
| is for output. The I/O connectors provide the physical interface | |||||||||||||||||
|
|
|
|
|
| to send and receive digital signals to a variety of external alarm | |||||||||||||||||||
|
|
|
|
|
|
|
|
|
|
|
|
| |||||||||||||
|
|
|
|
|
|
|
|
|
|
|
|
| devices. Please refer to the I/O Connector section in the manual | ||||||||||||
|
|
|
|
|
|
|
|
|
|
|
|
| for detailed information. |
|
|
|
|
|
|
|
| ||||
|
|
|
|
|
|
|
|
|
|
|
|
|
|
|
|
|
|
|
| ||||||
6 | Video/Audio | Plug the included A/V cable into the A/V out connector to use the | |||||||||||||||||||||||
camera with a television or VCR, or connect to speakers. | |||||||||||||||||||||||||
|
|
|
|
|
|
|
|
|
|
|
|
| |||||||||||||
7External Microphone Port Insert an external microphone to record audio.
8 | Reset Button | Press and hold for 10 seconds to reset the camera back to the | |
default settings. | |||
|
| ||
|
|
| |
9 | Antennas | Locate the antennas included with your | |
them to the antenna connectors located on the back of | |||
|
|
3 |