Figure 24. Add SNMP Community group
Delete Group: To delete previously defined SNMP Community group, press “Delete Group” button, the Delete SNMP Community configuration window will pop out; checked the delete dialog box. Press “Apply” to delete the selected SNMP Community Group.
Figure 25. Delete SNMP Community group
Modify Group: To modify previously defined SNMP Community group, click on the ID parameter to enter to the selected SNMP Community Group to configure its community name and community enable. Press “Apply” to save change of the SNMP Community Group.
Figure 196. Modify SNMP Community group
Configure SNMP Trap:
Figure 27. Configure SNMP Trap Setting
Trap authentication fail: When checked the dialog box of the Trap authentication fail, when fail to authentication, the Switch will trap the authentication fail even to the SNMP host.
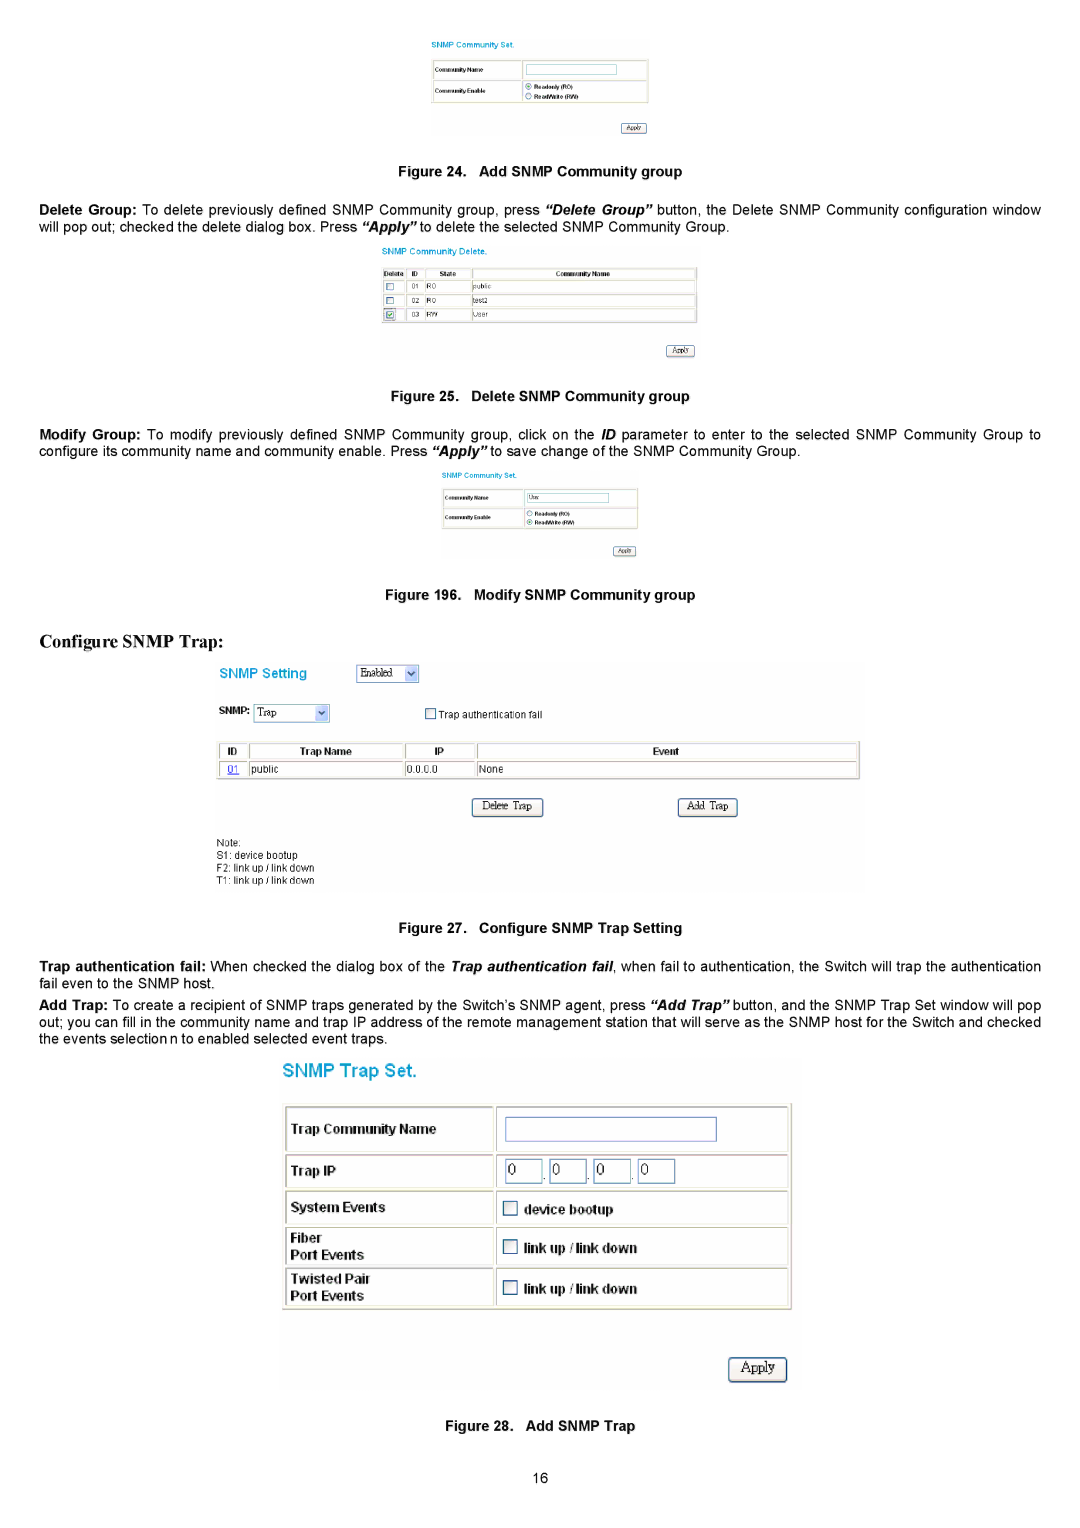
Add Trap: To create a recipient of SNMP traps generated by the Switch’s SNMP agent, press “Add Trap” button, and the SNMP Trap Set window will pop out; you can fill in the community name and trap IP address of the remote management station that will serve as the SNMP host for the Switch and checked the events selection n to enabled selected event traps.
Figure 28. Add SNMP Trap
16