Getting Started With PhotoImpression 3.0
1.Click Start.
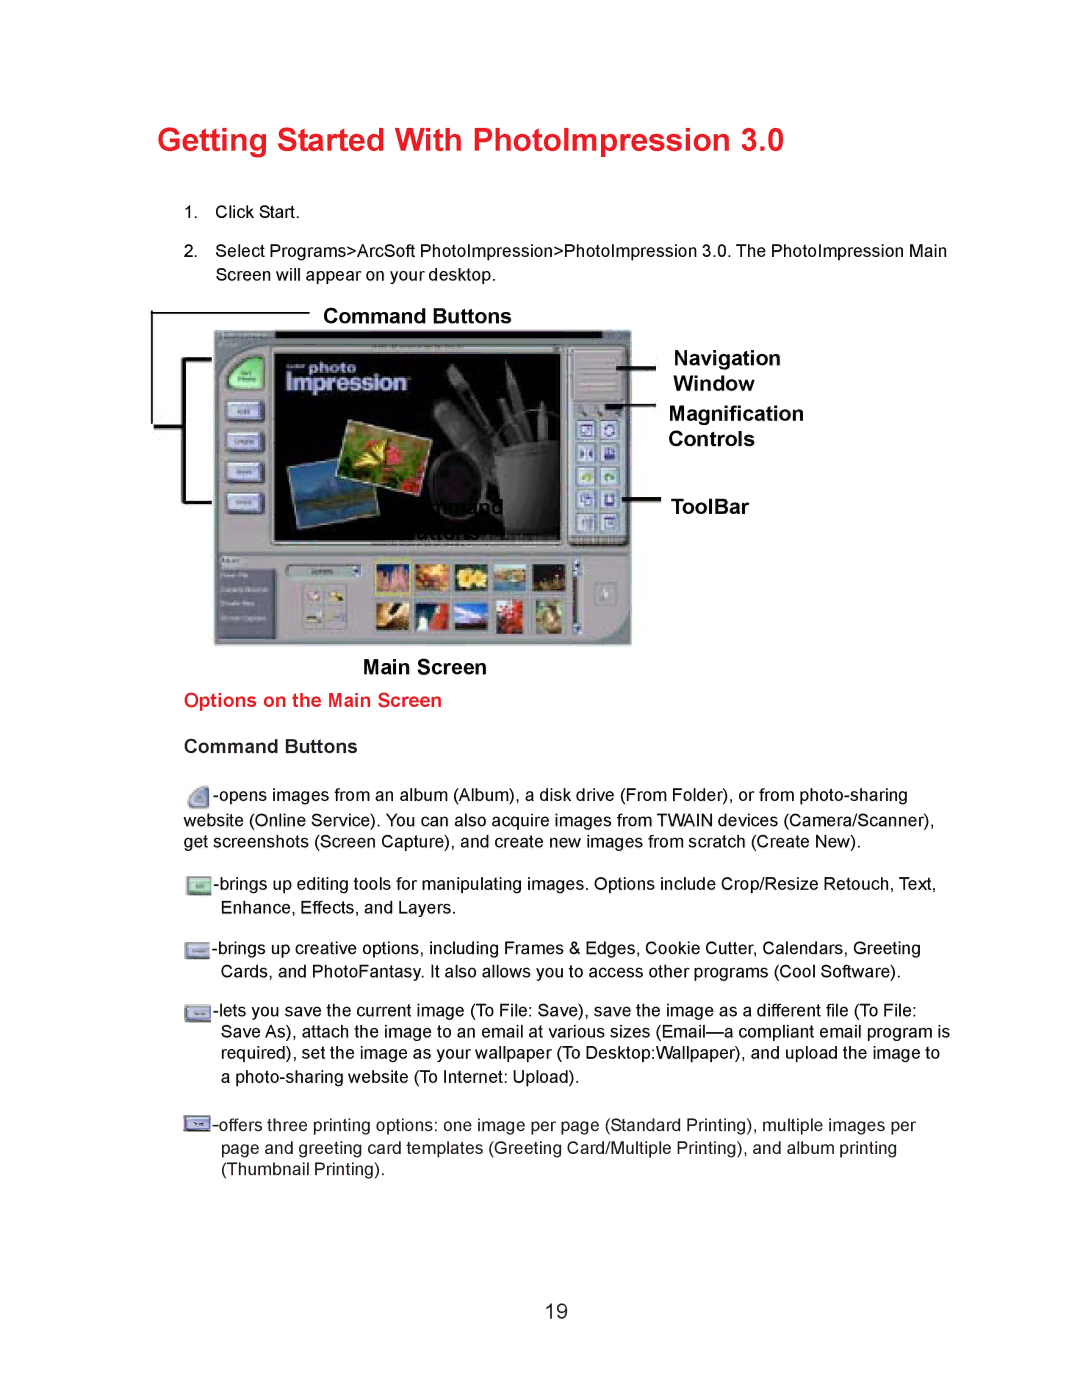
2.Select Programs>ArcSoft PhotoImpression>PhotoImpression 3.0. The PhotoImpression Main Screen will appear on your desktop.
Command Buttons
Navigation
Window
Magnification
Controls
CommandToolBar
Buttons
Main Screen
Options on the Main Screen
Command Buttons
 -opens images from an album (Album), a disk drive (From Folder), or from photo-sharing
website (Online Service). You can also acquire images from TWAIN devices (Camera/Scanner), get screenshots (Screen Capture), and create new images from scratch (Create New).
 -brings up editing tools for manipulating images. Options include Crop/Resize Retouch, Text, Enhance, Effects, and Layers.
 -brings up creative options, including Frames & Edges, Cookie Cutter, Calendars, Greeting Cards, and PhotoFantasy. It also allows you to access other programs (Cool Software).
 -lets you save the current image (To File: Save), save the image as a different file (To File: Save As), attach the image to an email at various sizes (Email—a compliant email program is required), set the image as your wallpaper (To Desktop:Wallpaper), and upload the image to
a photo-sharing website (To Internet: Upload).
 -offers three printing options: one image per page (Standard Printing), multiple images per page and greeting card templates (Greeting Card/Multiple Printing), and album printing (Thumbnail Printing).