Installation Instructions
5.Using a cordless drill, drill a ¼” (6.35 mm) hole in the cold water pipe you have selected.
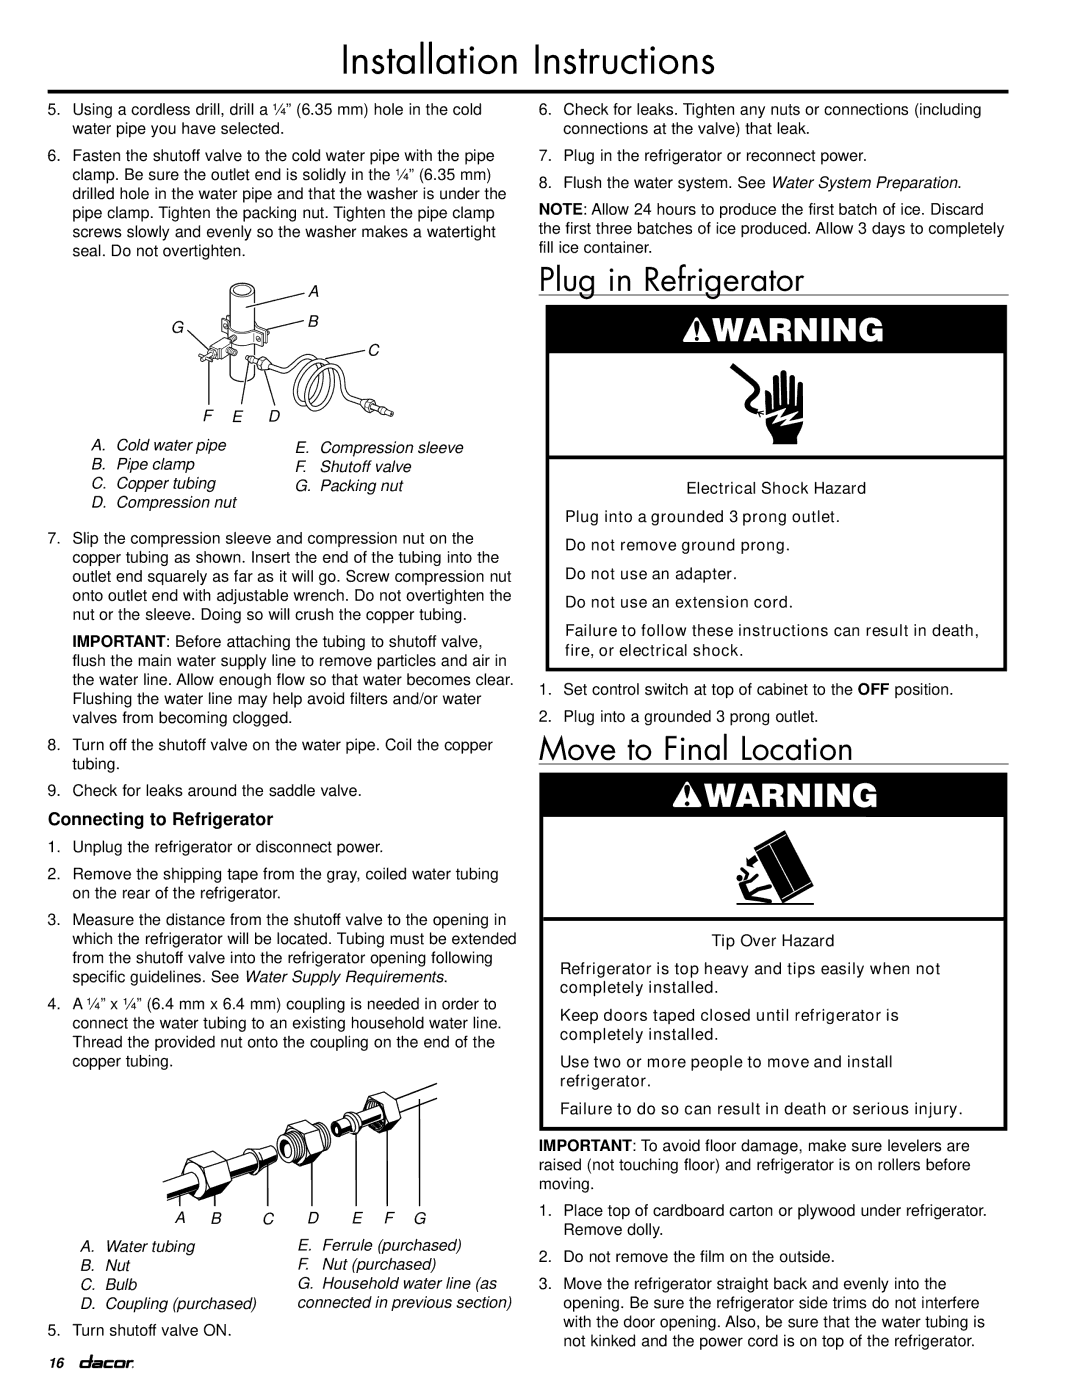
6.Fasten the shutoff valve to the cold water pipe with the pipe clamp. Be sure the outlet end is solidly in the ¼” (6.35 mm) drilled hole in the water pipe and that the washer is under the pipe clamp. Tighten the packing nut. Tighten the pipe clamp screws slowly and evenly so the washer makes a watertight seal. Do not overtighten.
| A |
G | B |
| |
| C |
F E | D |
|
A. Cold water pipe | E. Compression sleeve | |
B. Pipe clamp | F. | Shutoff valve |
C. Copper tubing | G. | Packing nut |
D.Compression nut
7.Slip the compression sleeve and compression nut on the copper tubing as shown. Insert the end of the tubing into the outlet end squarely as far as it will go. Screw compression nut onto outlet end with adjustable wrench. Do not overtighten the nut or the sleeve. Doing so will crush the copper tubing.
IMPORTANT: Before attaching the tubing to shutoff valve, flush the main water supply line to remove particles and air in the water line. Allow enough flow so that water becomes clear. Flushing the water line may help avoid filters and/or water valves from becoming clogged.
8.Turn off the shutoff valve on the water pipe. Coil the copper tubing.
9.Check for leaks around the saddle valve.
Connecting to Refrigerator
1.Unplug the refrigerator or disconnect power.
2.Remove the shipping tape from the gray, coiled water tubing on the rear of the refrigerator.
3.Measure the distance from the shutoff valve to the opening in which the refrigerator will be located. Tubing must be extended from the shutoff valve into the refrigerator opening following specific guidelines. See Water Supply Requirements.
4.A ¼” x ¼” (6.4 mm x 6.4 mm) coupling is needed in order to connect the water tubing to an existing household water line. Thread the provided nut onto the coupling on the end of the copper tubing.
A B | C | D | E F G |
A. Water tubing |
| E. | Ferrule (purchased) |
B. Nut |
| F. | Nut (purchased) |
C. Bulb |
| G. Household water line (as | |
D. Coupling (purchased) |
| connected in previous section) | |
5. Turn shutoff valve ON.
6.Check for leaks. Tighten any nuts or connections (including connections at the valve) that leak.
7.Plug in the refrigerator or reconnect power.
8.Flush the water system. See Water System Preparation.
NOTE: Allow 24 hours to produce the first batch of ice. Discard the first three batches of ice produced. Allow 3 days to completely fill ice container.
Plug in Refrigerator
![]() WARNING
WARNING
Electrical Shock Hazard
Plug into a grounded 3 prong outlet. Do not remove ground prong.
Do not use an adapter.
Do not use an extension cord.
Failure to follow these instructions can result in death, fire, or electrical shock.
1.Set control switch at top of cabinet to the OFF position.
2.Plug into a grounded 3 prong outlet.
Move to Final Location
![]() WARNING
WARNING
Tip Over Hazard
Refrigerator is top heavy and tips easily when not completely installed.
Keep doors taped closed until refrigerator is completely installed.
Use two or more people to move and install refrigerator.
Failure to do so can result in death or serious injury.
IMPORTANT: To avoid floor damage, make sure levelers are raised (not touching floor) and refrigerator is on rollers before moving.
1.Place top of cardboard carton or plywood under refrigerator. Remove dolly.
2.Do not remove the film on the outside.
3.Move the refrigerator straight back and evenly into the opening. Be sure the refrigerator side trims do not interfere with the door opening. Also, be sure that the water tubing is not kinked and the power cord is on top of the refrigerator.
16