Step 2: Hook the two mounting tabs over the center horizontal bar.
Removing and Installing the Convection Fan Filter
Step 2

 Oven Exhaust Cover
(On Selected Models Only)
Cleaning is best accomplished with a soft cloth or sponge dampened in a solution of warm water and hand dishwashing liquid

 Knobs and Spill Protector Rings
The control knobs provided with these ranges are designed for ease of use and longevity. The “D” shaped design of the knob shaft ensures proper orientation when
![]() WARNING:
WARNING:
Never block the holes in the control panel below the knobs. This will impair the flow of combustion air and adversely affects burner operation, possibly creating a hazardous condition.
The knobs should be washed regularly in warm, soapy water. Hand dishwashing liquid is excellent for this task. Knobs should be removed by gently pulling them straight off of the valve shafts. The spill protector rings should be cleaned in place. Use caution to avoid introduction of moisture into the control panel. To replace knobs, align the
![]() IMPORTANT:
IMPORTANT:
1.Turn the knobs to the “OFF” position prior to removing them from the valve stems.
2.The cooktop should never be operated without the knobs and spill protector rings in place.
3.Do not soak the knobs and spill protector rings in water or place them in the dishwasher.
4.Do not expose the knobs or spill protector rings to direct flame, hot utensils, or other sources of heat.
5.Do not use abrasive or corrosive cleaners or applicators. They could cause permanent damage.

 Burner Bases
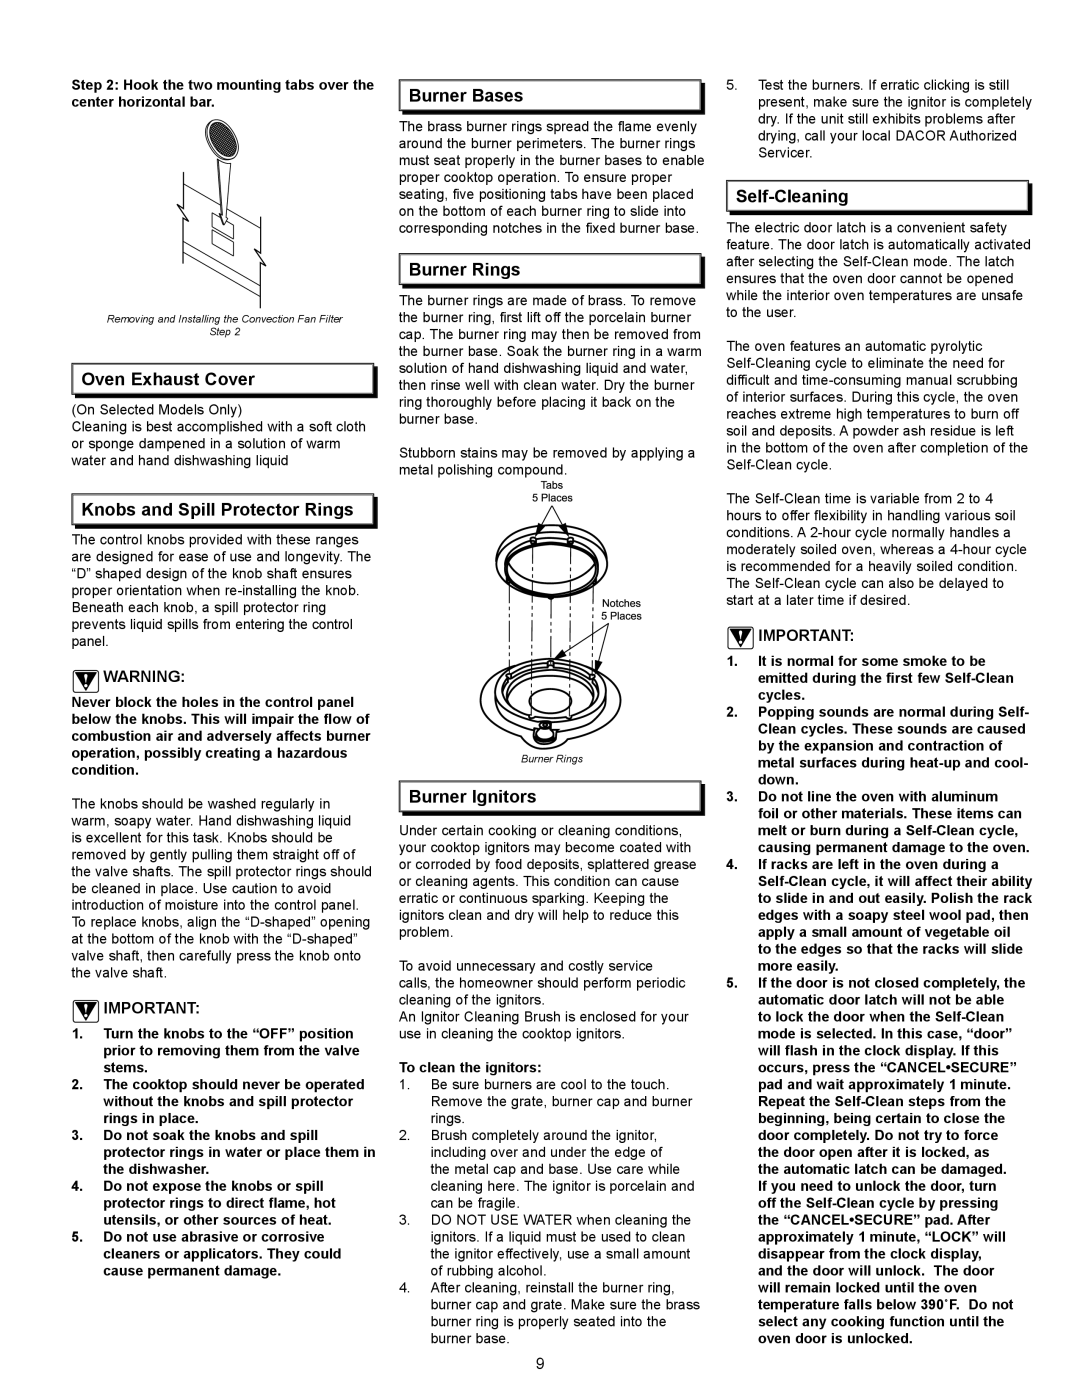
The brass burner rings spread the flame evenly around the burner perimeters. The burner rings must seat properly in the burner bases to enable proper cooktop operation. To ensure proper seating, five positioning tabs have been placed on the bottom of each burner ring to slide into corresponding notches in the fixed burner base.

 Burner Rings
The burner rings are made of brass. To remove the burner ring, first lift off the porcelain burner cap. The burner ring may then be removed from the burner base. Soak the burner ring in a warm solution of hand dishwashing liquid and water, then rinse well with clean water. Dry the burner ring thoroughly before placing it back on the burner base.
Stubborn stains may be removed by applying a metal polishing compound.
Burner Rings

 Burner Ignitors
Under certain cooking or cleaning conditions, your cooktop ignitors may become coated with or corroded by food deposits, splattered grease or cleaning agents. This condition can cause erratic or continuous sparking. Keeping the ignitors clean and dry will help to reduce this problem.
To avoid unnecessary and costly service calls, the homeowner should perform periodic cleaning of the ignitors.
An Ignitor Cleaning Brush is enclosed for your use in cleaning the cooktop ignitors.
To clean the ignitors:
1.Be sure burners are cool to the touch. Remove the grate, burner cap and burner rings.
2.Brush completely around the ignitor, including over and under the edge of the metal cap and base. Use care while cleaning here. The ignitor is porcelain and can be fragile.
3.DO NOT USE WATER when cleaning the ignitors. If a liquid must be used to clean the ignitor effectively, use a small amount of rubbing alcohol.
4.After cleaning, reinstall the burner ring, burner cap and grate. Make sure the brass burner ring is properly seated into the burner base.
5.Test the burners. If erratic clicking is still present, make sure the ignitor is completely dry. If the unit still exhibits problems after drying, call your local DACOR Authorized Servicer.


Self-Cleaning
The electric door latch is a convenient safety feature. The door latch is automatically activated after selecting the
The oven features an automatic pyrolytic
The
![]() IMPORTANT:
IMPORTANT:
1.It is normal for some smoke to be emitted during the first few
2.Popping sounds are normal during Self- Clean cycles. These sounds are caused by the expansion and contraction of metal surfaces during
3.Do not line the oven with aluminum foil or other materials. These items can melt or burn during a
4.If racks are left in the oven during a
5.If the door is not closed completely, the automatic door latch will not be able to lock the door when the
If you need to unlock the door, turn off the
9