5.The oven can be set to start now or later in the day. To start cooking now, do not perform any more programming steps. After six seconds “PRE”, “ON” and “TIMED” will appear in the clock display, and the oven will begin heating. After the “COOK TIME” has expired, the clock will beep three times, and “Hold” will be displayed. The cooling fan will continue to run, depending upon the length and temperature of the cooking process.
6.Press the “STOP TIME” touch pad, and “STOP” will appear in the clock display. Press the “TIME•TEMP” “+” pad to enter the time of day that you wish the oven to shut off. “DELAY” will now be displayed.
The oven will calculate the correct “START TIME.” After the “COOK TIME” has expired, the clock will beep three times, and “Hold” will be displayed. If cooking in a convection mode, the convection fan will also turn
off at this time. While in “Hold” mode, the oven temperature will be maintained at 150˚F for a period of two hours. “Hold” mode can be cancelled by pressing the “CANCEL•SECURE” touch pad. The cooling fan will continue to run depending upon the length and temperature of the cooking process.
DELAY TIMED COOKING TIPS
1.Do not use foods containing baking powder or yeast in Delay Timed Cooking. These foods will not rise properly.
2.Remember that “COOK TIME” refers to the length of the cooking cycle. It does not refer to the start time!
3.The time required to preheat the oven must be included in the “COOK TIME.” Thus, the “COOK TIME” should be increased by about 8 to 12 minutes depending upon the temperature setting. The broiler does not come on to preheat in the Delay Mode, so you will not
![]() NOTE:
NOTE:
The gas broilers are not activated for Pre- heat in the

 Dehydrating/Defrosting
The range can be used to dehydrate or defrost foods at low heat settings in “Pure Convection™” mode.
Follow these steps to dehydrate or defrost foods:
1.Position oven rack(s) at the proper height(s).
2.Place the food onto the center of the oven rack. (For dehydrating, prepare food as recommended then place food onto a drying rack.)
3.Press the “PURE CONVECTION™” pad.
4.Set the temperature to 135˚F. This is the minimum temperature that can be set. (For dehydrating, a higher temperature setting may be required. Follow the recommended temperature for the type of food being prepared.)
5.It is recommended that the user set the Minute Timer(s) to time the process.

 Broiling
Broiling is a quick and flavorful way to prepare many foods, including steaks, chicken, chops, hamburgers and fish. Broiling in the oven is completed with the oven door completely shut. It is normal and necessary for some smoke to be present to give the food a broiled flavor. The broil temperature may be adjusted in 5˚F increments from 135˚F up to the maximum setting of “HI”. The “HI” setting is equivalent to
555˚F.
Follow these steps to operate the oven in Standard Broil (PGR model only) or Convection Broil (RSD and RSE Models) modes:
1.Close the door tightly.
2.Press the “BROIL” or “CONVECTION BROIL” pad.
3.Press the “TIME•TEMP” “+” or
4.If a temperature other than “HI” is desired, press the “TIME•TEMP”
5.It is recommended that the user set the Minute Timer(s) to time the broiling process.
6.When the Minute Timer expires and/or the food is cooked, press the “CANCEL•SECURE” touch pad to turn off the oven. The cooling fan will continue to run for 30 to 45 minutes depending upon the length and temperature of the broiling process.
![]() NOTE:
NOTE:
For broiling and top grill tips refer to your Dacor cookbook. Your complimentary cookbook was packed with your range. If you did not receive your cookbook, please contact Dacor at (800)

 Burner Controls (MRE Only)
To turn the element on, tap the “ON/OFF” key then glide your finger across the settings below the numbers which correspond to the element power. At any time while the element is on, you may glide your finger up or down the scale to adjust its heat.
The dual element, located in the front left burner, can be activated after the “ON/OFF” key has been pressed. At any time during the cooking process, the small dual element indicator can be tapped to turn the element on or off. It will illuminate when the outer ring is activated.
To turn an element off, tap the Cancel/ Secure key. You may turn off all active elements at the same time by tapping twice on the Dacor logo below the controls.
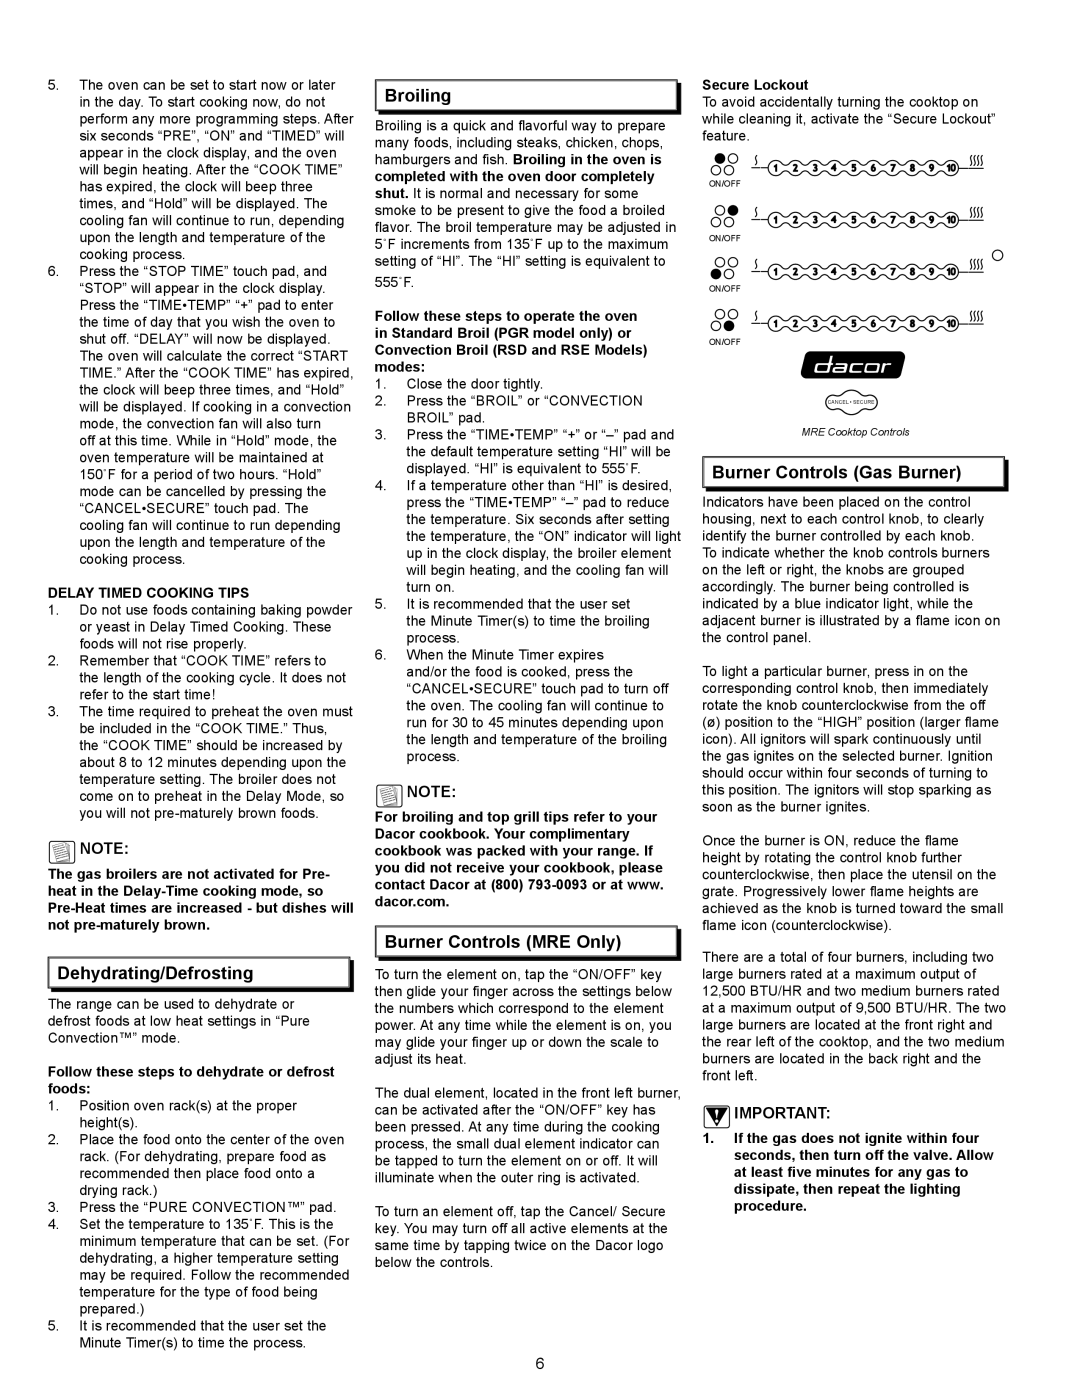
Secure Lockout
To avoid accidentally turning the cooktop on while cleaning it, activate the “Secure Lockout” feature.
ON/OFF
ON/OFF
ON/OFF
ON/OFF
CANCEL • SECURE
MRE Cooktop Controls

 Burner Controls (Gas Burner)
Indicators have been placed on the control housing, next to each control knob, to clearly identify the burner controlled by each knob. To indicate whether the knob controls burners on the left or right, the knobs are grouped accordingly. The burner being controlled is indicated by a blue indicator light, while the adjacent burner is illustrated by a flame icon on the control panel.
To light a particular burner, press in on the corresponding control knob, then immediately rotate the knob counterclockwise from the off
(ø)position to the “HIGH” position (larger flame icon). All ignitors will spark continuously until the gas ignites on the selected burner. Ignition should occur within four seconds of turning to this position. The ignitors will stop sparking as soon as the burner ignites.
Once the burner is ON, reduce the flame height by rotating the control knob further counterclockwise, then place the utensil on the grate. Progressively lower flame heights are achieved as the knob is turned toward the small flame icon (counterclockwise).
There are a total of four burners, including two large burners rated at a maximum output of 12,500 BTU/HR and two medium burners rated at a maximum output of 9,500 BTU/HR. The two large burners are located at the front right and the rear left of the cooktop, and the two medium burners are located in the back right and the front left.
![]() IMPORTANT:
IMPORTANT:
1.If the gas does not ignite within four seconds, then turn off the valve. Allow at least five minutes for any gas to dissipate, then repeat the lighting procedure.
6