3
4 Insert a blank 1.44 MB floppy disk into the floppy disk drive on your programmer. Press ENTER on your keyboard to format the floppy disk.
5
6
7
Repeat the formatting process for the remainder of the disks.
Insert the “UniFam 8.7/TaskLink 7.30” CD into your PC's
Browse to the 'X:\floppies\auto_v87' directory (where X is the
Note: When you insert the “UniFam 8.7/TaskLink 7.30” CD into your PC, the TaskLink v6.1 install program will
8
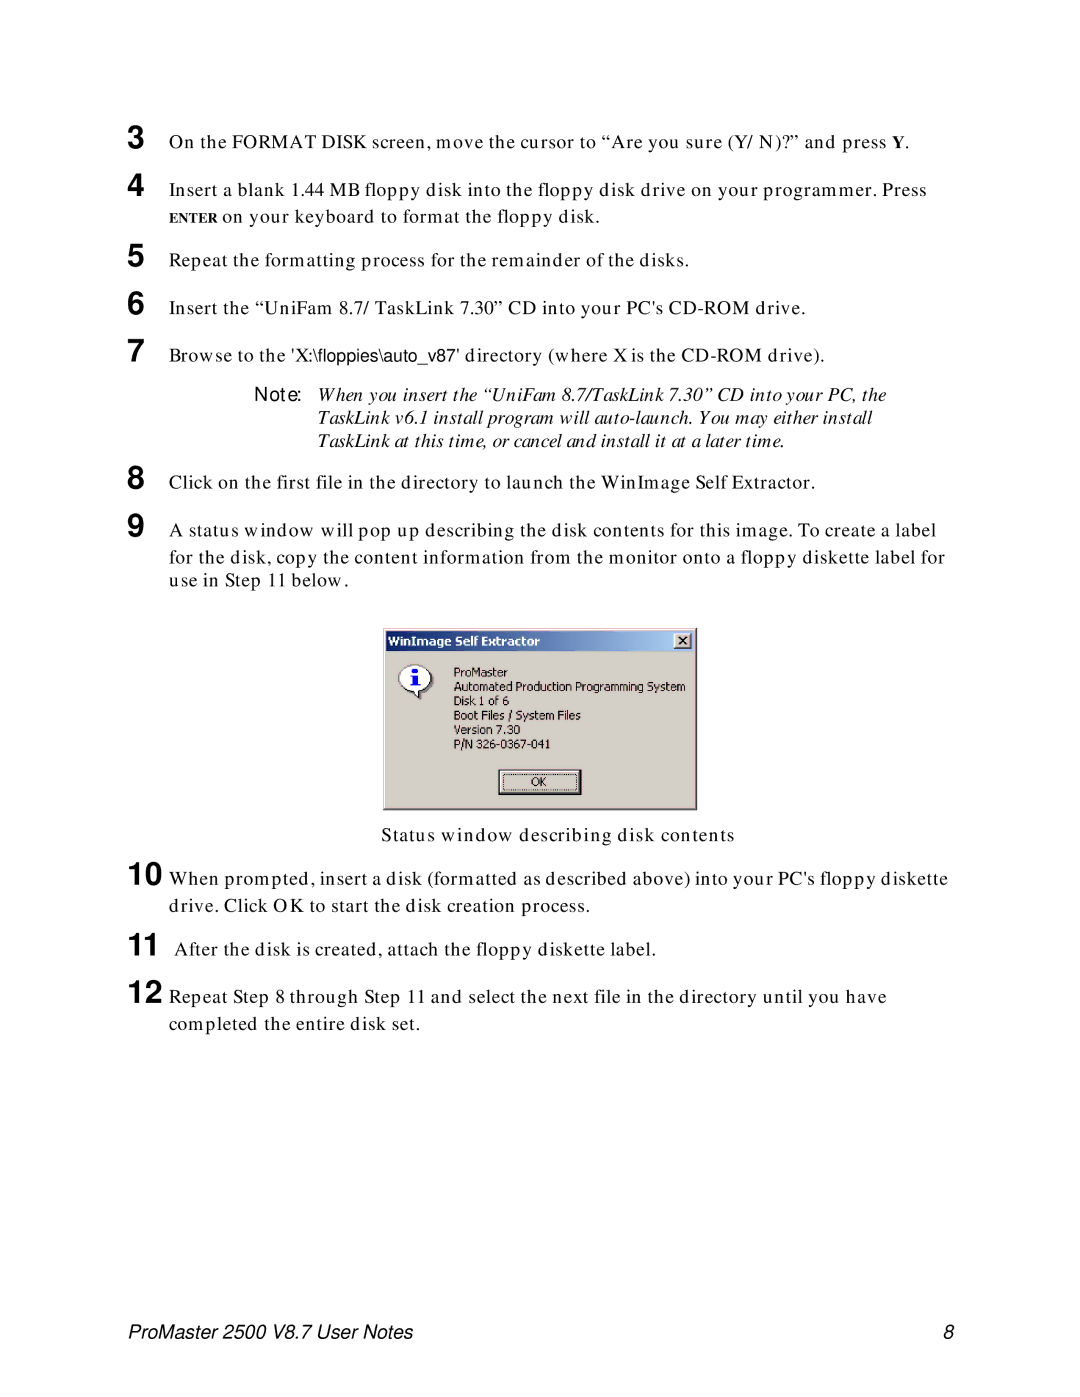
9 A status window will pop up describing the disk contents for this image. To create a label for the disk, copy the content information from the monitor onto a floppy diskette label for use in Step 11 below.
Status window describing disk contents
10 When prompted, insert a disk (formatted as described above) into your PC's floppy diskette drive. Click OK to start the disk creation process.
11
12 Repeat Step 8 through Step 11 and select the next file in the directory until you have completed the entire disk set.
ProMaster 2500 V8.7 User Notes | 8 |