Back to Contents Page
Operating the Monitor
Dell™ E170S/E190S Flat Panel Monitor User's Guide
Using the Front Panel Controls
Using the
Setting the Maximum Resolution
Using the Dell Soundbar (Optional)
Using the Tilt
Using the Front Panel
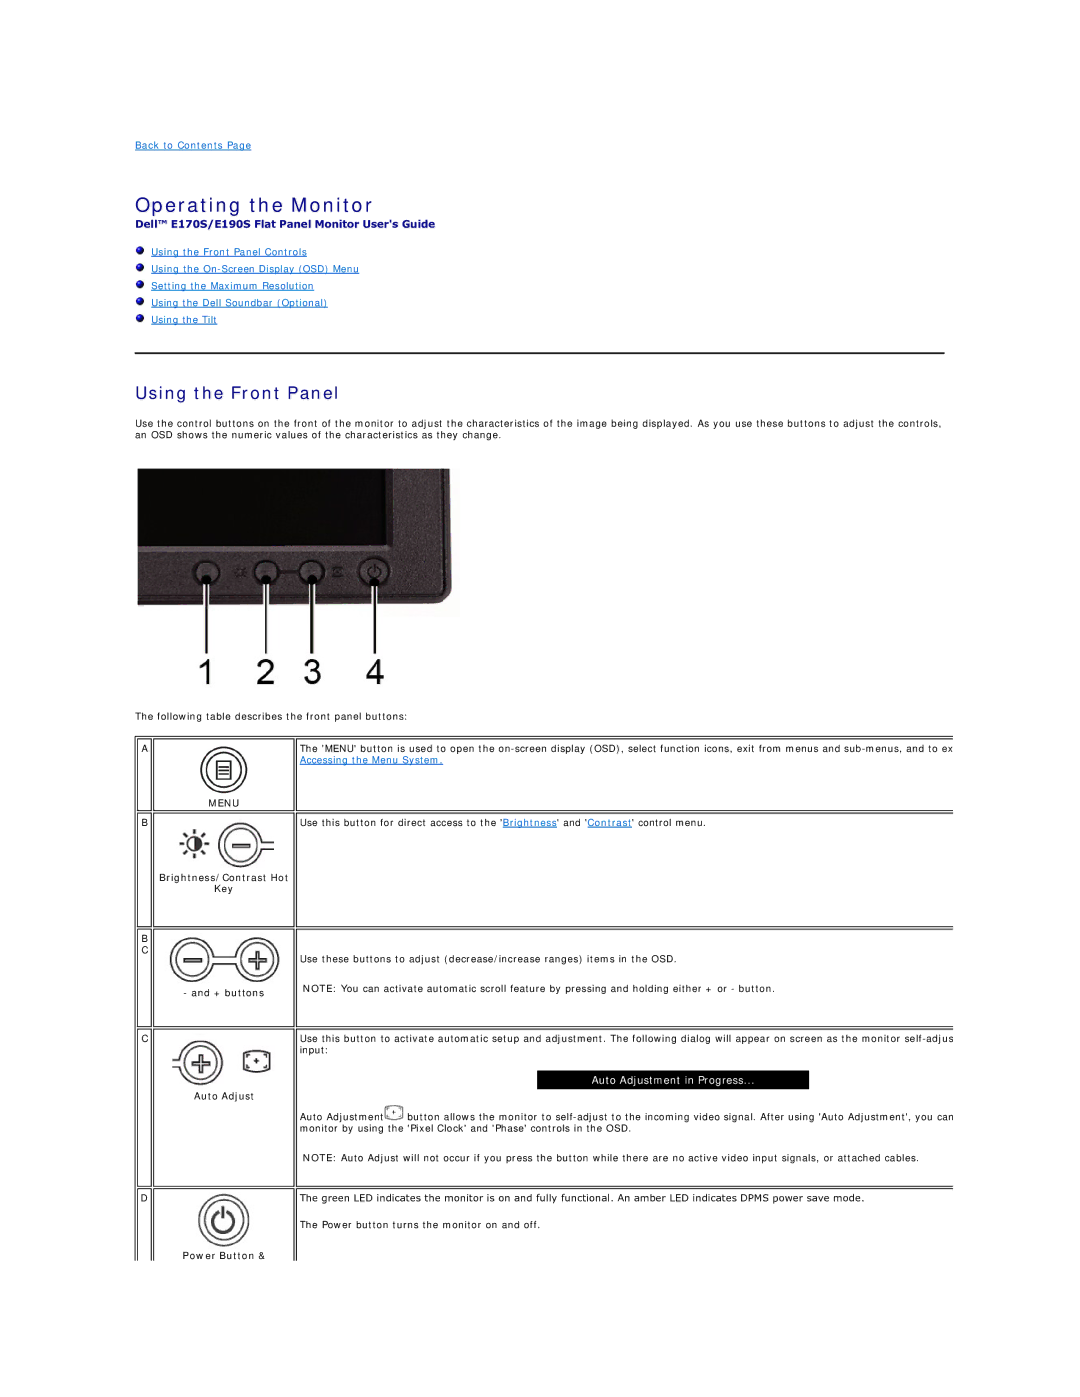
Use the control buttons on the front of the monitor to adjust the characteristics of the image being displayed. As you use these buttons to adjust the controls, an OSD shows the numeric values of the characteristics as they change.
The following table describes the front panel buttons:
A
MENU
The 'MENU' button is used to open the
B
B C
Brightness/Contrast Hot
Key
- and + buttons
Use this button for direct access to the 'Brightness' and 'Contrast' control menu.
Use these buttons to adjust (decrease/increase ranges) items in the OSD.
NOTE: You can activate automatic scroll feature by pressing and holding either + or - button.
C
Auto Adjust
Use this button to activate automatic setup and adjustment. The following dialog will appear on screen as the monitor
Auto Adjustment in Progress...
Auto Adjustment![]() button allows the monitor to
button allows the monitor to
NOTE: Auto Adjust will not occur if you press the button while there are no active video input signals, or attached cables.
D
The green LED indicates the monitor is on and fully functional. An amber LED indicates DPMS power save mode.
The Power button turns the monitor on and off.