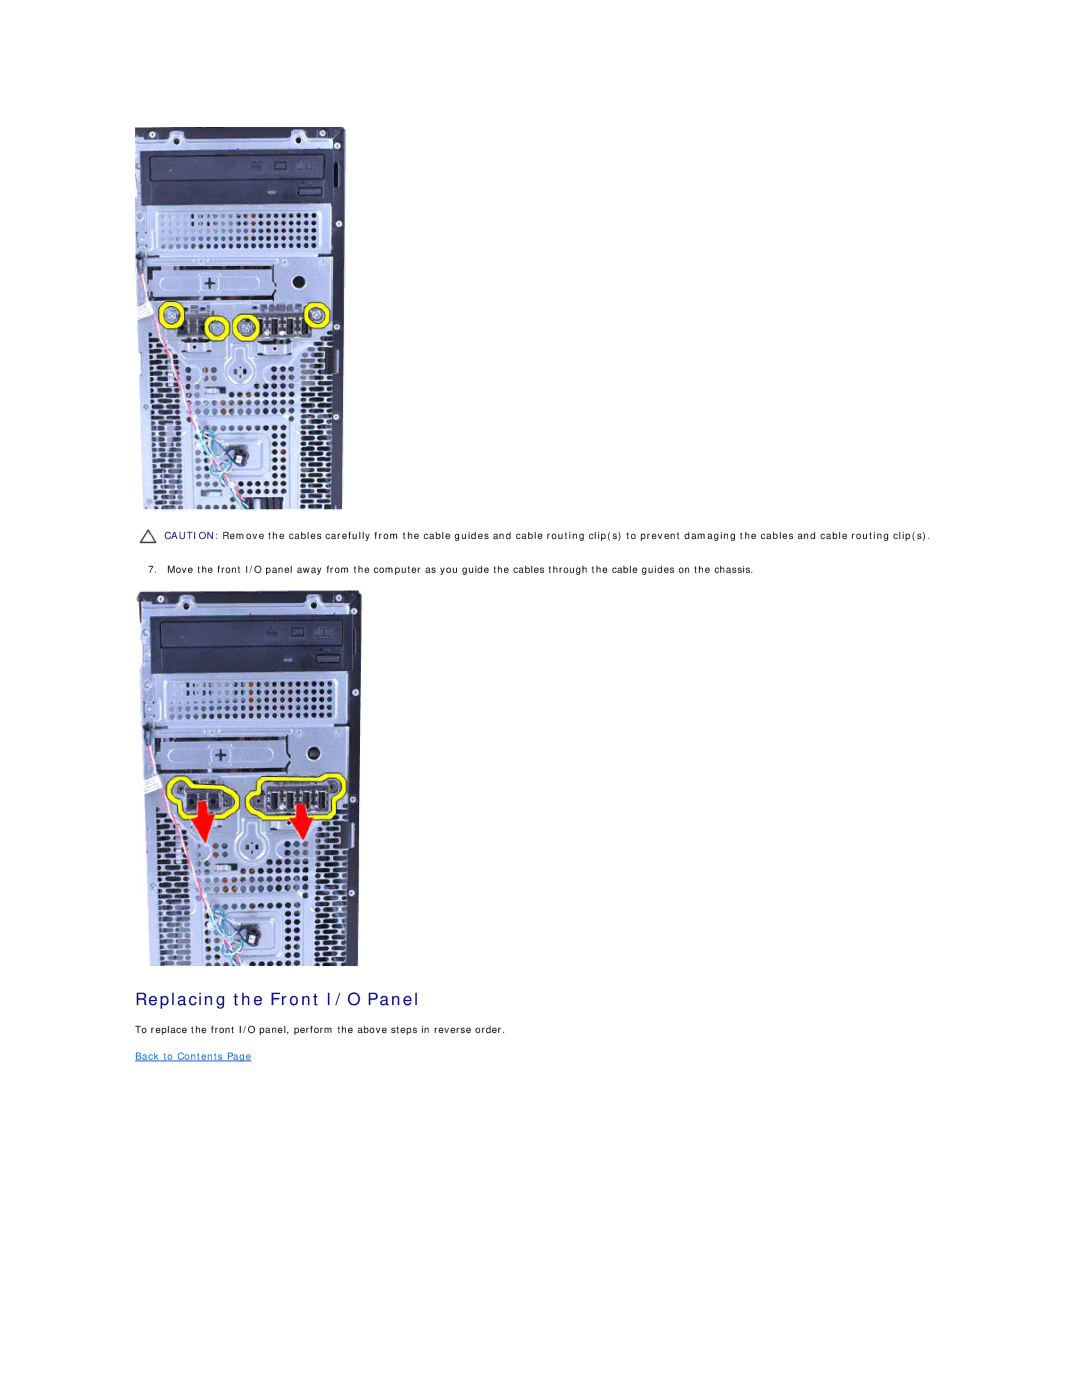
CAUTION: Remove the cables carefully from the cable guides and cable routing clip(s) to prevent damaging the cables and cable routing clip(s).
7. Move the front I/O panel away from the computer as you guide the cables through the cable guides on the chassis.
Replacing the Front I/O Panel
To replace the front I/O panel, perform the above steps in reverse order.