The Boot Device Menu appears, listing all available boot devices. Each device has a number next to it.
4.On the Boot Device Menu choose the device you want to boot from.
For example, if you are booting to a USB memory key, highlight USB Flash Device and press <Enter>.
NOTE: To boot to a USB device, the device must be bootable. To ensure your device is bootable, check the device documentation.
Changing Boot Sequence for Future Boots
1.Enter system setup (see Entering System Setup).
2.Use the arrow keys to highlight the Boot menu option and press <Enter> to access the menu.
![]() NOTE: Write down your current boot sequence in case you want to restore it.
NOTE: Write down your current boot sequence in case you want to restore it.
3.Press the up- and
4.Press plus (+) or minus
Clearing Forgotten Passwords
CAUTION: The computer must be disconnected from the electrical outlet to clear the Password setting.
1.Follow the procedures in Before You Begin.
2.Remove the computer cover (see Replacing the Computer Cover).
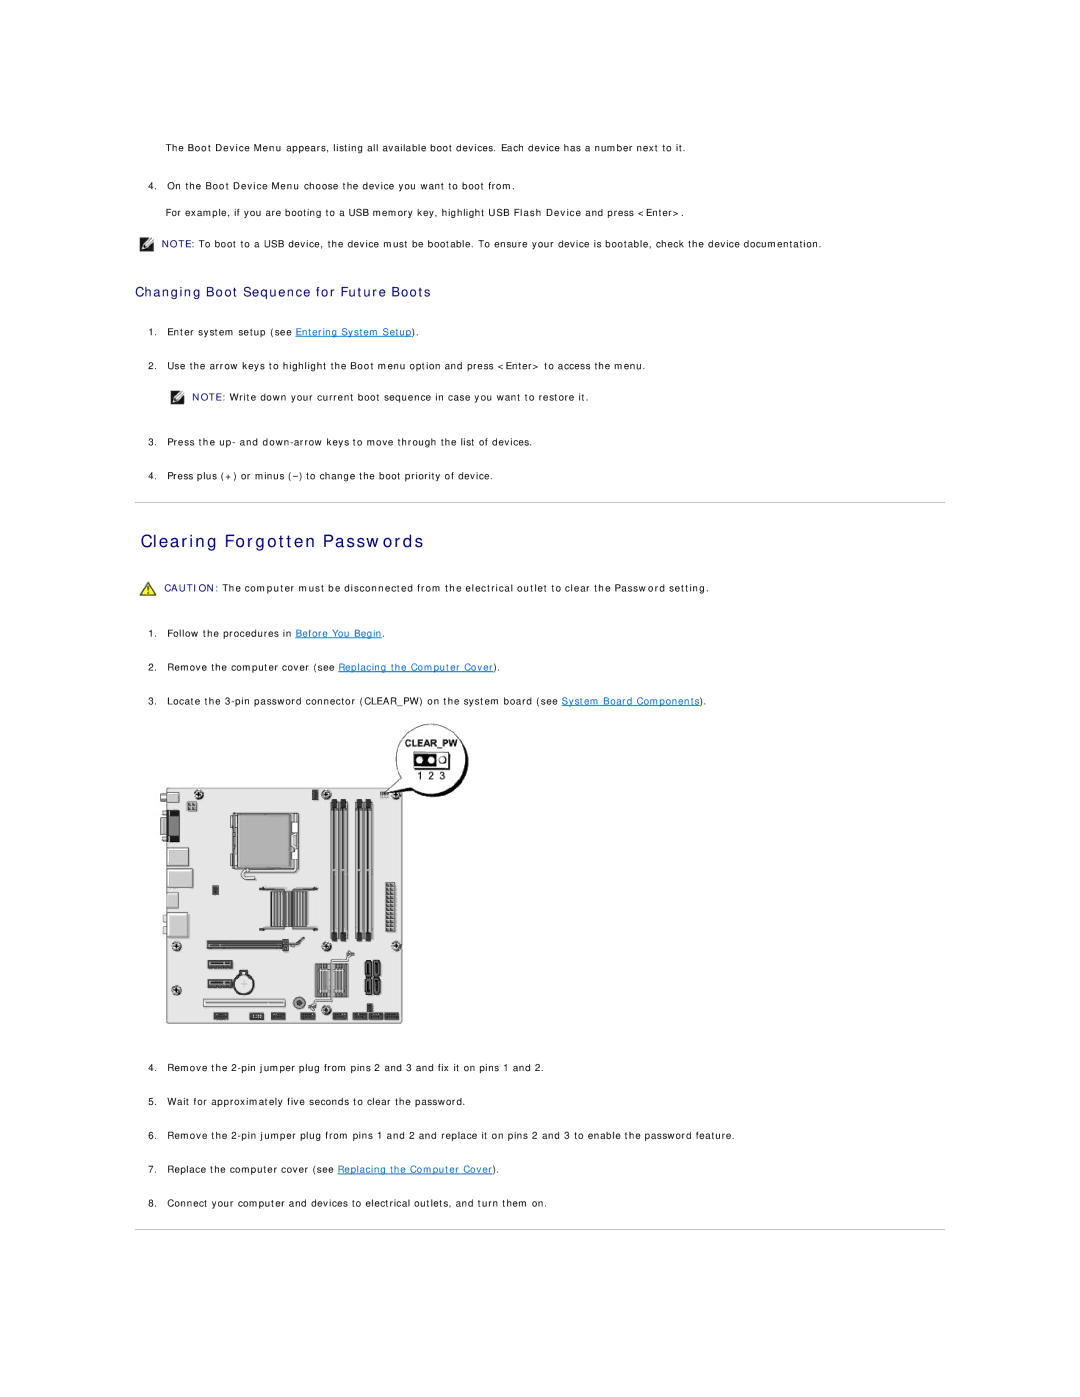
3.Locate the
4.Remove the
5.Wait for approximately five seconds to clear the password.
6.Remove the
7.Replace the computer cover (see Replacing the Computer Cover).
8.Connect your computer and devices to electrical outlets, and turn them on.