Back to Contents Page
Setting Up the Monitor
Dell™ E2011H Monitor User's Guide
Attaching the Stand
Connecting the Monitor
Organizing the Cables
Attaching the Soundbar (Optional)
Removing the Stand
Wall Mounting (Optional)
Attaching the Stand
NOTE: The stand is detached from monitor when it is shipped from the factory.
NOTE: This is applicable for a monitor with a stand. When any other stand is bought, please refer to the respective stand setup guide for set up instructions.
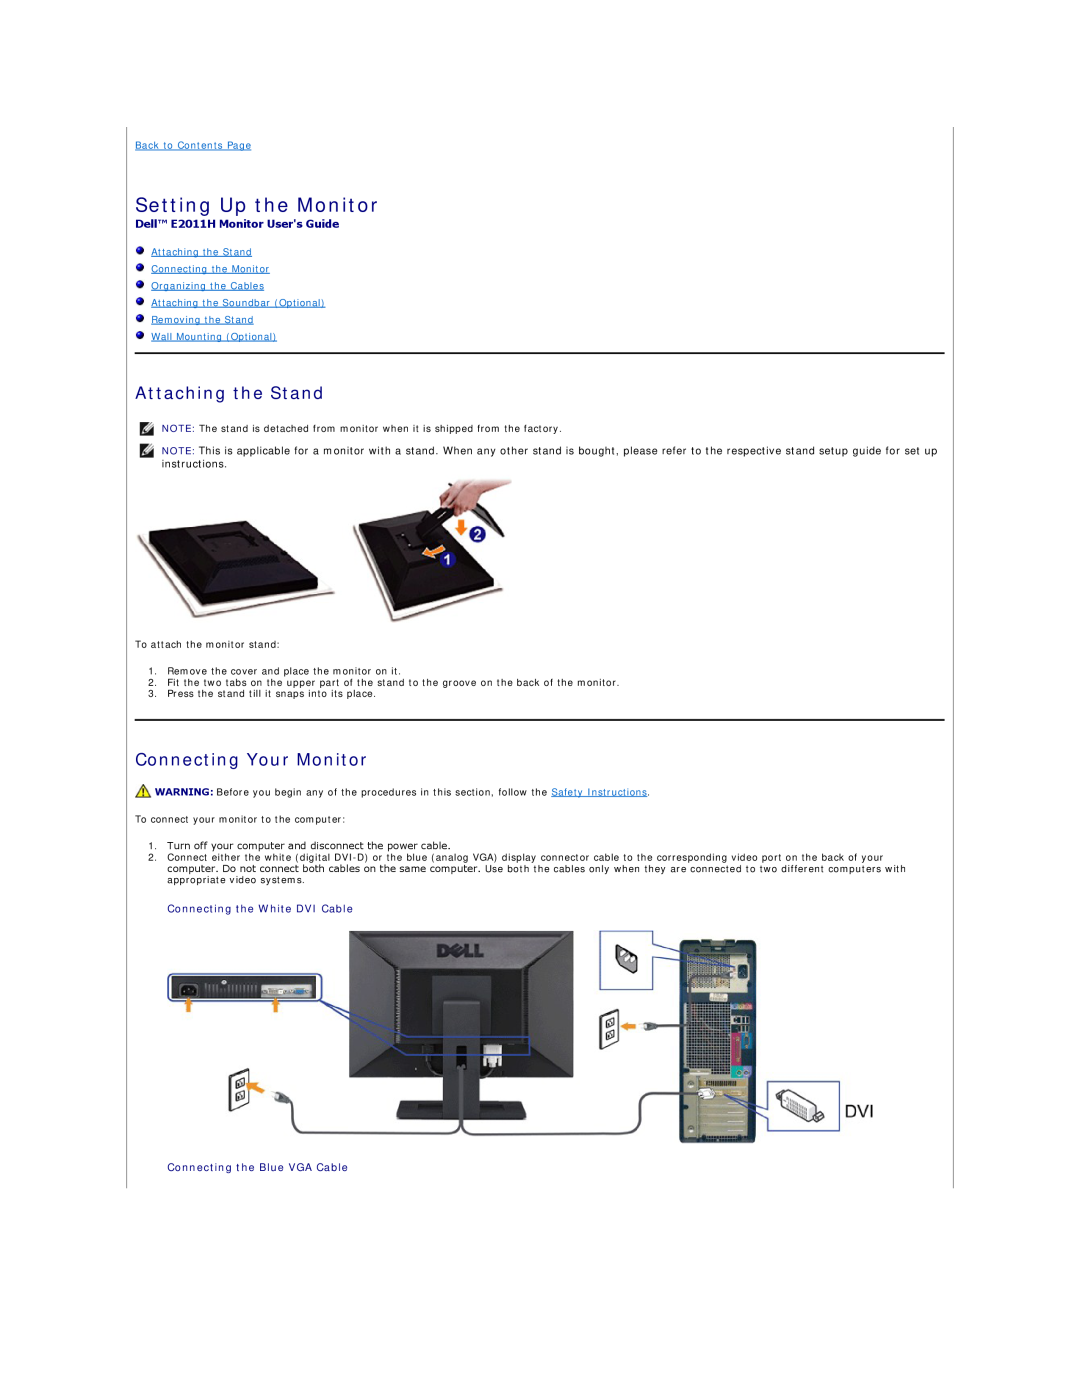
To attach the monitor stand:
1.Remove the cover and place the monitor on it.
2.Fit the two tabs on the upper part of the stand to the groove on the back of the monitor.
3.Press the stand till it snaps into its place.
Connecting Your Monitor
![]() WARNING: Before you begin any of the procedures in this section, follow the Safety Instructions.
WARNING: Before you begin any of the procedures in this section, follow the Safety Instructions.
To connect your monitor to the computer:
1.Turn off your computer and disconnect the power cable.
2.Connect either the white (digital