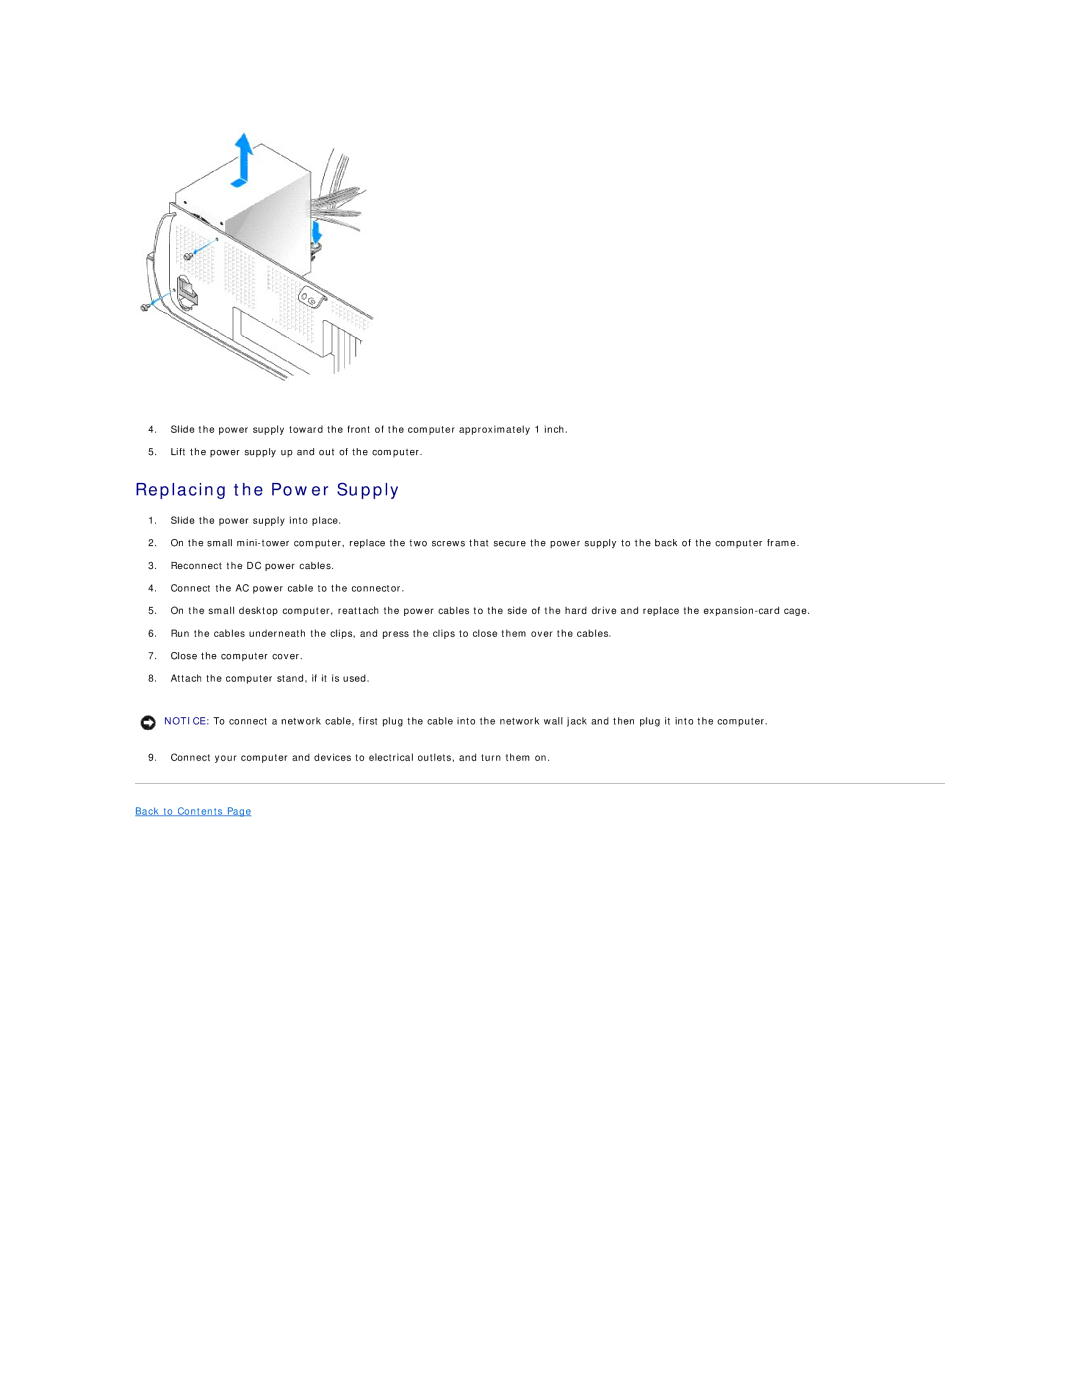
4.Slide the power supply toward the front of the computer approximately 1 inch.
5.Lift the power supply up and out of the computer.
Replacing the Power Supply
1.Slide the power supply into place.
2.On the small
3.Reconnect the DC power cables.
4.Connect the AC power cable to the connector.
5.On the small desktop computer, reattach the power cables to the side of the hard drive and replace the
6.Run the cables underneath the clips, and press the clips to close them over the cables.
7.Close the computer cover.
8.Attach the computer stand, if it is used.
NOTICE: To connect a network cable, first plug the cable into the network wall jack and then plug it into the computer.
9.Connect your computer and devices to electrical outlets, and turn them on.