Removing the Hard Drive(s)
1.Follow the instructions in “Before You Begin” on page 6.
2.Remove the battery pack (see “Removing the Battery Pack” on page 11).
3.Remove the compartment door (see “Removing the Compartment Door” on page 14).
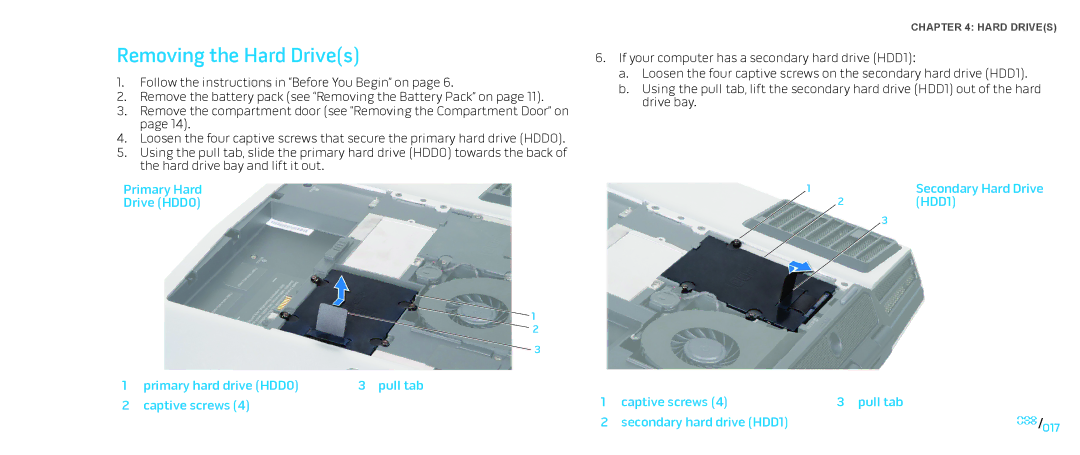
4.Loosen the four captive screws that secure the primary hard drive (HDD0).
5.Using the pull tab, slide the primary hard drive (HDD0) towards the back of the hard drive bay and lift it out.
Primary Hard
Drive (HDD0)
|
| 1 |
|
| 2 |
|
| 3 |
1 | primary hard drive (HDD0) | 3 pull tab |
2 | captive screws (4) |
|
CHAPTER 4: HARD DRIVE(S)
6.If your computer has a secondary hard drive (HDD1):
a.Loosen the four captive screws on the secondary hard drive (HDD1).
b.Using the pull tab, lift the secondary hard drive (HDD1) out of the hard drive bay.
1 | Secondary Hard Drive |
2 | (HDD1) |
| 3 |
1 | captive screws (4) | 3 pull tab |
2 | secondary hard drive (HDD1) | 017/ |
|
| 017 |