Replacing the Display Panel
1.Reconnect the top
2.Reconnect the bottom
3.Replace the display panel inside the display back cover.
NOTE: The eight screw locations are numbered. Replace the screws in sequential order.
4.Replace the eight M2 x
5.Replace the display bezel.
Display Latch
Removing the Display Latch
CAUTION: Before you begin the following procedure, follow the safety instructions in the Product Information Guide.
NOTICE: To avoid electrostatic discharge, ground yourself by using a wrist grounding strap or by touching an unpainted metal surface on the computer.
NOTICE: To help prevent damage to the system board, you must remove the main battery (see Before Working Inside Your Computer) before you begin working inside the computer.
1.Follow the instructions in Before Working Inside Your Computer.
2.Remove the display assembly (see Removing the Display Assembly).
3.Remove the display bezel (see Removing the Display Bezel).
4.Remove the display panel (see Display Panel).
NOTICE: A strip of copper foil may be present beneath the support bracket on some systems; ensure that you do not tear this foil while removing the bracket.
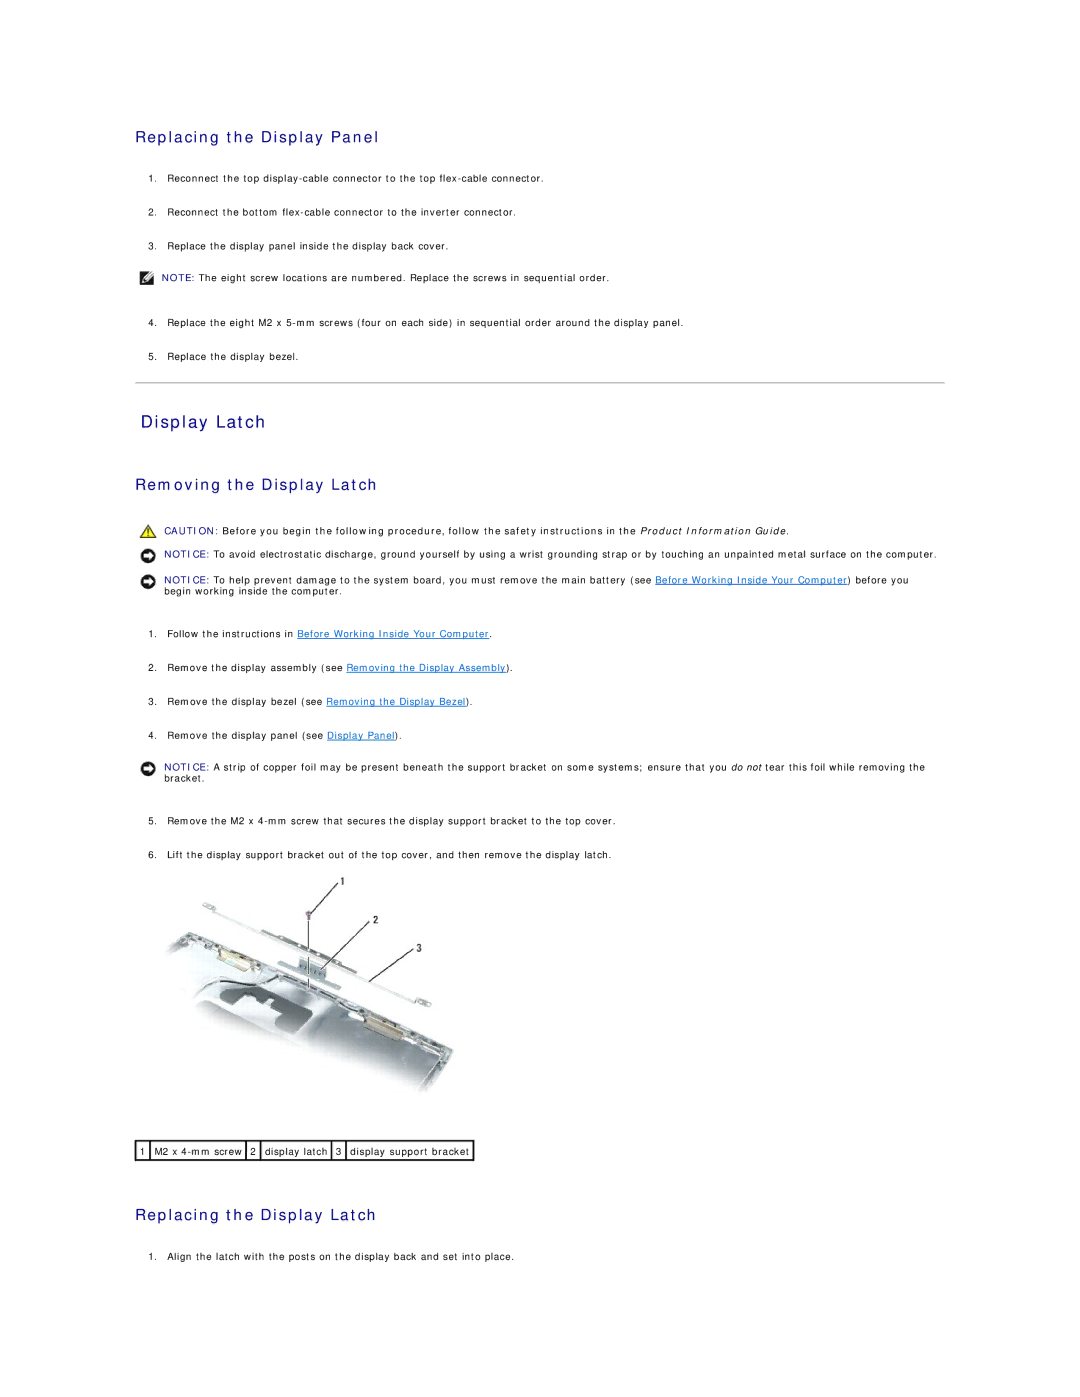
5.Remove the M2 x
6.Lift the display support bracket out of the top cover, and then remove the display latch.
![]() 1
1 ![]() M2 x
M2 x ![]() 2
2 ![]() display latch
display latch ![]() 3
3 ![]() display support bracket
display support bracket ![]()
Replacing the Display Latch
1. Align the latch with the posts on the display back and set into place.