CARTON CONTENTS
IMPORTANT: DO NOT LIFT THE MITER SAW BY THE SWITCH HANDLE. THIS ACTION CAN CAUSE MIS- ALIGNMENT. ALWAYS LIFT THE MACHINE BY THE BASE OR CARRYING HANDLE.
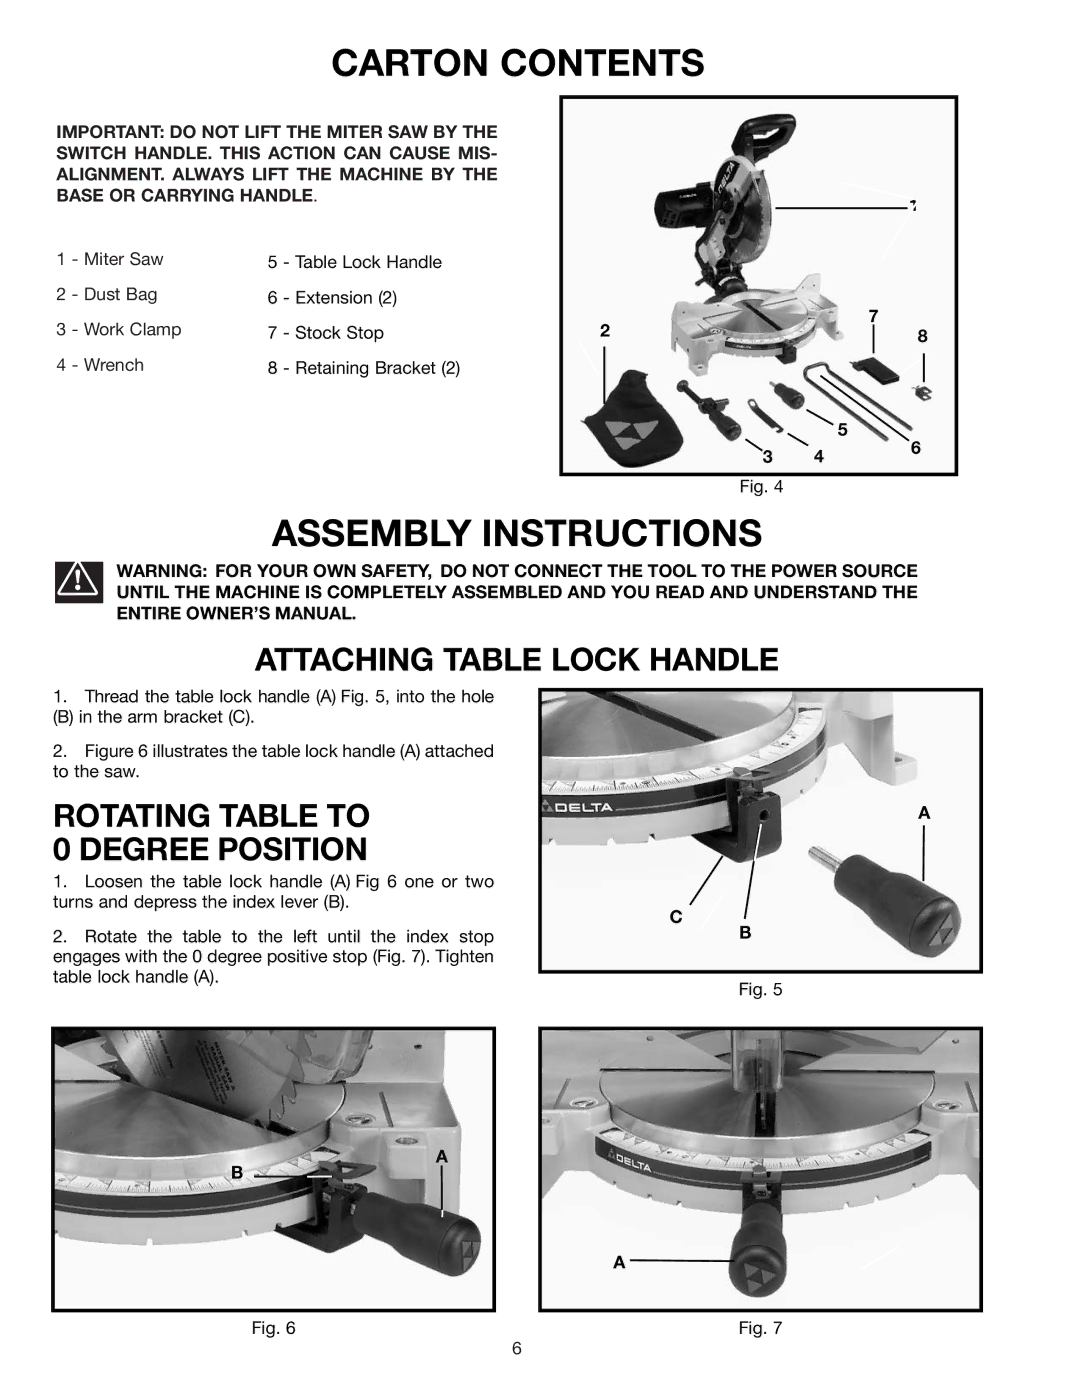
1 | - Miter Saw | 5 | - Table Lock Handle |
2 | - Dust Bag | 6 | - Extension (2) |
3 | - Work Clamp | 7 | - Stock Stop |
4 | - Wrench | 8 | - Retaining Bracket (2) |
1
7
2 | 8 |
|
|
| 5 |
3 | 4 | 6 |
|
Fig. 4
ASSEMBLY INSTRUCTIONS
WARNING: FOR YOUR OWN SAFETY, DO NOT CONNECT THE TOOL TO THE POWER SOURCE UNTIL THE MACHINE IS COMPLETELY ASSEMBLED AND YOU READ AND UNDERSTAND THE ENTIRE OWNER’S MANUAL.
ATTACHING TABLE LOCK HANDLE
1.Thread the table lock handle (A) Fig. 5, into the hole
(B) in the arm bracket (C).
2.Figure 6 illustrates the table lock handle (A) attached to the saw.
ROTATING TABLE TO 0 DEGREE POSITION
1.Loosen the table lock handle (A) Fig 6 one or two turns and depress the index lever (B).
2.Rotate the table to the left until the index stop engages with the 0 degree positive stop (Fig. 7). Tighten table lock handle (A).
A
C
B
Fig. 5
A
B
A
Fig. 6 | Fig. 7 |
6