ATTACHING
DUST BAG
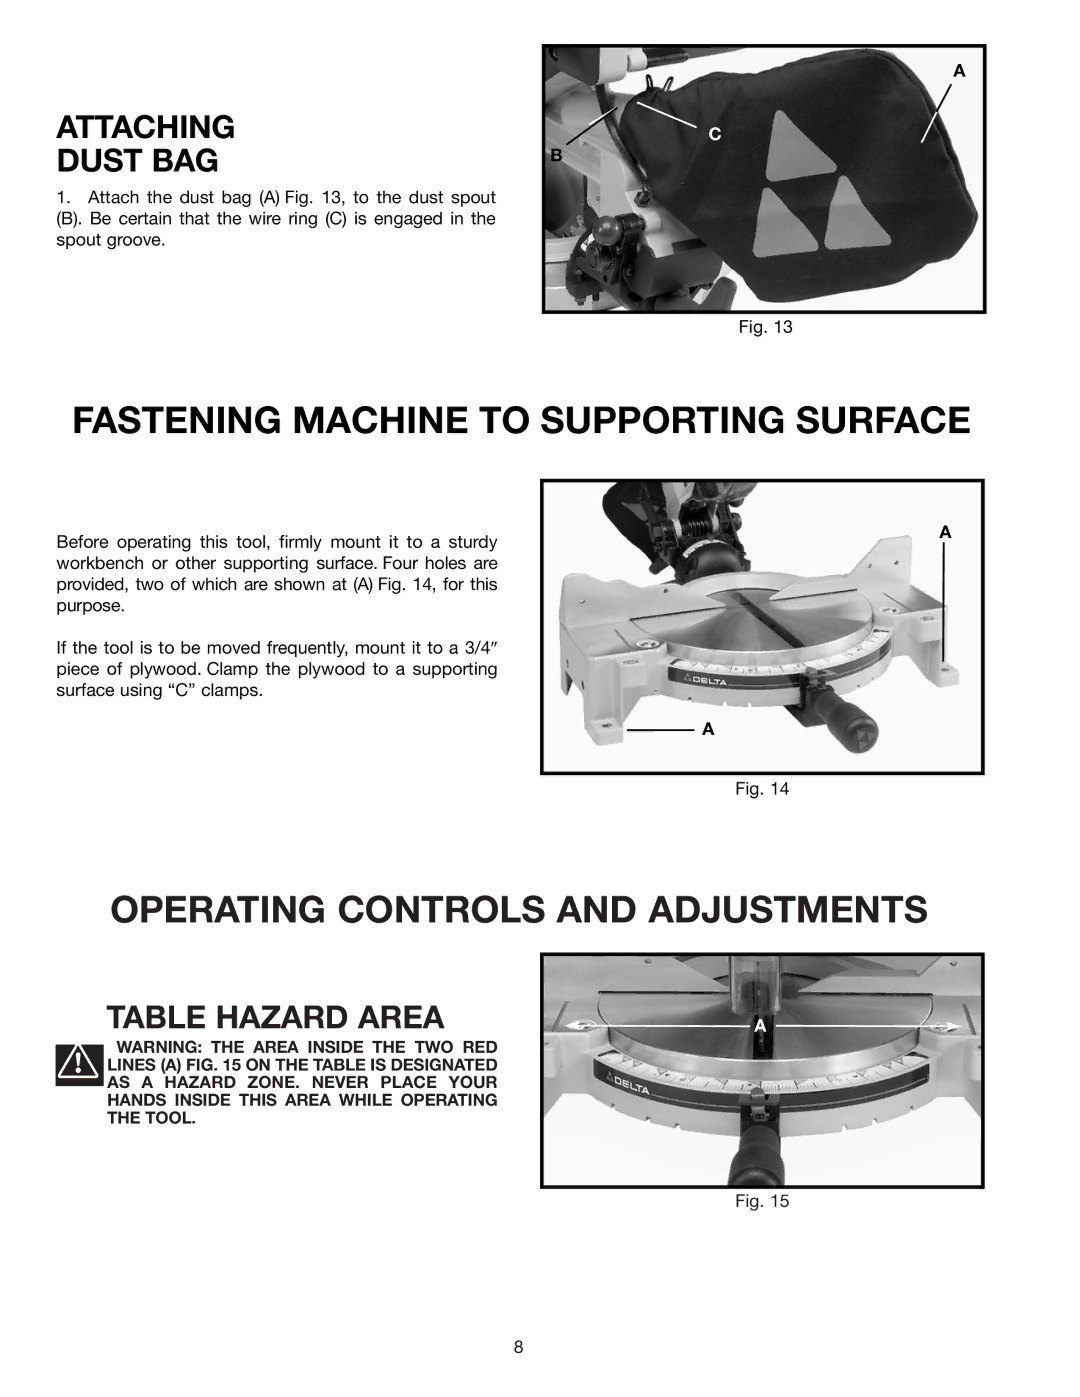
1.Attach the dust bag (A) Fig. 13, to the dust spout
(B). Be certain that the wire ring (C) is engaged in the spout groove.
A
C
B
Fig. 13
FASTENING MACHINE TO SUPPORTING SURFACE
Before operating this tool, firmly mount it to a sturdy workbench or other supporting surface. Four holes are provided, two of which are shown at (A) Fig. 14, for this purpose.
If the tool is to be moved frequently, mount it to a 3/4″ piece of plywood. Clamp the plywood to a supporting surface using “C” clamps.
A
A
Fig. 14
OPERATING CONTROLS AND ADJUSTMENTS
TABLE HAZARD AREA
WARNING: THE AREA INSIDE THE TWO RED LINES (A) FIG. 15 ON THE TABLE IS DESIGNATED AS A HAZARD ZONE. NEVER PLACE YOUR HANDS INSIDE THIS AREA WHILE OPERATING THE TOOL.
![]() A
A ![]()
Fig. 15
8
