ASSEMBLY
![]() For your own safety, do not connect the machine to the power source until the machine is completely assembled and you read and understand the entire instruction manual.
For your own safety, do not connect the machine to the power source until the machine is completely assembled and you read and understand the entire instruction manual.
ASSEMBLY TOOLS REQUIRED
1/2” & 9/16" Open or Box End Wrench - not provided
1/2” & 9/16" Socket and Drive - not provided
Flat or Phillips Screwdriver - not provided
ASSEMBLY TIME ESTIMATE
Assembly for this machine takes approximately
INSTALLING THE CASTERS
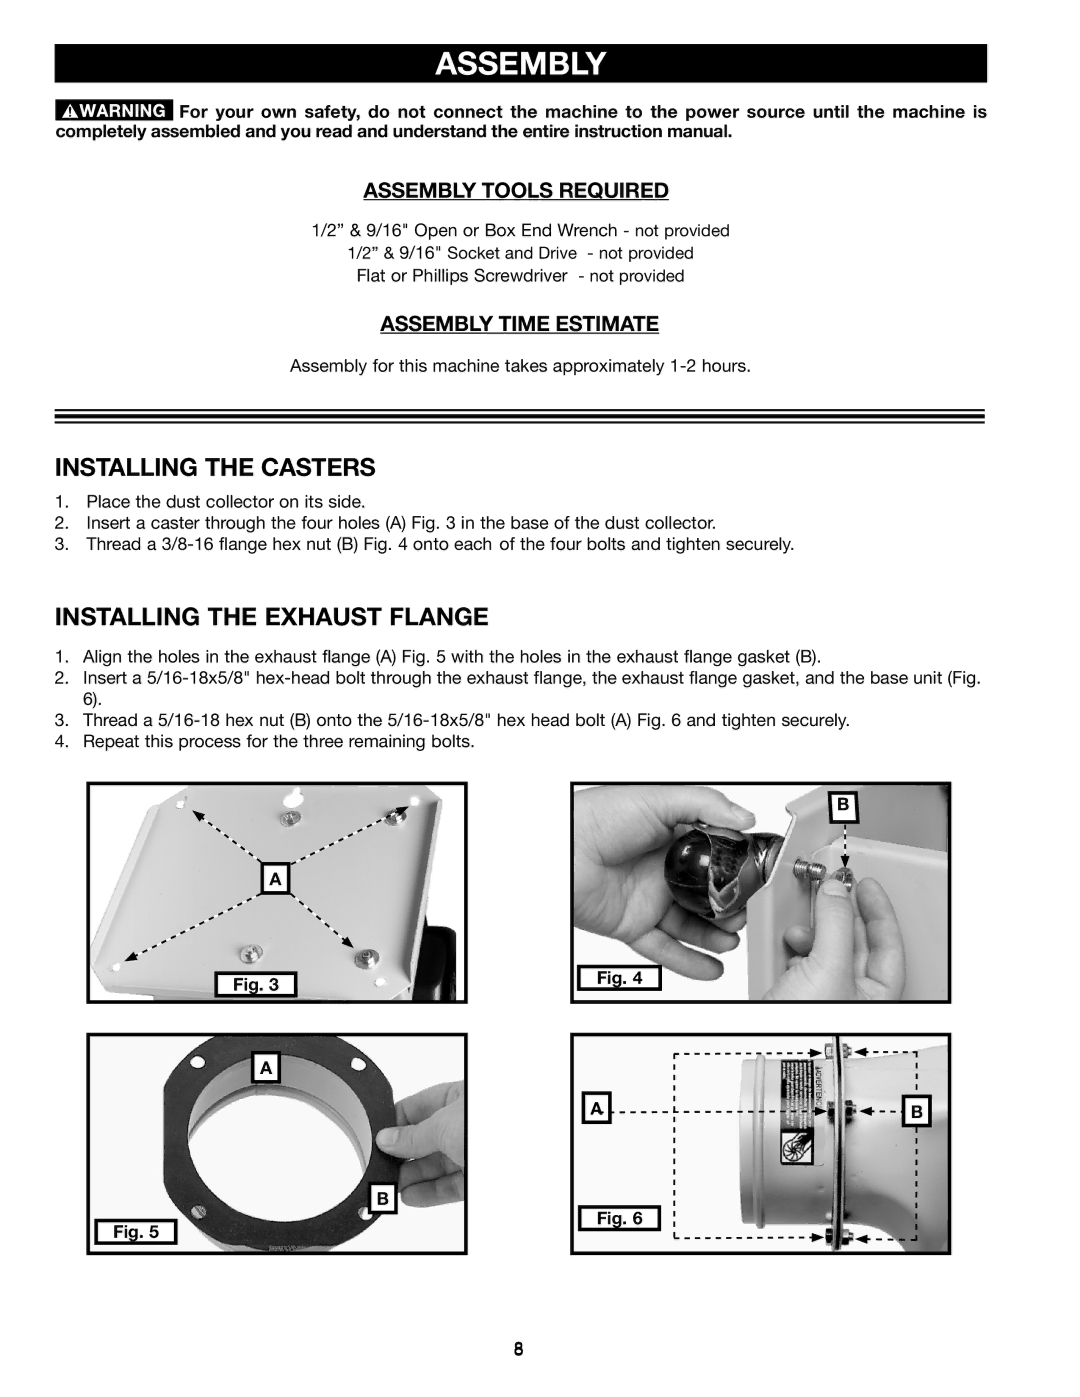
1.Place the dust collector on its side.
2.Insert a caster through the four holes (A) Fig. 3 in the base of the dust collector.
3.Thread a
INSTALLING THE EXHAUST FLANGE
1.Align the holes in the exhaust flange (A) Fig. 5 with the holes in the exhaust flange gasket (B).
2.Insert a
3.Thread a
4.Repeat this process for the three remaining bolts.
A |
Fig. 3 |
A |
B |
Fig. 5 |
B
Fig. 4 |
A | B |
Fig. 6 |
8
