PMA-500AE specifications
The Denon PMA-500AE is a high-quality integrated amplifier that embodies the renowned engineering and audio performance that Denon has been recognized for over a century. Designed for both audiophiles and casual listeners, this amplifier balances modern technology with a classic analog touch, making it an ideal choice for various audio setups.One of the primary features of the PMA-500AE is its robust power output. It delivers a powerful 50 watts per channel into 8 ohms, ensuring that it can drive a wide range of speakers effectively. This solid power output enables the amplifier to reproduce rich and dynamic sound, making it suitable for various music genres.
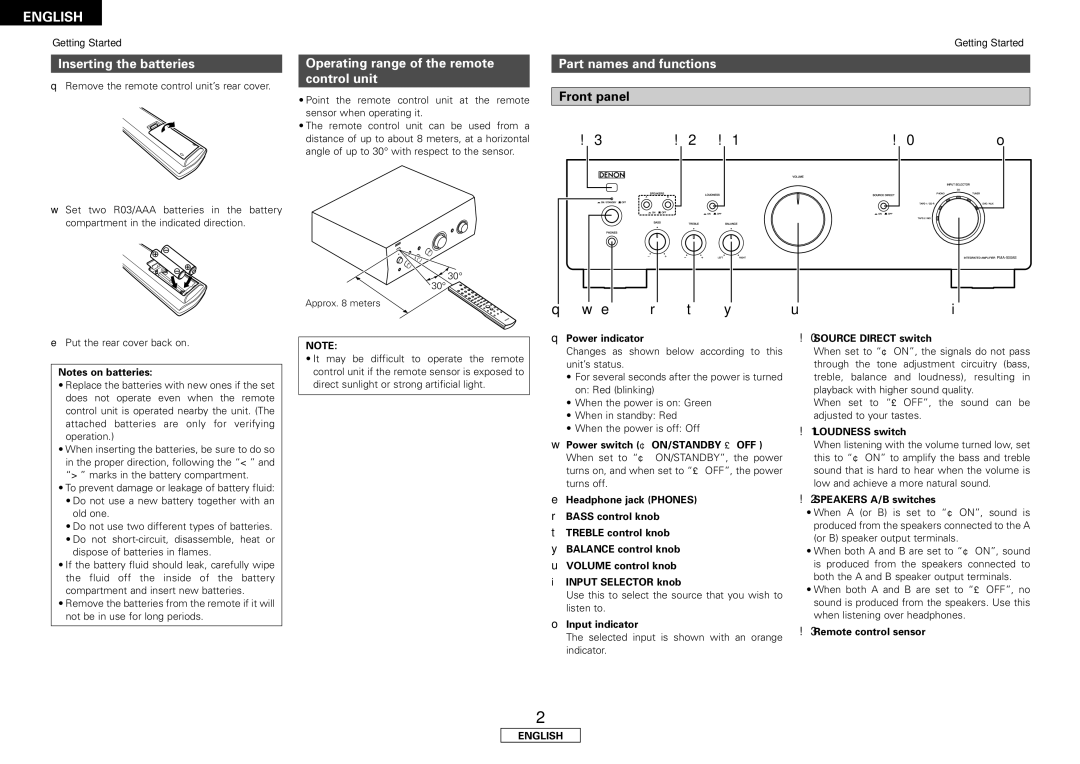
The Pure Direct mode is another exciting aspect of the PMA-500AE. This mode allows audio signals to bypass unnecessary circuits, delivering a more direct sound path for a cleaner and more transparent audio signal. This feature is particularly beneficial for purists who prioritize audio fidelity and seek to experience their music as close to the original recording as possible.
In terms of connectivity, the PMA-500AE offers versatile options. It features multiple analog inputs, including phono, CD, and auxiliary inputs, allowing users to connect various devices easily. The dedicated phono input supports both moving magnet and moving coil cartridges, making it an excellent choice for vinyl enthusiasts who want to enjoy the warmth of analog sound.
The build quality of the Denon PMA-500AE is also noteworthy. It features a robust chassis designed to minimize vibrations and interference, ensuring a stable performance. This helps maintain audio clarity, even at high volumes. The amplifier is adorned with an elegant design that fits seamlessly into any home audio setup, combining aesthetics with functionality.
The amplifier is equipped with Dynamic Discrete Circuitry, which enhances sound quality by reducing distortion and improving signal integrity. This advanced circuitry, combined with a high-current design, offers an expansive soundstage with excellent detail retrieval.
Overall, the Denon PMA-500AE integrated amplifier represents an excellent blend of performance, versatility, and design, making it a perfect choice for those seeking to elevate their home audio experience. With its combination of modern features and time-honored engineering, it continues to be a popular choice among audio enthusiasts.