INSTALLING TO | For convenience and efficiency, install heater |
WALL | • where there is easy access for operation, inspection, and service |
• in coldest part of room | |
Continued | CEILING |
|
36"
Minimum
![]() 6" Minimum
6" Minimum
From ![]()
![]()
![]() Sides Of
Sides Of
Heater
Right
LeftSide
Side
3" Minimum To Top Surface
Of Carpeting, Tile Or Other
Combustible Material
FLOOR
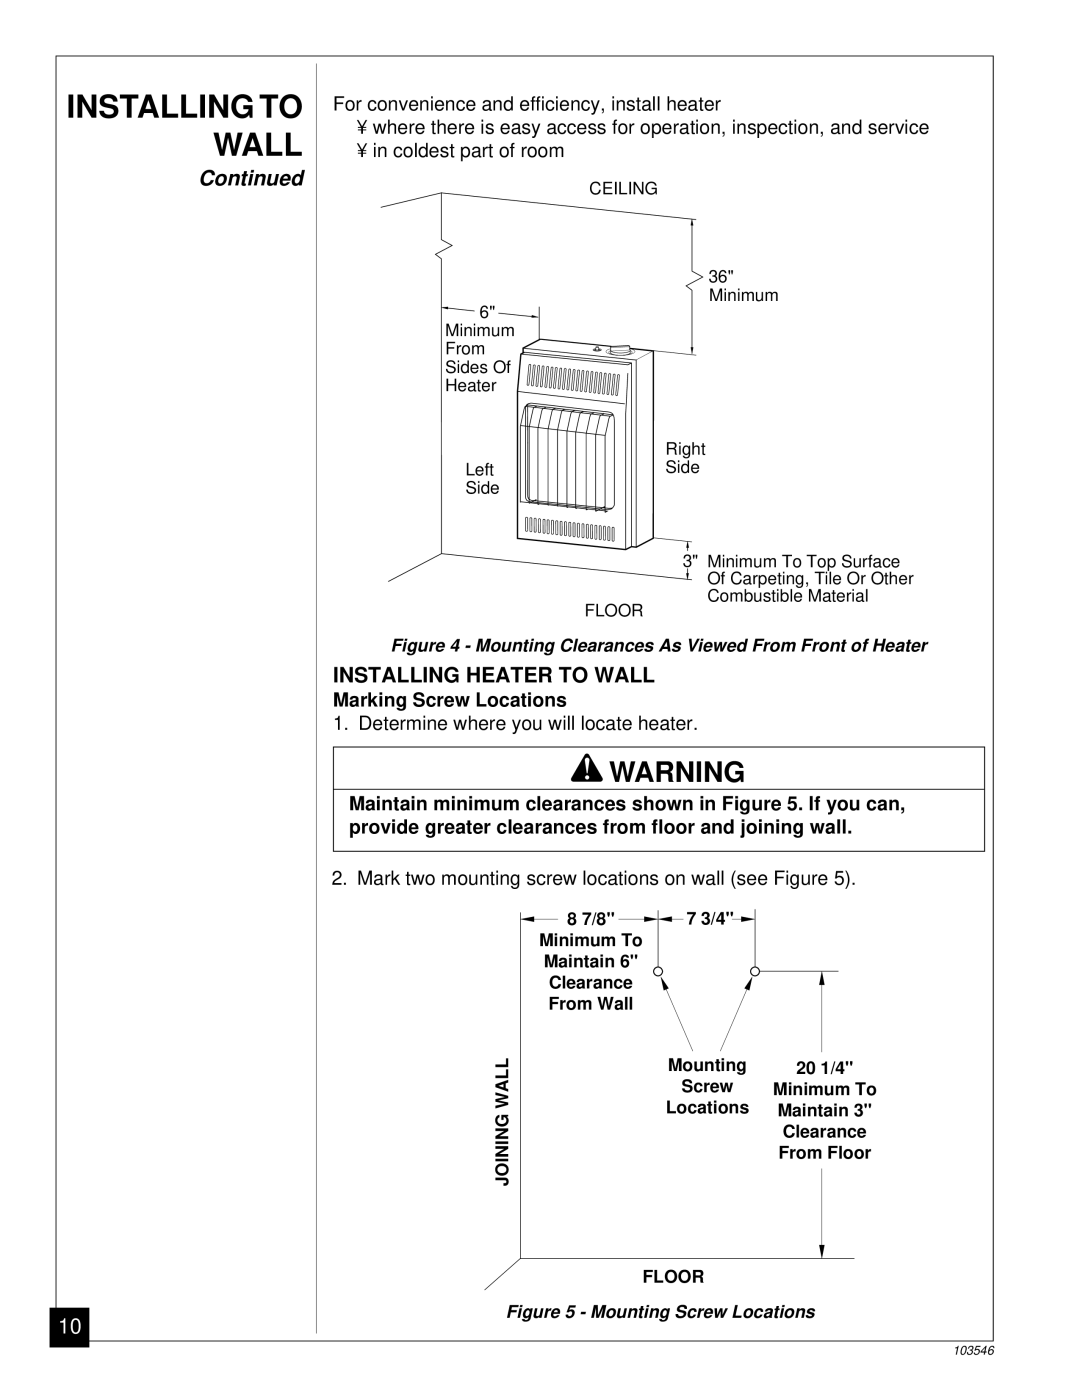
Figure 4 - Mounting Clearances As Viewed From Front of Heater
INSTALLING HEATER TO WALL
Marking Screw Locations
1. Determine where you will locate heater.
![]() WARNING
WARNING
Maintain minimum clearances shown in Figure 5. If you can, provide greater clearances from floor and joining wall.
2. Mark two mounting screw locations on wall (see Figure 5).
8 7/8" ![]()
![]() 7 3/4"
7 3/4"![]()
Minimum To
Maintain 6"
Clearance
From Wall
WALL | Mounting | 20 1/4" |
| Screw | Minimum To |
JOINING | Locations | Maintain 3" |
| Clearance | |
|
| |
|
| From Floor |
FLOOR
Figure 5 - Mounting Screw Locations
10
103546