Installation
CAUTION: BEFORE STARTING THE INSTALLATION, TURN THE POWER OFF AT THE
CIRCUIT BREAKER.
If you want to use the Manual Override feature you will need to install the fixture on a circuit controlled by a switch.
If controlling more than one fixture with this sen- sor, refer to page 6.
Standard Wiring
Screw the JourneyMan¨ replacement motion sen- sor into a base plate or lighting fixture that will accommodate the sensor.
If your fixture has a gasket, make sure it is in place before connecting any wires.
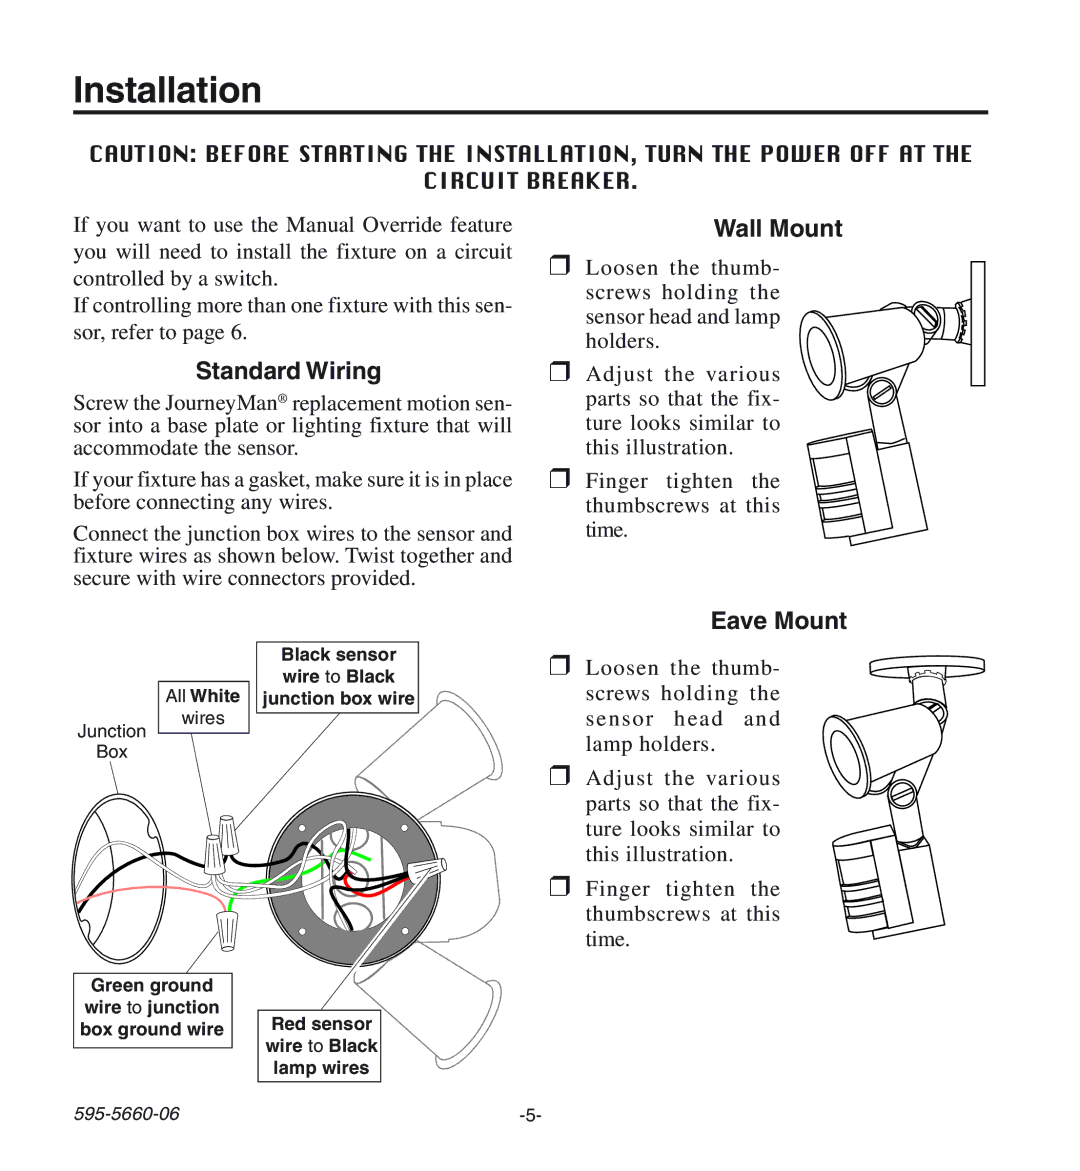
Connect the junction box wires to the sensor and fixture wires as shown below. Twist together and secure with wire connectors provided.
Wall Mount
❒Loosen the thumb- screws holding the sensor head and lamp holders.
❒Adjust the various parts so that the fix- ture looks similar to this illustration.
❒Finger tighten the thumbscrews at this time.
Black sensor wire to Black
All White junction box wire wires
Junction
Box
Green ground
wire to junction
box ground wire Red sensor wire to Black
lamp wires
Eave Mount
❒Loosen the thumb- screws holding the sensor head and lamp holders.
❒Adjust the various parts so that the fix- ture looks similar to this illustration.
❒Finger tighten the thumbscrews at this time.