INSTALLING
Continued
INSTALLING LOGS
WARNING
WARNING ICON | G 001 |
Failure to position the parts in accordance with these diagrams or failure to use only parts specifically approved with this heater may result in property damage or personal injury.
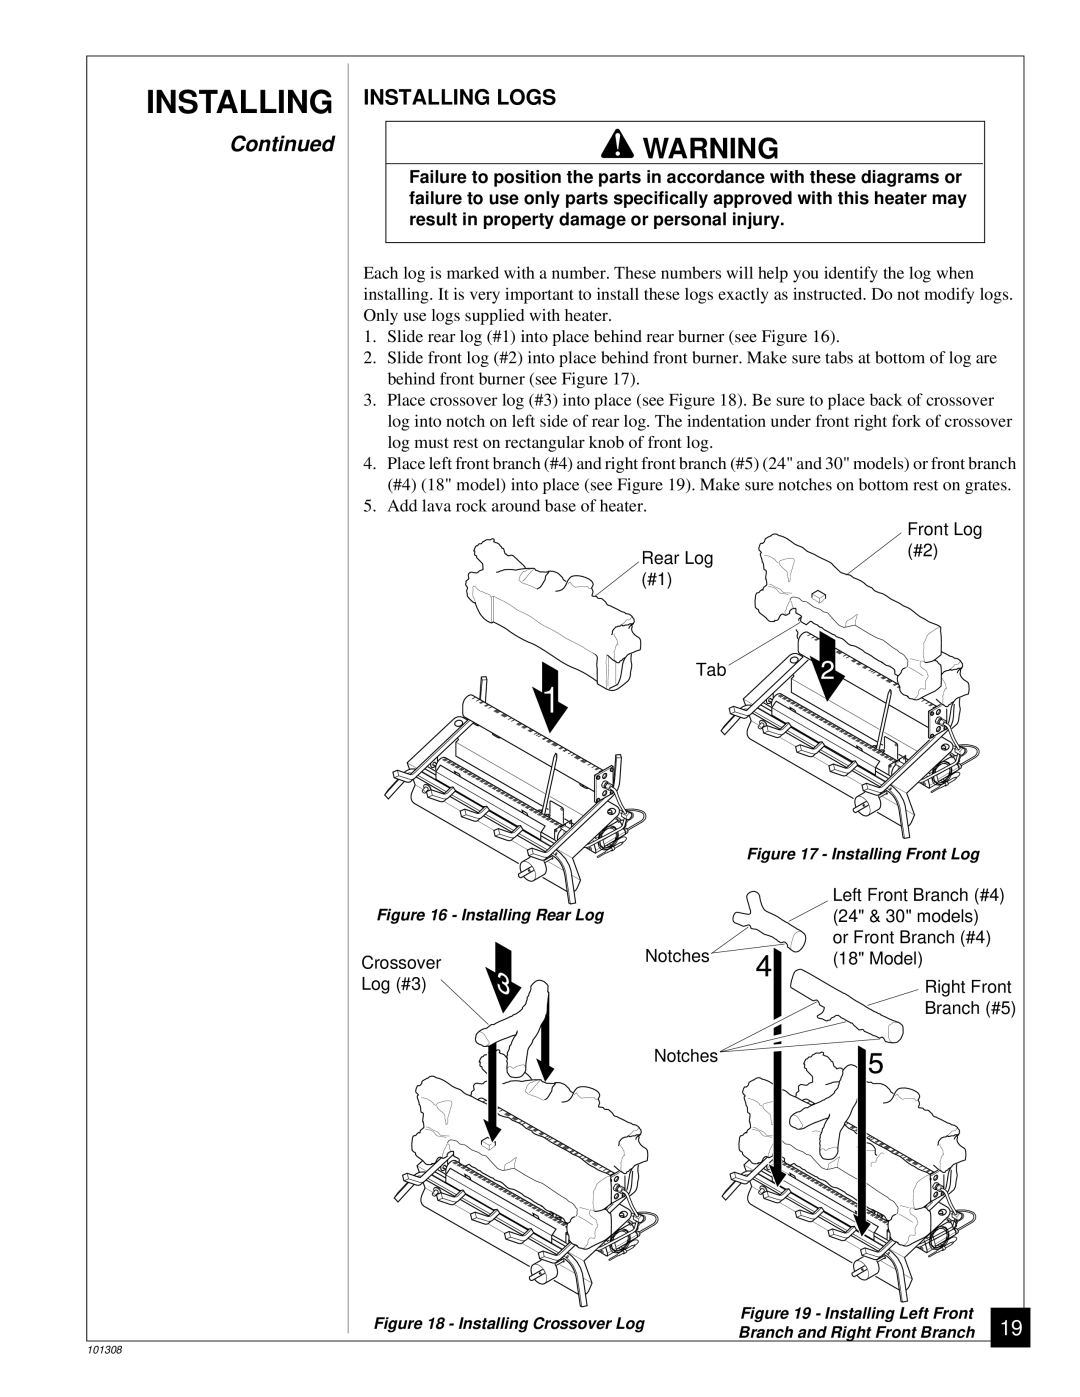
Each log is marked with a number. These numbers will help you identify the log when installing. It is very important to install these logs exactly as instructed. Do not modify logs. Only use logs supplied with heater.
1.Slide rear log (#1) into place behind rear burner (see Figure 16).
2.Slide front log (#2) into place behind front burner. Make sure tabs at bottom of log are behind front burner (see Figure 17).
3.Place crossover log (#3) into place (see Figure 18). Be sure to place back of crossover log into notch on left side of rear log. The indentation under front right fork of crossover log must rest on rectangular knob of front log.
4.Place left front branch (#4) and right front branch (#5) (24" and 30" models) or front branch (#4) (18" model) into place (see Figure 19). Make sure notches on bottom rest on grates.
5.Add lava rock around base of heater.
Rear Log (#1)
Front Log (#2)
Tab
|
| Figure 17 - Installing Front Log |
|
| Left Front Branch (#4) |
Figure 16 - Installing Rear Log |
| (24" & 30" models) |
| Notches | or Front Branch (#4) |
Crossover | (18" Model) |
Log (#3) | Right Front |
| Branch (#5) |
| Notches |
Figure 18 - Installing Crossover Log
Figure 19 - Installing Left Front
Branch and Right Front Branch
19
101308