
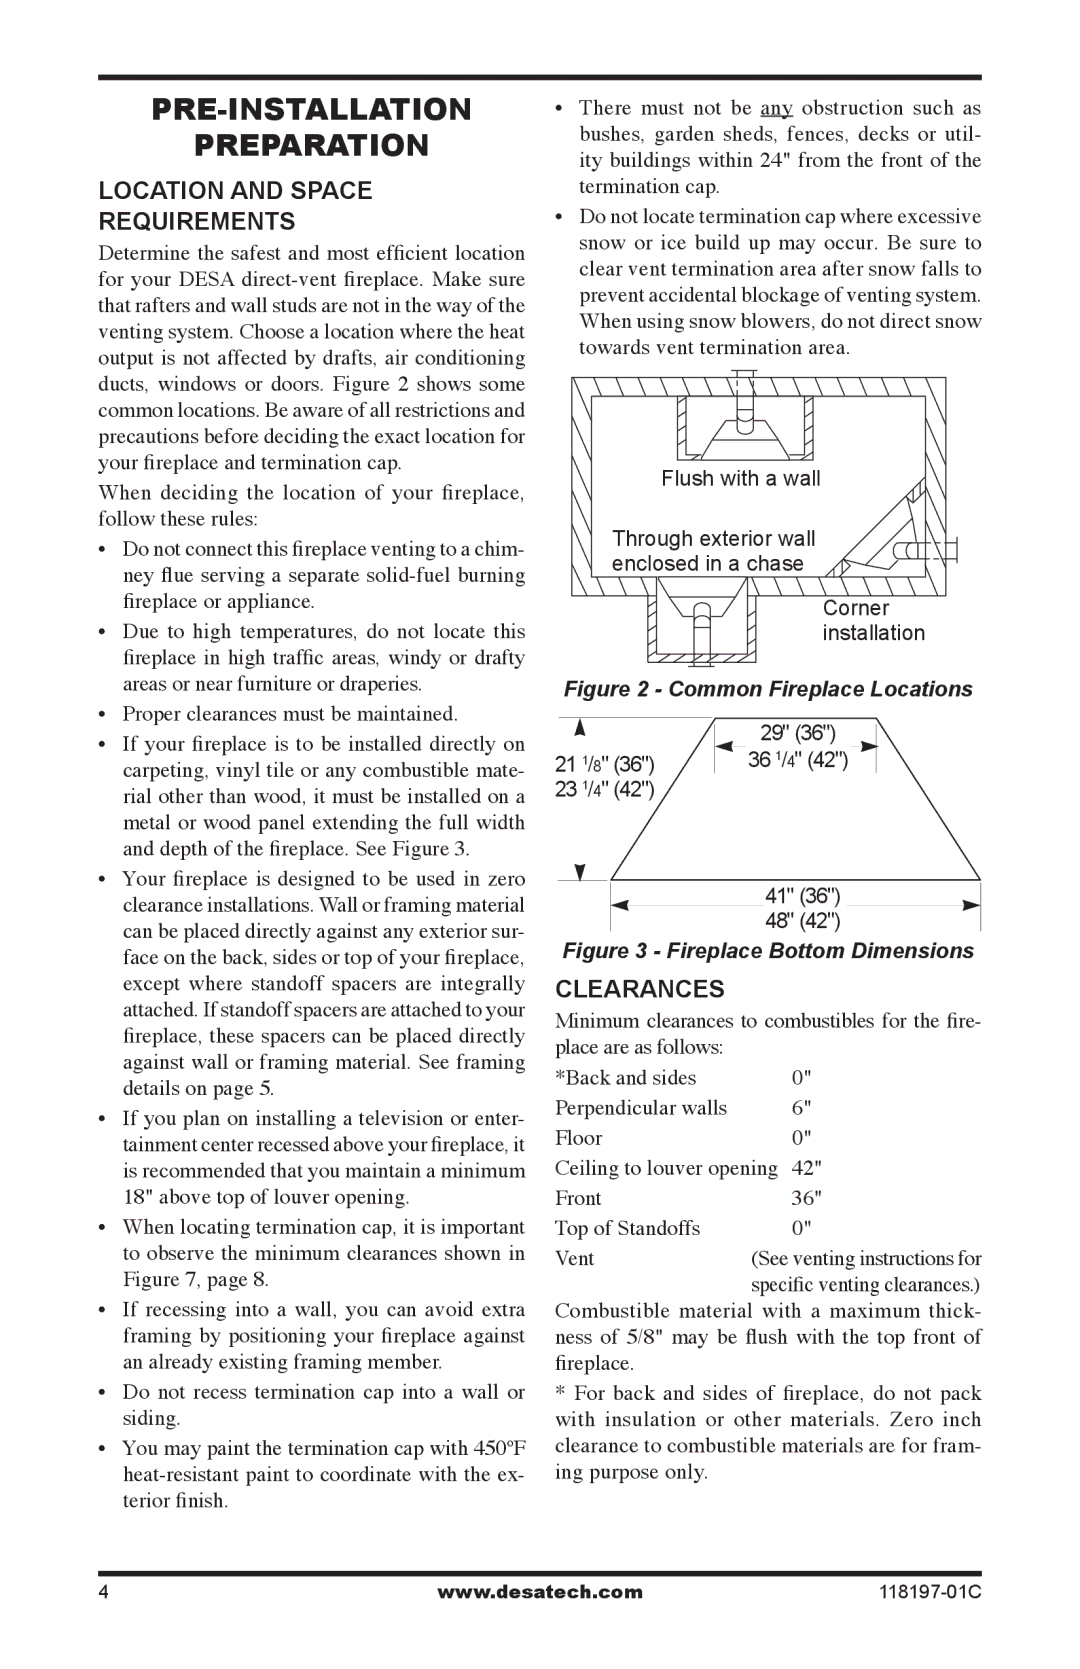
(V)DVC36(B)(H), (V)DVC42(B)(H) specifications
Desa (V)DVC36(B)(H) and (V)DVC42(B)(H) are distinguished products in the realm of innovative heating solutions, specifically engineered for residential and commercial environments. These direct vent gas fireplaces combine traditional aesthetics with modern technology to provide users with both comfort and efficiency.One of the main features of the (V)DVC36 model is its ability to deliver significant heat output while maintaining a sleek and stylish design. It boasts an impressive heat capacity, making it an ideal choice for spaces that require a dependable source of warmth. Additionally, the unit's dimensions strike a balance between form and function, ensuring it fits beautifully within a variety of interior layouts.
Similarly, the (V)DVC42 model advances this concept with a larger size that facilitates even greater heat output. It caters to bigger rooms and open-concept spaces, ensuring that warmth is evenly distributed. Both models are equipped with advanced ceramic glass technology which enhances efficiency by allowing maximum heat transfer into the room while maintaining safety and visibility of the flames.
Another noteworthy characteristic of these models is their direct venting system. This technology allows for the safe expulsion of exhaust gases while drawing in fresh air for combustion. The result is a cleaner operation with minimal emissions, making them a more environmentally friendly choice compared to other heating options. The direct vent design also minimizes drafts, contributing to overall comfort within the living space.
In addition to their efficiency, the Desa (V)DVC36(B)(H) and (V)DVC42(B)(H) fireplaces come equipped with user-friendly controls. These features allow for easy operation, enabling users to adjust the flame height and heat output to suit their specific needs. The intuitive design ensures that even those new to gas fireplaces can enjoy the benefits without a steep learning curve.
Furthermore, both models can be customized with various decorative options, including different media types like logs, pebbles, or crystals, allowing homeowners to tailor their fireplace to their individual style.
In summary, the Desa (V)DVC36(B)(H) and (V)DVC42(B)(H) fireplaces exemplify the intersection of elegance, technology, and efficiency. Offering robust heat output, direct venting for safety, and customizable aesthetics, they represent a valuable addition to any home or commercial space looking to merge comfort with sophistication.