C-clockwise

OPERATING HEATER (Manual Control Infrared Models)

Manual Lighting Procedure

OPERATING HEATER (Thermostat Control Blue Flame and Infrared Models)

For Your Safety Read Before Lighting

Lighting Instructions

13

OPERATING HEATER

Continued

MANUAL LIGHTING PROCEDURE

1.Remove front panel (see Figure 10, page 7).

2.Follow steps 1 through 5 under Lighting Instructions, page 12.

3.With control knob pressed in, strike match. Hold match to pilot until pilot lights.

4.Keep control knob pressed in for 10 seconds after pilot is lit. After 10 seconds, release control knob.

5.Replace front panel.

THERMOSTAT CONTROL BLUE FLAME

AND INFRARED MODELS

FOR YOUR SAFETY READ

BEFORE LIGHTING

WARNING: If you do not follow these instructions exactly, a fire or explosion may result causing prop- erty damage, personal injury or loss of life.

A.This appliance has a pilot which must be lighted by hand. When lighting the pilot, follow these instructions exactly.

B.BEFORE LIGHTING smell all around the appliance area for gas. Be sure to smell next to the floor because some gas is heavier than air and will settle on the floor.

WHAT TO DO IF YOU SMELL GAS

Do not try to light any appliance.

Do not touch any electric switch; do not use any phone in your building.

Immediately call your gas supplier from a neighbor’s phone. Follow the gas supplier’s instructions.

If you cannot reach your gas supplier, call the fire de- partment.

C.Use only your hand to push in or turn the gas control knob. Never use tools. If the knob will not push in or turn by hand, don’t try to repair it, call a qualified service techni- cian or gas supplier. Force or attempted repair may result in a fire or explosion.

D.Do not use this appliance if any part has been under water. Immediately call a qualified service technician to inspect the appliance and to replace any part of the control system and any gas control which has been under water.

LIGHTING INSTRUCTIONS

1.STOP! Read the safety information above.

2.Make sure equipment shutoff valve is fully open.

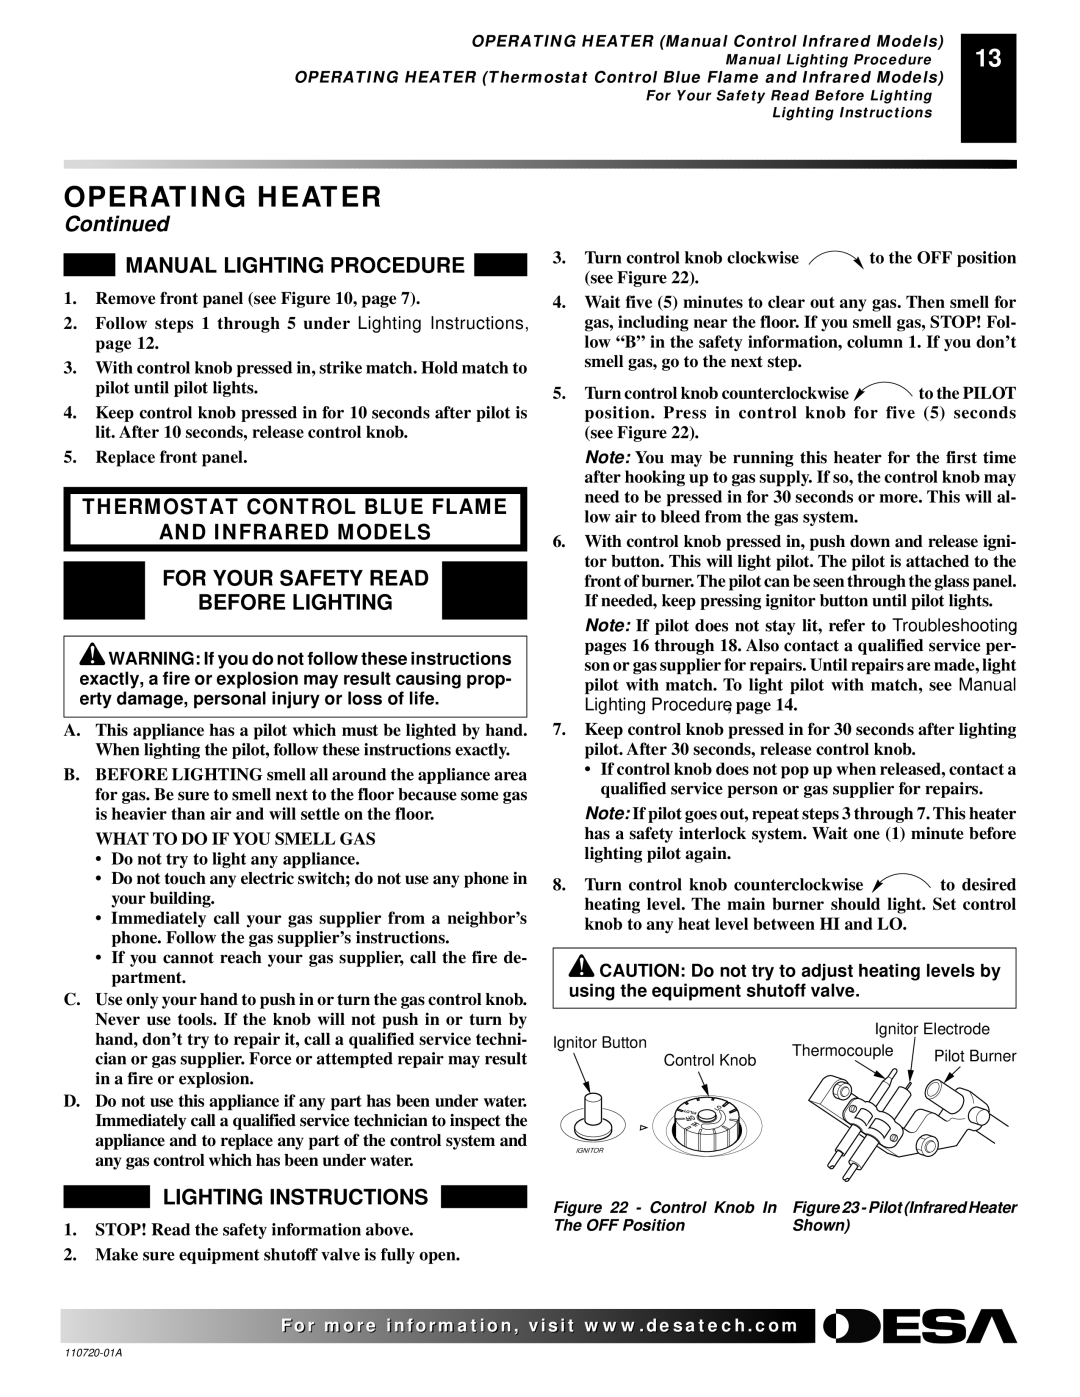
3. Turn control knob clockwise Clockwise to the OFF position (see Figure 22).

4.Wait five (5) minutes to clear out any gas. Then smell for gas, including near the floor. If you smell gas, STOP! Fol- low “B” in the safety information, column 1. If you don’t smell gas, go to the next step.

5. Turn control knob counterclockwise C-clockwiseto the PILOT position. Press in control knob for five (5) seconds (see Figure 22).

Note: You may be running this heater for the first time after hooking up to gas supply. If so, the control knob may need to be pressed in for 30 seconds or more. This will al- low air to bleed from the gas system.

6.With control knob pressed in, push down and release igni- tor button. This will light pilot. The pilot is attached to the front of burner. The pilot can be seen through the glass panel. If needed, keep pressing ignitor button until pilot lights.

Note: If pilot does not stay lit, refer to Troubleshooting, pages 16 through 18. Also contact a qualified service per- son or gas supplier for repairs. Until repairs are made, light pilot with match. To light pilot with match, see Manual Lighting Procedure, page 14.

7.Keep control knob pressed in for 30 seconds after lighting pilot. After 30 seconds, release control knob.

If control knob does not pop up when released, contact a qualified service person or gas supplier for repairs.

Note: If pilot goes out, repeat steps 3 through 7. This heater has a safety interlock system. Wait one (1) minute before lighting pilot again.

8. Turn control knob counterclockwise to desired heating level. The main burner should light. Set control knob to any heat level between HI and LO.

CAUTION: Do not try to adjust heating levels by using the equipment shutoff valve.

Ignitor Button


Ignitor Electrode


Thermocouple

Pilot Burner

Control Knob


T

ILOP

LO


FFO


H


I


IGNITOR


Figure 22 - Control Knob In

Figure 23 - Pilot (Infrared Heater

The OFF Position


Shown)


For more information, visit www.desatech.com

110720-01A

Page 13
Image 13
Desa VP1000BTA VN10A, VP600BA, VN600BA, VN1000BTA, VP1000BTA, VN10A, VP10A, VN6D, VP5D OFF Position Shown

VP600BA, VN600BA, VN1000BTA, VP1000BTA, VN10A, VP10A, VN6D, VP5D, VP1000BTA VN10A, VP10A specifications

The Desa VP600BA, VN600BA, VN1000BTA, VP1000BTA, VN10A, VP10A, VN6D, and VP5D models represent a remarkable lineup in the realm of ventilation and heating solutions. Each of these models is designed with specific features and technologies that cater to diverse needs, enhancing comfort and efficiency in residential and commercial environments.

Starting with the VP600BA and VN600BA, these models provide robust heating capabilities paired with user-friendly interfaces. Highlighting energy efficiency, both units are engineered to minimize energy consumption while maximizing output. The VN1000BTA and VP1000BTA step up the game with advanced thermostatic controls. These models not only provide reliable heating but also enable precise temperature regulation, ensuring optimal comfort levels.

The VN10A and VP10A models are tailored for versatility, accommodating various space sizes without compromising performance. Equipped with high-efficiency burners, they deliver consistent warmth even in colder climates. The VN6D and VP5D models are compact yet powerful, making them perfect for smaller spaces or areas where installation flexibility is essential. Their lightweight design allows for easy maneuverability while maintaining high-temperature output.

Innovative technologies define these models, with features like electronic ignition systems that provide a hassle-free start-up experience. Many bear smart technology integration, allowing users to control settings remotely via smartphone applications. This level of interactivity signifies a growing trend in home automation, where convenience is key.

The aesthetics of these models cannot be overlooked. With sleek designs and customizable options, they seamlessly blend into a variety of interior decors, enhancing the overall ambiance of any space. The builds are also designed for durability, featuring corrosion-resistant materials that assure longevity.

In terms of safety, these models incorporate multiple redundancies, including automatic shut-off features and robust flame management systems. Hence, user peace of mind is guaranteed alongside effective heating solutions.

Overall, the Desa VP600BA, VN600BA, VN1000BTA, VP1000BTA, VN10A, VP10A, VN6D, and VP5D models exemplify a harmonious balance of function, technology, and design, making them ideal choices for heating and ventilation in contemporary settings. Their array of features ensures each unit meets the specific demands of users, providing an energy-efficient and comfortable environment regardless of the application.