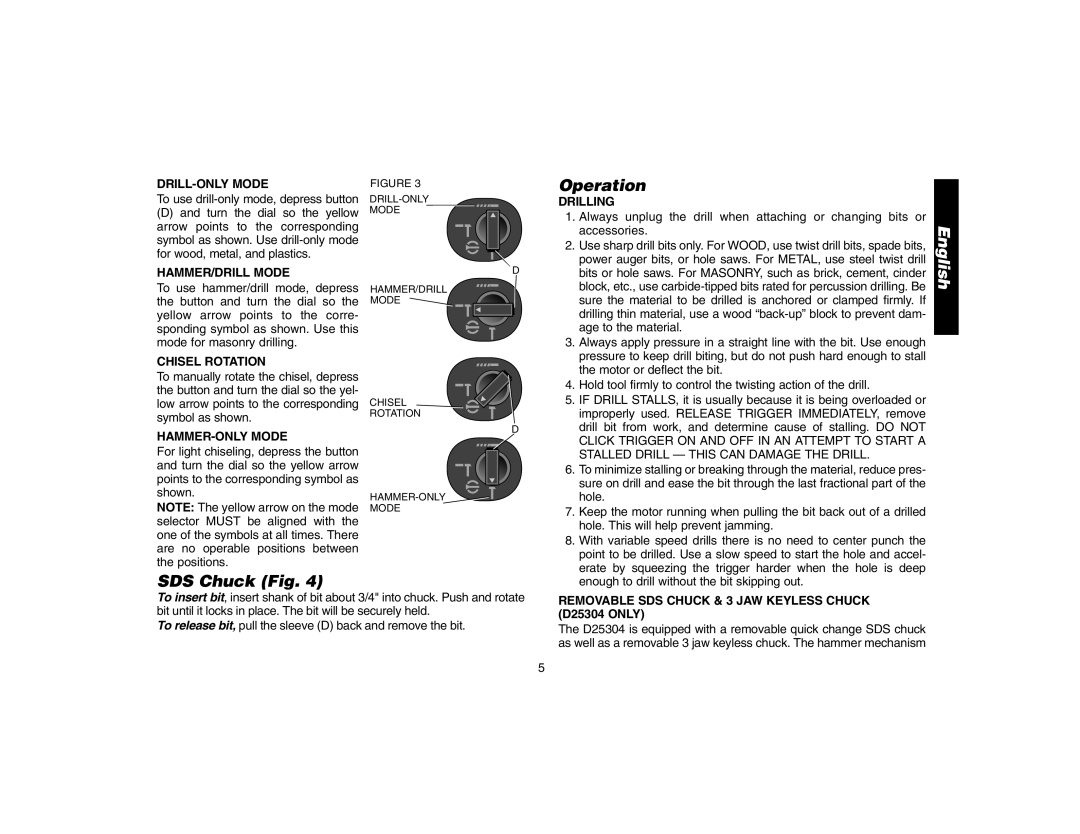
DRILL-ONLY MODE
To use
(D)and turn the dial so the yellow arrow points to the corresponding symbol as shown. Use
HAMMER/DRILL MODE
To use hammer/drill mode, depress the button and turn the dial so the yellow arrow points to the corre- sponding symbol as shown. Use this mode for masonry drilling.
CHISEL ROTATION
To manually rotate the chisel, depress the button and turn the dial so the yel- low arrow points to the corresponding symbol as shown.
HAMMER-ONLY MODE
For light chiseling, depress the button and turn the dial so the yellow arrow points to the corresponding symbol as shown.
NOTE: The yellow arrow on the mode selector MUST be aligned with the one of the symbols at all times. There are no operable positions between the positions.
FIGURE 3
MODE
D
HAMMER/DRILL
MODE
CHISEL
ROTATION
D
MODE
Operation
DRILLING
1. | Always unplug the drill when attaching or changing bits or |
| accessories. |
2. | Use sharp drill bits only. For WOOD, use twist drill bits, spade bits, |
| power auger bits, or hole saws. For METAL, use steel twist drill |
| bits or hole saws. For MASONRY, such as brick, cement, cinder |
| block, etc., use |
| sure the material to be drilled is anchored or clamped firmly. If |
| drilling thin material, use a wood |
| age to the material. |
3. | Always apply pressure in a straight line with the bit. Use enough |
| pressure to keep drill biting, but do not push hard enough to stall |
| the motor or deflect the bit. |
4. | Hold tool firmly to control the twisting action of the drill. |
5. | IF DRILL STALLS, it is usually because it is being overloaded or |
| improperly used. RELEASE TRIGGER IMMEDIATELY, remove |
| drill bit from work, and determine cause of stalling. DO NOT |
| CLICK TRIGGER ON AND OFF IN AN ATTEMPT TO START A |
| STALLED DRILL — THIS CAN DAMAGE THE DRILL. |
6. | To minimize stalling or breaking through the material, reduce pres- |
| sure on drill and ease the bit through the last fractional part of the |
| hole. |
7. | Keep the motor running when pulling the bit back out of a drilled |
| hole. This will help prevent jamming. |
8. | With variable speed drills there is no need to center punch the |
| point to be drilled. Use a slow speed to start the hole and accel- |
| erate by squeezing the trigger harder when the hole is deep |
English
SDS Chuck (Fig. 4)
To insert bit, insert shank of bit about 3/4" into chuck. Push and rotate bit until it locks in place. The bit will be securely held.
To release bit, pull the sleeve (D) back and remove the bit.
enough to drill without the bit skipping out. |
REMOVABLE SDS CHUCK & 3 JAW KEYLESS CHUCK (D25304 ONLY)
The D25304 is equipped with a removable quick change SDS chuck as well as a removable 3 jaw keyless chuck. The hammer mechanism
5