English
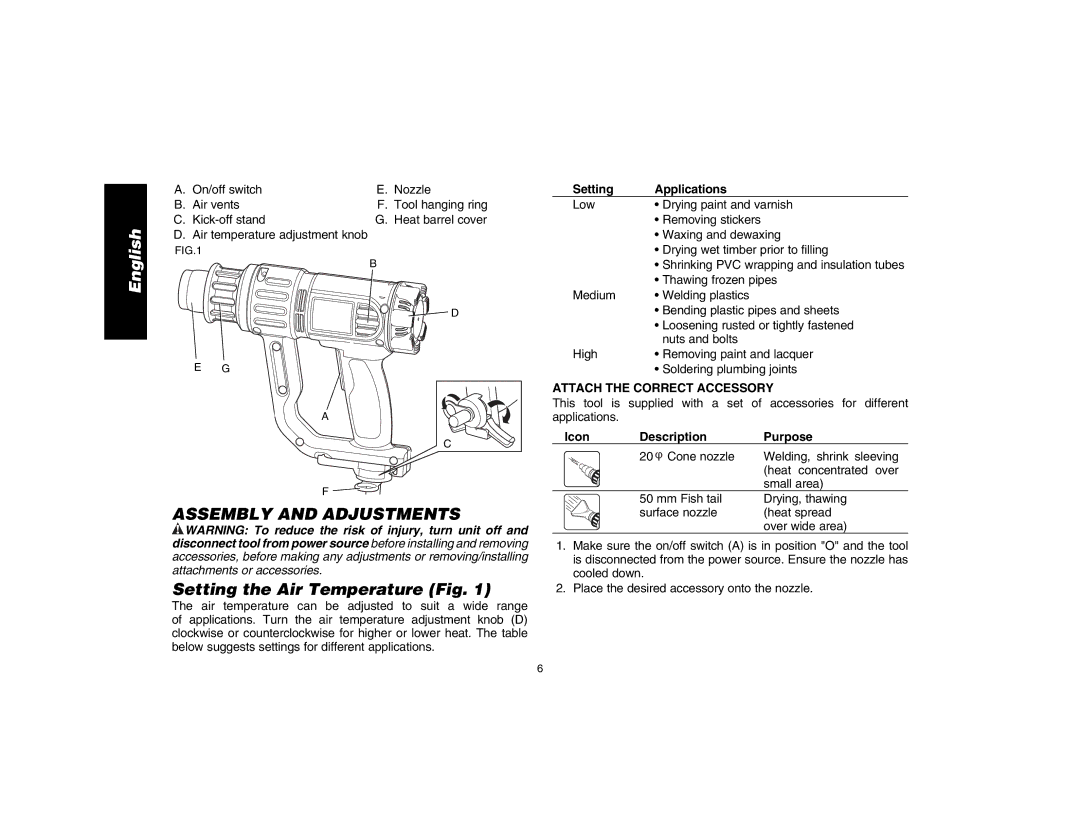
A. On/off switch | E. Nozzle | |
B. Air vents | F. Tool hanging ring | |
C. | G. Heat barrel cover | |
D. Air temperature adjustment knob |
| |
FIG.1 |
|
|
|
| B |
|
| D |
E | G |
|
A
C
F ![]()
![]()
ASSEMBLY AND ADJUSTMENTS
![]() WARNING: To reduce the risk of injury, turn unit off and disconnect tool from power source before installing and removing accessories, before making any adjustments or removing/installing attachments or accessories.
WARNING: To reduce the risk of injury, turn unit off and disconnect tool from power source before installing and removing accessories, before making any adjustments or removing/installing attachments or accessories.
Setting the Air Temperature (Fig. 1)
The air temperature can be adjusted to suit a wide range of applications. Turn the air temperature adjustment knob (D) clockwise or counterclockwise for higher or lower heat. The table below suggests settings for different applications.
Setting | Applications |
Low | • Drying paint and varnish |
| • Removing stickers |
| • Waxing and dewaxing |
| • Drying wet timber prior to filling |
| • Shrinking PVC wrapping and insulation tubes |
| • Thawing frozen pipes |
Medium | • Welding plastics |
| • Bending plastic pipes and sheets |
| • Loosening rusted or tightly fastened |
| nuts and bolts |
High | • Removing paint and lacquer |
| • Soldering plumbing joints |
ATTACH THE CORRECT ACCESSORY
This tool is supplied with a set of accessories for different applications.
Icon | Description | Purpose |
| 20 φ Cone nozzle | Welding, shrink sleeving |
|
| (heat concentrated over |
|
| small area) |
| 50 mm Fish tail | Drying, thawing |
| surface nozzle | (heat spread |
|
| over wide area) |
1.Make sure the on/off switch (A) is in position "O" and the tool is disconnected from the power source. Ensure the nozzle has cooled down.
2.Place the desired accessory onto the nozzle.
6