![]() CAUTION: Never attempt to open the battery pack for any reason. If the plastic housing of the battery pack breaks or cracks, return to a service center for recycling.
CAUTION: Never attempt to open the battery pack for any reason. If the plastic housing of the battery pack breaks or cracks, return to a service center for recycling.
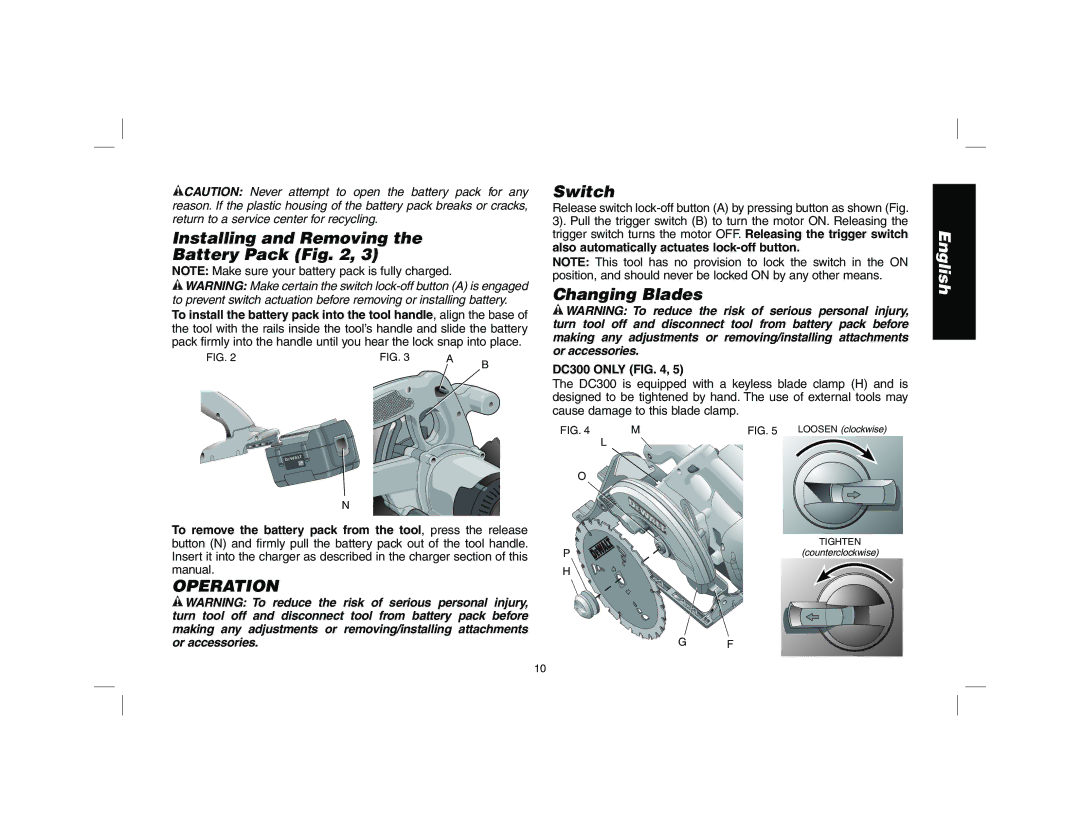
Installing and Removing the
Battery Pack (Fig. 2, 3)
NOTE: Make sure your battery pack is fully charged.
![]() WARNING: Make certain the switch
WARNING: Make certain the switch
To install the battery pack into the tool handle, align the base of the tool with the rails inside the tool’s handle and slide the battery pack firmly into the handle until you hear the lock snap into place.
FIG. 2 | FIG. 3 | A | B | ||
|
|
|
|
| |
|
|
|
|
|
|
|
|
|
|
|
|
|
|
|
|
|
|
N
To remove the battery pack from the tool, press the release button (N) and firmly pull the battery pack out of the tool handle. Insert it into the charger as described in the charger section of this manual.
OPERATION
![]() WARNING: To reduce the risk of serious personal injury, turn tool off and disconnect tool from battery pack before making any adjustments or removing/installing attachments or accessories.
WARNING: To reduce the risk of serious personal injury, turn tool off and disconnect tool from battery pack before making any adjustments or removing/installing attachments or accessories.
Switch
Release switch
NOTE: This tool has no provision to lock the switch in the ON position, and should never be locked ON by any other means.
Changing Blades
![]() WARNING: To reduce the risk of serious personal injury, turn tool off and disconnect tool from battery pack before making any adjustments or removing/installing attachments or accessories.
WARNING: To reduce the risk of serious personal injury, turn tool off and disconnect tool from battery pack before making any adjustments or removing/installing attachments or accessories.
DC300 ONLY (FIG. 4, 5)
The DC300 is equipped with a keyless blade clamp (H) and is designed to be tightened by hand. The use of external tools may cause damage to this blade clamp.
FIG. 4 | M | FIG. 5 | LOOSEN (clockwise) |
| L |
|
|
O
P | TIGHTEN |
(counterclockwise) |
H
G F
English
10